An office chair can wobble because one wheel is not supporting it properly, an assembly joint is loose, an adjustment has expected play, or a structural component is damaged. Locate the moving interface before deciding that tightening is the answer. A chair that suddenly becomes unstable should leave use until the cause is understood.
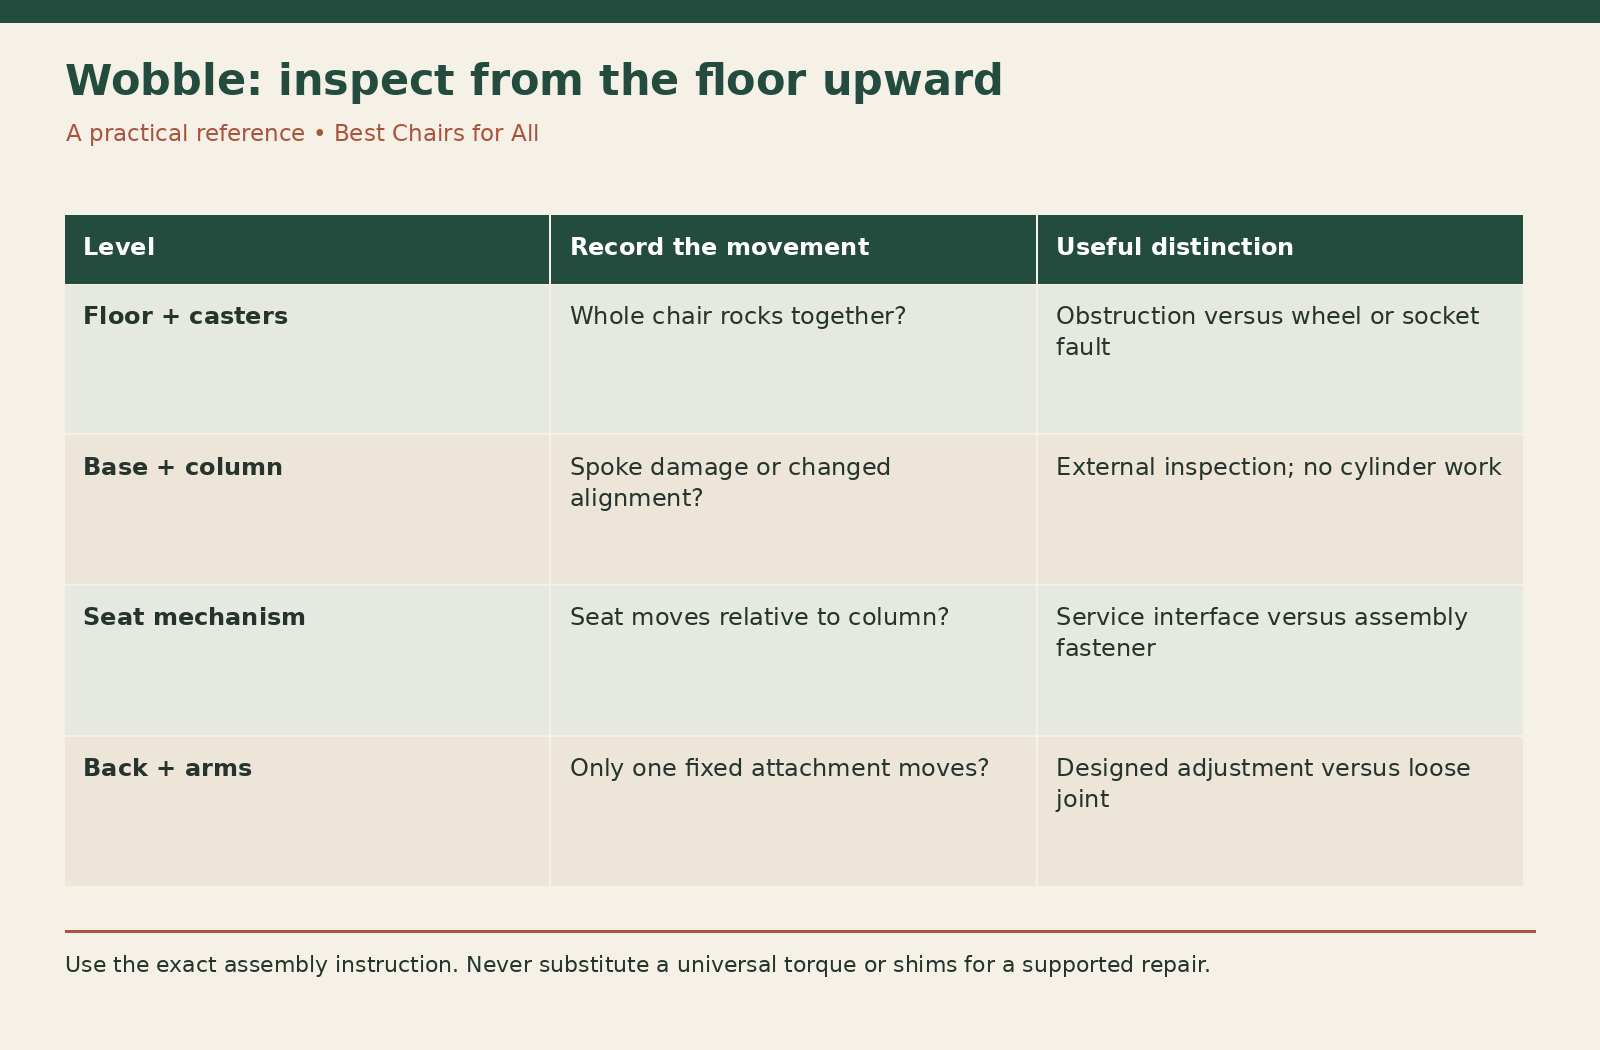
This guide gives you a bottom-to-top inspection route and a joint map for describing the fault. It does not provide a universal bolt torque or a method for taking apart a gas lift. Those details depend on the exact chair and should come from its manufacturer or service provider.
Define what is moving
Describe the wobble in mechanical terms where you can. Does the whole base rock on the floor? Does the seat move relative to the column? Does only the backrest or one arm move? Does the chair lean permanently or move back and forth around a normal position?
Those descriptions distinguish a contact problem from an attachment problem. For instance, a back that moves while the seat and base remain still directs attention above the seat. A base that rocks while everything above it moves together points lower in the assembly or toward the floor.
Avoid testing with exaggerated side loading. Keep hands away from joints and pinch points and do not ask another person to sit in a visibly compromised chair. A visual inspection and clear report can be enough to justify service without reproducing the most dramatic version of the fault.
Remove the obvious floor variables
Inspect for a cord, mat edge, caster on a threshold, or one wheel sitting in a carpet hollow. An otherwise intact chair can feel uneven when its floor contacts are not on the same surface. Move loose obstructions and check the mat’s condition before investigating the chair’s internal joints.
If the chair can be moved safely without loading it, place it on a known suitable level surface and compare its unloaded stance. This is an observation, not proof that every component is sound. A problem that disappears off a curled mat still calls for correcting the mat rather than accepting the original arrangement.
Do not use folded paper, blocks, or extra pads under selected wheels to level the chair. A rolling chair needs its designed contact and movement pattern. If the floor itself is uneven or damaged, ask facilities or the property owner to assess it instead of modifying one caster position.
Inspect each caster and its socket
Look for a caster that is partly detached, a mismatched wheel height, a damaged tread, or hair preventing normal movement. Compare the installed position with the other casters. One recently replaced wheel should not be assumed compatible simply because it went into the base.
Inspect the surrounding base spoke for cracks or deformation. A loose socket and a loose removable stem are different faults. New wheels will not fix a broken socket, and packing the opening with tape can hide damage while leaving retention uncertain.
If the manufacturer’s instructions support caster reseating or replacement, follow the exact procedure and use compatible parts. Stop if the connection will not remain engaged or the socket looks damaged. Record the wheel position on a sketch so support knows whether the fault is isolated or repeated around the base.
Examine the base without dismantling the column
Look along accessible base spokes and around their junction with the center. Check for a changed shape, separation, or a missing supported floor contact. Do not attempt to straighten a bent base or clamp a cracked spoke back together.
A permanent lean and a back-and-forth wobble can overlap, but they are not identical. If the whole seat has shifted visibly to one side, use the separate sideways-lean inspection guide and stop normal use. The relevant service decision may concern a complete base or mechanism rather than an accessible screw.
Do not use this inspection as a reason to loosen the base hub or remove the cylinder. The column connection and pressure component need model-specific service handling. Exterior observation is enough to describe movement near that area without opening it.
Check the assembly document for accessible joints
Find the exact model and revision before using a tool. IKEA’s MARKUS assembly instructions illustrate identified hardware and connection locations for that product. They are useful because they connect an actual joint to an actual part, rather than saying that every chair should be tightened in the same way.
Compare visible assembly fasteners with the documented locations. Confirm that the right screw or bolt was used and that washers or spacers specified by the instruction are present. Do not remove parts merely to inventory hardware when that work is outside the owner procedure.
Use the indicated tool and any specified torque. An impact driver or a longer wrench can exceed the intended tightening force. A fastener that turns without securing, a damaged head, or a joint that remains open needs assessment. Tightening harder is not a repair for stripped threads or an incorrect bolt length.
Distinguish adjustment travel from a fixed-joint fault
Arm pads may slide or pivot, seat depth can adjust, and back supports may flex as part of their design. Before labeling that motion as looseness, read the adjustment guide and check whether the relevant control is engaged as instructed.
Expected adjustment travel does not explain every wobble. The distinction is whether a designed moving part behaves within its intended operation, or a fixed attachment has become loose or damaged. Ask the manufacturer to review a video if the boundary is unclear; there is no universal acceptable millimeter allowance for every chair joint.
Do not tighten a moving interface until it stops moving just to create a more rigid feel. That may defeat the adjustment or damage a bearing or sliding surface. The desired result is correct operation, not total immobility throughout a chair designed to recline and adjust.
Check recalls before treating a backrest fault
An unstable back attachment deserves a recall check. The September 2026 CPSC Branch Ergonomic Chair notice concerns certain chairs with backrest anchors installed incorrectly during manufacture. It directs affected owners to stop use and obtain the specified remedy.
That notice is a concrete example of why a loose back should not automatically be treated as an ordinary screw-maintenance problem. Match the exact model and identifying information and follow the current notice. Do not assume all chairs from the brand are affected or that a similar-looking chair is covered.
Check your own manufacturer even when its name differs from this example. If there is no matching notice, continue with the product’s service route. Absence of a recall does not make a visibly separating joint suitable for use, and a generic tightening video does not replace an official remedy.
Make a bottom-to-top joint map
Draw the chair as five levels: floor and wheels; base; column; seat mechanism; back and arms. At each level, record whether adjacent parts move together or separately. Use a photograph or short external video rather than putting fingers into a loaded connection.
For a hypothetical case, write “base and column remain aligned; seat shifts relative to column; no accessible loose assembly fastener identified.” That description points service toward an interface without asserting that a cylinder or bearing has failed. Another case might read “left arm bracket moves relative to seat; documented mounting fastener visibly loose.”
Add when the change began and any recent event: relocation, caster replacement, assembly, or impact. These details help distinguish a new installation mismatch from a gradually developing fault. They also allow a repair provider to ask for the most relevant photographs first.
Decide what the owner check has established
There are several legitimate outcomes. You may find a floor obstruction and correct it. You may identify an owner-serviceable assembly fastener and follow its documented instruction. You may identify damaged hardware or a joint whose repair requires service. The inspection does not need to culminate in a home repair to be useful.
The Herman Miller warranty and service page demonstrates the identifying information and dealer route used by one major manufacturer. For your chair, gather the label and purchase information and use its own support process. Ask which assembly is implicated and whether an approved replacement is available.
Request confirmation of the repair scope. Replacing a worn arm pad will not address movement at the seat-column interface. A quotation should identify the problem it will correct, the compatible component, and whether installation is included. Keep uncertainty visible rather than treating any replacement part as a complete solution. If the provider needs a closer image, ask which interface should be shown and whether the chair must remain unloaded. It is often possible to document a gap or damaged fitting from the outside. Avoid removing covers or carrying out a destructive demonstration merely to improve the picture.
Verify stability after a supported correction
Return the chair to its intended level surface and inspect the assembled stance. Check that caster attachments are complete and that the relevant fixed joint is secure under the manufacturer’s functional-check process. Do not perform improvised overload or tipping tests.
Operate normal controls and confirm that adjustment travel still works. If the wobble persists, stop and report the result. Repeatedly tightening a joint that loosens again can indicate a problem that the original check did not resolve, such as damaged threads or the wrong hardware.
Retain the before-and-after observations. A precise record of which interface moved, what correction was approved, and what changed helps the next service decision. A stable chair with functioning adjustments is the target; a chair held rigid by overtightened parts or makeshift supports has not achieved that result.
Something unclear or out of date? Send a correction with this article’s title and the detail to check.
Sources, research & corrections policy ↗