A PU leather gaming chair usually needs a gentle wipe, not a cupboard full of leather treatments. The harder question is deciding whether a mark is dirt, transferred color, cleaner residue, or a damaged surface. Those problems can look similar, and repeatedly scrubbing the wrong one can turn a small cosmetic issue into a bigger repair.
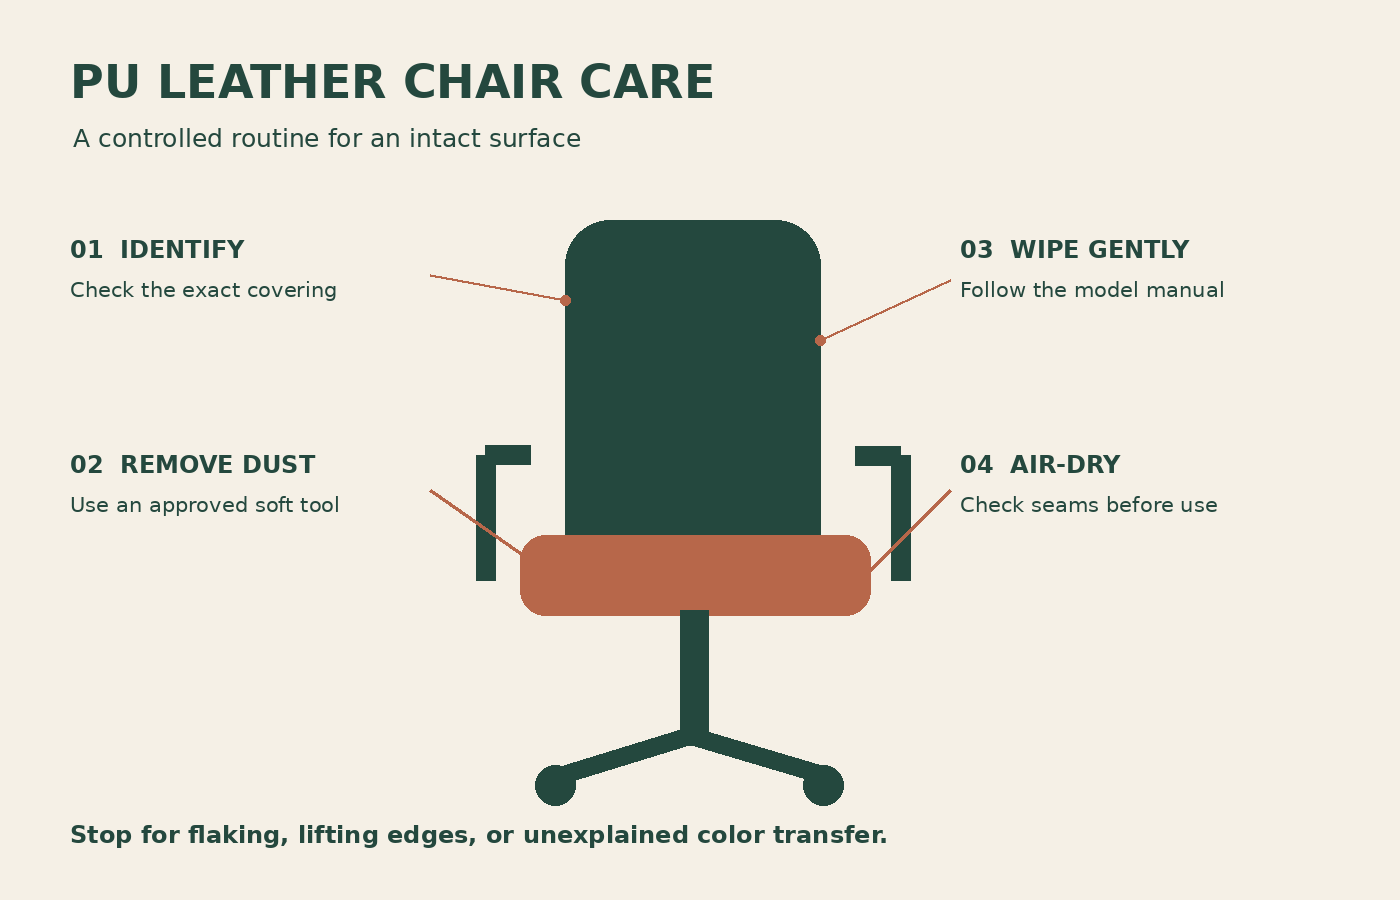
Start with the care instructions for your exact upholstery. “Gaming chair” describes a product category, while “leather,” “leatherette,” “PU,” and “hybrid” describe different coverings. This guide provides a practical inspection and cleaning workflow. Manufacturer directions take priority wherever they differ.
First identify what actually covers your chair
Find your order confirmation, model label, and material option before opening a cleaning product. A model may be sold in fabric and synthetic versions, and the same chair can contain more than one material. For example, Corsair’s gaming-chair FAQ identifies PU seating surfaces and PVC back surfaces on certain models, while its T3 Rush uses fabric. A cleaner selected only from the chair’s appearance may therefore be the wrong product.
Make a small material map: seat, front of backrest, rear shell, arm pads, pillows, and any removable cover. Record the approved method beside each one. This takes a few minutes once and avoids repeatedly guessing whether a detachable pillow has the same care requirements as the seat.
If the material is unknown, use a dry, soft cloth for loose dust and ask the manufacturer for the relevant guide. Do not identify leather by scratching, applying solvents, or trying to burn a hidden sample. Those experiments damage the item you are trying to preserve.
Build a small cleaning kit with a clear purpose
Set out two clean, pale microfiber cloths, a bowl of clean water, and a soft upholstery brush or approved soft vacuum attachment. One cloth removes soil; the second helps you inspect the surface without carrying yesterday’s dirt around. Pale cloths also make transferred color easier to see. Reserve these cloths for the chair so they do not contain furniture polish or kitchen degreaser.
Add a cleaner only when the chair’s own instructions allow it. “Suitable for leather” is not enough information if the bottle does not address your synthetic covering. Bolero’s PU-chair care sheet warns that some leather treatments are unsuitable and that sealed PU gains little benefit from conditioning. That is a useful reason to verify compatibility rather than automatically adding a conditioning step.
Keep the kit simple enough to use after a spill. A towel beside the desk is more useful during an accident than a specialist bottle stored in another room. Keep liquids away from power strips and electronics before starting.
A six-step routine for ordinary surface dirt
- Inspect before getting the chair wet. Look for open seams, lifting edges, cracks, loose trim, or an already sticky finish. Photograph questionable areas so you can compare them after cleaning. If the coating is coming away, use the damage workflow below.
- Remove loose particles first. Lift crumbs from the seat crease with the soft tool allowed by your manual. Do not push a hard nozzle between upholstery panels. Check the tool itself for grit before touching the chair.
- Prepare the cloth away from the chair. Dampen it, then wring it thoroughly. The aim is a controlled wipe, not water running into stitching. Keep the bowl on a separate stable surface.
- Work in small sections. Wipe an area that you can inspect easily, turn the cloth to a clean face, and move on. Start with the least dirty panels and leave heavily used contact areas until later.
- Check what changed. Look in angled light for remaining soil or streaks. If the mark does not improve with a gentle pass, pause and identify it rather than increasing pressure.
- Let the chair dry before sitting. Leave the room ventilated, keep the chair out of use, and check seams as well as the center of each panel. Do not speed the process with concentrated heat.
This staged method limits the size of any mistake. It also tells you whether the simplest permitted approach worked before you introduce another variable. There is no benefit in applying a stronger product to the whole seat when a small area already shows that water removes the dirt.
Where manufacturer instructions differ
Secretlab’s current aftercare guide specifies a slightly water-dampened cloth for its named leatherette surfaces, complete air drying, and its designated cleaner for deeper cleaning. It warns against alcohol wipes and other upholstery cleaners. Those directions are specific to the listed Secretlab materials.
The noblechairs EPIC Compact manual takes a different route: it describes a small amount of mild soap diluted in water as an alternative to its own care kit, followed by a damp wipe to remove residue. Permission in that manual does not establish permission for an unrelated chair.
The practical rule is to copy the approved procedure for your model, not combine the strongest elements from several guides. Do not add soap to a water-only instruction because another brand permits it, or use one company’s proprietary cleaner on another company’s chair without confirmation.
Handle spills by separating removal from stain treatment
For a fresh drink spill, first remove the excess with an absorbent cloth. Lift the cloth and reposition it rather than spreading liquid across a larger area. Then inspect where the liquid traveled: the seat crease, stitching, detachable cushions, and the floor under the chair. A clean-looking top panel does not prove that liquid stayed out of the seams.
Only after removing excess liquid should you use the cleaning method permitted by the care guide. If a sugary drink leaves tackiness, make one controlled cleaning attempt and allow the surface to dry before judging the result. Wet material can feel different from dry material, so adding more cleaner immediately makes diagnosis harder.
Record the spill type and approximate time when asking support for help. “A sticky mark after cola sat overnight” is more useful than “the leather feels strange.” For a large spill that entered padding, ask how the manufacturer wants it handled; surface wiping cannot establish that hidden foam has dried.
A decision table for marks that will not disappear
| What you observe | Reasonable next step | What to avoid |
|---|---|---|
| Loose crumbs or dust | Use an approved soft dry tool before wiping. | Grinding debris into the surface. |
| Fresh liquid on an intact panel | Absorb excess, then follow model-specific care. | Flooding seams to rinse them. |
| A mark remains after gentle cleaning and drying | Photograph it and ask about a compatible treatment. | Repeated stronger experiments. |
| Color appears on the cloth | Stop and establish whether it is soil, dye, or coating. | Assuming all transferred color means successful cleaning. |
| Flaking, exposed backing, or lifting edges | Investigate replacement upholstery or support options. | Scrubbing as if the damage were a stain. |
These are observation categories rather than laboratory diagnoses. Their purpose is to help you decide when routine cleaning ends and a support question begins. Save the product name and a photograph of its label if a cleaner was involved.
What to do about peeling, cracking, or a sticky finish
Cleaning removes contamination; it does not reconstruct a missing surface layer. If flakes are already lifting, stop rubbing and collect loose debris without pulling attached material away. Photograph the affected panel in daylight, including a wider image showing its position on the chair.
Contact the seller or manufacturer before using a repair coating. Ask whether the relevant panel, backrest, seat assembly, or cover is replaceable, whether the damage affects warranty handling, and which cleaning action is acceptable while the case is reviewed. Secretlab’s FAQ requests image or video evidence for warranty claims; keeping clear records is therefore more useful than trying several undocumented remedies first.
A slipcover can change appearance and protect surrounding areas from loose flakes, but it is not evidence that underlying deterioration has stopped. Check compatibility and access to controls before fitting one. If the problem includes a broken frame, unstable base, or failing mechanism, treat that separately from upholstery and stop using the chair until assessed.
Prevent the avoidable wear around your desk
Look at where the chair actually sits during the day. A seat parked beside a radiator, under a sunlit window, or against an abrasive desk corner has a different exposure pattern from one in the middle of a shaded room. Bolero’s care sheet identifies prolonged sunlight, heat outlets, and humidity extremes as conditions to avoid. Moving the chair or shading the window may be a more useful maintenance change than buying another bottle.
Inspect pockets, belts, and metal details that contact the seat. Make room for the chair to rotate without scraping the desk or wall. Put pet bedding somewhere more attractive than the seat if claws are repeatedly catching the upholstery. These are practical changes to contact and location; they do not require assuming that a coating has a guaranteed lifespan.
After a hot session, inspect high-contact areas instead of following a rigid calendar blindly. A lightly used guest chair and a daily workstation need different attention. Set a reminder to check condition, then clean according to what you find and the manufacturer’s instructions.
A maintenance log that helps when something changes
Keep a note containing the model, material, purchase date, care-guide link, cleaner used, and photographs of the chair when new. Add a short entry only when something meaningful happens: a spill, persistent mark, new crack, or change of product. This creates a useful record without turning routine cleaning into a complicated project.
For a shared chair, leave a simple instruction beside the cleaning kit: “Check the material guide; do not use desk disinfectant on the seat.” Shared work areas often contain several cleaning products, and accidental substitution is easier when bottles look similar. If infection-control requirements apply, ask the chair manufacturer which process is compatible rather than guessing that a household wipe meets both needs.
Common questions
Can I use baby wipes or disinfectant wipes?
Do not assume compatibility from a wipe’s intended use on skin or desks. Read the chair’s guidance and the wipe label. If the brand excludes alcohol or unspecified upholstery cleaners, choose its permitted method instead. A product being convenient does not establish that it is suitable for the coating.
Does PU leather need real-leather conditioner?
Not automatically. Check for explicit approval for the chair’s material. If the manual gives a complete routine without conditioner, adding one creates an unnecessary compatibility question. Genuine leather care instructions should not be copied to a synthetic seat merely because both are called leather in a listing.
Should I steam-clean the chair?
Use steam only if the exact product’s instructions expressly permit it. For a chair with no such permission, it introduces moisture and heat beyond the gentle routine described here. Ask support about embedded dirt or odor rather than treating steam as the next universal step.
How often should I clean it?
Check frequently enough to catch spills and loose debris promptly, then use your model’s prescribed maintenance schedule where one exists. The right trigger is a combination of manufacturer instructions and actual use. A quick inspection is often all that is needed; every inspection does not need to become a deep clean.
For your next cleaning session, make just three decisions first: identify the covering, choose its approved method, and decide whether the problem is dirt or possible damage. Those decisions are what keep routine care controlled and make a difficult mark easier to explain when you need help.
Something unclear or out of date? Send a correction with this article’s title and the detail to check.
Sources, research & corrections policy ↗