Replace office-chair casters by matching the chair’s approved attachment, installed height, floor application, and brake behavior before fitting the new set. Wheel diameter is only one dimension. A caster can appear to fit a socket while using the wrong stem, changing the chair’s minimum height, or removing an intended safety function.
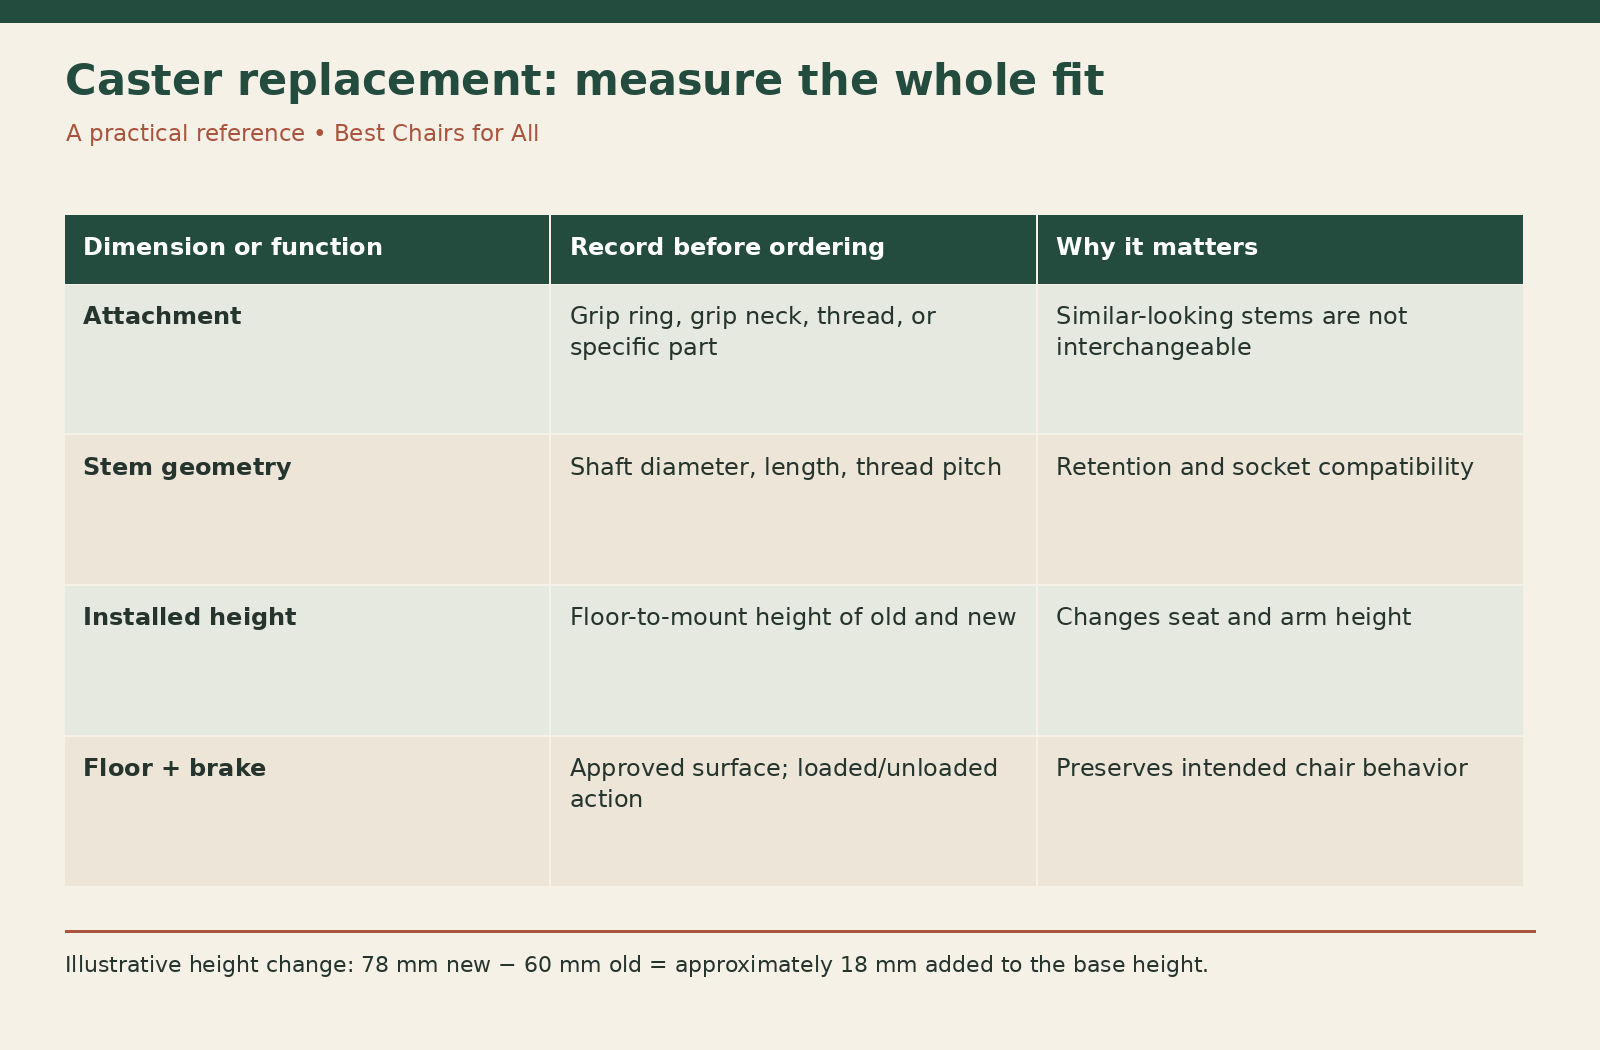
Start with the chair manufacturer’s compatible replacement part whenever possible. If you need to compare an alternative, use the measurement worksheet below and get confirmation for the whole installation. Do not use tape, adhesive, drilled sockets, or improvised sleeves to make an almost-fitting stem stay in place.
Identify the chair before measuring a wheel
Find the model label, manufacturing date, and any configuration information. Chairs sold under one family name can change over time, and a secondhand chair may have a replacement base. Photograph the base and existing casters as well as the label so the supplier can see the actual assembly.
Check whether the maker offers a floor-specific caster set. Official instructions may distinguish carpet wheels, hard-floor wheels, braking casters, and glides. The appropriate replacement must preserve intended chair behavior as well as fit the base. Our existing caster floor-type guide covers the broad tread differences; this guide focuses on attachment and installation.
Do not order from the chair’s appearance alone. A black twin-wheel caster is a broad shape, not a part number. Likewise, a marketplace statement that a set fits most chairs is a starting claim to verify, not proof that it suits your particular base and floor.
Determine the attachment type
Common arrangements include grip-ring stems, grip-neck stems, threaded stems, and other model-specific designs. The Service Caster stem-measurement guide shows why identifying the fastening comes before taking dimensions. Threaded and push-in stems are not interchangeable merely because their outside diameters look close.
Inspect an accessible caster or a manufacturer diagram. If the chair permits caster removal, follow that procedure to expose the attachment for measurement. Avoid assuming that twisting will unscrew a push-in caster or that pulling hard will release a threaded connection. When the attachment is unclear, send images to the supplier first.
If the original stem stays in the base while the wheel comes off, stop and identify the arrangement. Some designs intentionally have separate components; other cases indicate separation during removal. The replacement must match the actual interface rather than the incomplete part left in your hand.
Measure the stem in the right places
For a grip-ring stem, record shaft diameter and usable length using an appropriate caliper or other accurate measurement method. Measure the shaft itself rather than treating the retaining ring’s widest point as the basic diameter. Keep the retaining feature visible in a photograph beside the numbers.
The Conveyer & Caster measurement guide explains stem-type and dimension checks. For threaded stems, diameter alone is insufficient: pitch and thread system also matter. If you cannot establish those accurately, ask a specialist to identify the part instead of selecting whichever nut appears to start turning.
Record units explicitly. Do not round an unfamiliar metric measurement into a nearby inch size and declare a match. A small mismatch can affect retention or socket condition. Give the supplier the measured values, the chair identity, and the original part, if practical, so they can confirm compatibility.
Compare installed height, not just wheel diameter
The distance that matters for chair geometry is the assembled height from the floor contact to the base mounting interface. Wheel diameter contributes to that height, but the fork or housing and fastening arrangement also matter. Two casters with equal wheel diameters can have different overall heights.
Use a hypothetical example to see the effect. If the original installed caster height is 60 mm and the proposed replacement is 78 mm, the base rises by about 18 mm, assuming the rest of the installation is unchanged. A chair that already barely lowers enough may then leave your feet unsupported. These are illustrative dimensions, not specifications for a particular product.
Measure the available clearance at the position you actually use, including any keyboard tray. For instance, a hypothetical arm pad with only 10 mm below a desk apron cannot absorb an 18 mm height increase without another supported adjustment. Seat-height range and arm-height range are related here but should be measured independently; lowering one control may not recover the required clearance. Check minimum seat height, arm-to-desk clearance, and any under-desk obstruction before approving the change. A more freely rolling wheel is a poor improvement if the new height makes the chair unusable. Record the original set’s dimensions before discarding it so you retain a useful reference.
Match the floor and movement behavior
Choose casters documented for the actual floor or mat. A hard-floor tread and a carpet tread serve different applications, and a floor manufacturer’s requirements may also affect the choice. Avoid treating non-marking as a guarantee against scratches when grit can be trapped at the contact surface.
Check braking separately. A caster may lock manually, resist movement under load, or resist movement when unloaded. A replacement that removes or reverses that behavior can change how the chair behaves while you approach or leave it. Ask the chair manufacturer which options are supported for your use.
Do not create a whole-chair capacity by multiplying a caster’s advertised rating by five. The complete chair includes a base, seat, cylinder, and mechanism with their own limits and configuration requirements. Ask for compatible parts that preserve the manufacturer’s stated capacity instead of relying on a component arithmetic shortcut.
Review a model-specific instruction before removal
The Herman Miller Setu caster and glide replacement document is an example of a procedure tied to named parts and a particular chair. It demonstrates the value of consulting a matching instruction rather than treating every base as identical.
Read the complete relevant procedure before starting. Distinguish a caster replacement from a recycling disassembly document, which may intentionally damage parts and may involve components outside owner maintenance. A destructive end-of-life sequence is not an appropriate shortcut for routine repair.
Keep the cylinder, base hub, and recline mechanism outside this task. If a caster replacement unexpectedly requires pressure-component work or dismantling the chair structure, obtain service advice. Do not cut, heat, drill, or open a gas cylinder while trying to change wheels.
Prepare the chair and the new parts
Unload the chair, clear a protected area, and support it as the instructions require. Avoid resting the full chair weight on controls, delicate upholstery, or an unsupported back edge. Get help with positioning if the chair is heavy or cannot be held securely.
Lay out the complete replacement set and compare each part before removing the originals. Check for shipping damage, matching attachment dimensions, consistent installed heights, and any designated caster positions. If the manufacturer specifies a mixture of parts, follow that pattern; otherwise do not invent one from leftover wheels.
Keep the old set together until the new installation is verified. Photograph anything unusual as you proceed. An unexpected loose insert or retained stem is easier to identify when the original parts are still available and you have not tried to modify the socket.
Install only by the supported method
Follow the applicable instruction for removal and full seating of the replacement. Keep the stem aligned and stop if the fit seems wrong. More force does not make an incorrect diameter compatible, and a caster that appears seated only because the base is distorted has not been successfully installed.
Inspect sockets for cracks or visible damage before returning the chair upright. A new caster cannot repair a broken base spoke. If a part falls out, rocks excessively in the socket, or will not reach its specified seated position, take the chair out of use and resolve the mismatch.
Do not lubricate a retaining connection unless the instructions specify an approved product and location. Adhesives, shims, and altered retaining rings can disguise the wrong fit. A supported installation should not depend on improvised material packed around the stem.
Use this compatibility worksheet
Create a record with ten fields: chair model and revision; base identity; old caster part; attachment type; stem diameter; stem length; thread details if applicable; installed height; floor type; and brake behavior. Add a supplier confirmation field and the replacement part identifier.
For example, write “push-in grip ring; measured shaft and length; hard-floor application; no manual brake; proposed height change plus 18 mm” rather than “large universal wheels.” Mark any unknown field clearly. The worksheet turns an uncertain online purchase into a request that a parts specialist can actually answer.
After fitting, add the date and final checks: full retention, level stance, expected movement, floor compatibility, and usable seat height. Keep the supplier’s written answer and instructions. If you later change flooring or desks, those records explain what was installed and why.
Check the result in the workstation
Return the chair upright on a suitable level surface and inspect all floor contacts before normal use. Follow the manufacturer’s functional checks and confirm expected rolling or braking in a clear area. Stop if there is new instability, binding, or an unusual lean.
Recheck your working height and desk clearance. If the new casters raised the seat, adjust the chair only within its normal range. Do not compensate for an unsuitable set by modifying the cylinder or removing structural components. Choose a supported caster with appropriate geometry instead.
Inspect the first-use area for debris and signs of unexpected floor marking. Clean the treads and floor as their care instructions require. A compatible set should produce a chair that retains its intended stance, fits the workstation, and behaves predictably on the selected surface; free rolling by itself is only one part of that result.
Something unclear or out of date? Send a correction with this article’s title and the detail to check.
Sources, research & corrections policy ↗