Clean a camping chair by following the care instructions for its fabric and frame, removing loose dirt first, using only a permitted cleaner, and letting every part dry before packing. The most important step is often the one after washing: opening the chair at home instead of leaving a damp seat compressed inside its bag.
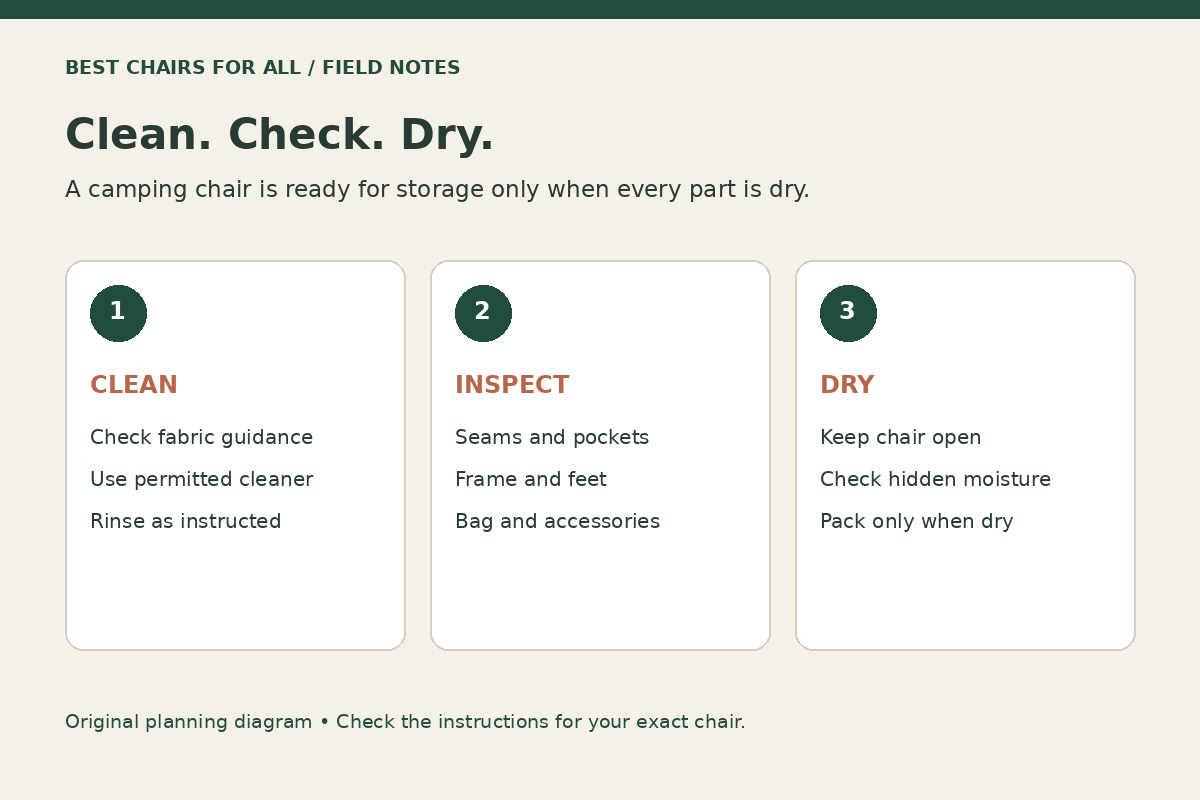
A folding camp chair is a collection of materials. The seat, coating, plastic hubs, steel hardware, foam padding, and carry bag may need different treatment. A method suitable for a patio cushion can be wrong for a lightweight technical seat. This guide offers a conservative workflow and explains where to stop and check the manufacturer.
Start by identifying the chair and its care limits
Look under the seat, inside the bag, or on the label for the brand and model. Find the official instructions before taking the chair apart. Photograph the label and save the care page so you can consult it when the chair is muddy and the paper instructions are elsewhere.
Check four permissions: whether the seat is removable, whether any component is machine washable, which cleaning agents are allowed, and how the chair should be dried. Removable does not mean washable. The Helinox care guide, for example, says its seats and carry bags are not machine washable and directs users to gentle spot cleaning with warm water.
If you cannot identify the material or locate instructions, begin with dry removal of loose debris and a small clean-water spot test on an inconspicuous area. Do not escalate to bleach, solvent, steam, pressure washing, or a washing machine simply because ordinary dirt remains. Contacting the brand is more useful than guessing which aggressive method the chair can tolerate.
Set up a cleaning space that also works for drying
Choose a ventilated place where the chair can remain open after cleaning. Put it on a surface that will not transfer more dirt to wet feet or fabric. Keep a soft cloth, a soft brush, a bucket of clean water, and any manufacturer-approved mild cleaner nearby. Separate the brush used for dirty feet from the cloth used on the seat.
Do not begin a full soaking just before you need to put the chair in a cupboard or load a car. If the weather is uncertain, prepare a sheltered drying space first. A garage with the door open while you work or a suitable covered area may be more convenient than repeatedly moving a dripping chair indoors when rain starts.
Remove loose items from pockets. Check cup holders and sewn storage compartments for wrappers, crumbs, or wet tissues. Take off removable accessories only as the instructions allow. Photograph the original arrangement if you will need to remember how the fabric attaches or how a detachable headrest is threaded.
Step 1: remove loose dirt before adding water
With the chair empty and fully supported, shake loose debris away from you and gently brush the surface. Let ordinary wet mud dry enough to lift away without smearing, unless the manufacturer’s advice for the specific stain says otherwise. Work gently around seams and mesh rather than forcing a stiff brush through them.
A vacuum with a soft upholstery attachment can help with crumbs in a fabric pocket if used carefully. Keep suction and the tool away from loose stitching or damaged mesh. Do not pull apart a strained seam to chase a few grains of sand; make a note to ask the manufacturer whether that seam needs repair.
Inspect as you clean. A dark area may be dirt, but it can also be worn coating or a frayed patch. If a support pocket is torn or a frame member is damaged, separate the repair question from the cleaning job. A clean chair with compromised structure still needs attention before someone sits in it.
Step 2: clean the seat without unnecessary saturation
Dampen a soft cloth with the permitted water or cleaning solution, then work on a small area. Give soil time to loosen rather than repeatedly grinding it into the weave. Use a gentle touch around stitching, printed logos, and coated sections. Keep the amount of water appropriate to the chair’s instructions and construction.
For brands that permit it, mild soap and water may be enough for routine grime. GCI Outdoor’s product support page recommends that approach and instructs beach users to wash their gear with fresh water and dry it before storage. That advice belongs to GCI’s products; it should not overwrite a different maker’s restrictions.
Remove permitted cleaner as directed, using fresh water rather than continually wiping with a dirty, soapy cloth. If the chair has padding, consider where water could remain after the surface looks dry. Avoid soaking it merely to make the cleaning feel more thorough. The goal is to remove the dirt with the least disruptive approved treatment.
Step 3: treat the frame as a separate job
Wipe the legs, braces, feet, and accessible joints with a clean cloth. Remove grit before folding mechanisms move through it. Pay attention to the underside, where mud can remain unnoticed until it drops onto a clean floor or ends up inside the bag.
Do not flood enclosed components or force water into a mechanism to dislodge every particle. Use the chair’s instructions for joint maintenance. Lubrication, if needed, should be the type and location the manufacturer specifies; adding a household spray everywhere can stain fabric or create another cleaning problem.
Look for missing end caps, damaged feet, coating loss, and corrosion while the surfaces are exposed. Record anything uncertain with a photo. Cleaning can reveal a problem, but it cannot prove the remaining strength of a damaged part. Ask the maker about replacements rather than concealing a defect under paint or tape.
Step 4: clean the bag and accessories
The bag needs its own check because a clean chair placed in a dirty, damp sleeve is unfinished work. Empty it, turn accessible pockets out, and remove grit around the opening. Follow its label for washing. If machine washing is prohibited, gently clean spots using the permitted method and keep it open for drying.
Consider straps and buckles separately. A carry strap can be wet even when the seat has dried, especially where layers overlap. Clean a cup holder or detachable pouch in a way that reaches the corners without stretching it off the frame. Give each item a place to dry instead of piling wet accessories on the seat.
If the bag has a persistent smell after appropriate cleaning and complete drying, ask about a replacement. Perfume does not answer the underlying problem, and a tightly closed storage space makes it harder to notice whether dampness remains. Treat odor as a prompt to inspect rather than something to cover up.
How to tell when the chair is ready to pack
Leave the chair open in a ventilated, sheltered position permitted by its care instructions. Blot accessible moisture with a clean towel when appropriate. Turn or reposition removable items so that both sides can dry, and avoid placing wet fabric directly against a wall or another chair.
Use a readiness check instead of a promised drying time. Feel the seams, fabric pockets around pole ends, padded sections, underside of the seat, straps, and bag. Look for droplets in joints and water trapped beneath accessories. If any part remains damp, continue drying it.
Temperature, humidity, airflow, construction, and the amount of water used all affect the process. An article cannot honestly guarantee that every chair will dry in two hours. A chair that feels dry across its broad surface may still be wet in a thick seam. Check the slowest-drying parts before the convenient ones.
Do not use a radiator, campfire, hot air gun, or tumble dryer unless the manufacturer explicitly permits that method. Heat is not a shortcut worth guessing about. For related use precautions, the Helinox handling guide specifically warns against excessive heat and open flames.
Deal with stains by substance, not by a universal recipe
For food or drink, lift away solids and blot liquid promptly when safe and practical. Avoid spreading a small mark across the seat by vigorous rubbing. Then identify the fabric and follow its stain instructions. Keep oily sunscreen, grease, and sticky sap in separate categories because one approved treatment may not address them all.
Do not transfer a bleach recipe from a different fabric brand. The Sunbrella upholstery cleaning guide provides fabric-specific stain and mildew methods and distinguishes removable casings from other constructions. It is useful evidence that care is material-specific, not permission to bleach an unidentified camping chair.
If you see suspected mold or extensive mildew, follow the chair maker’s instructions and the cleaning product label. Avoid dry brushing growth into the air around other people. For widespread contamination, uncertain material damage, or a persistent problem after approved cleaning, consult the manufacturer about replacement rather than repeatedly applying stronger chemicals.
A practical return-home routine
- Unload the chair before leaving it in the car overnight.
- Open it in your prepared drying area, even if you only have time to remove loose debris.
- Empty pockets and separate wet accessories and the bag.
- Use approved cleaning only where needed.
- Inspect the frame and support seams while they are visible.
- Check the slow-drying areas before folding.
- Store the clean, completely dry chair where it is protected as instructed.
This routine is designed to be realistic after a tiring trip. You do not need to perform a deep clean after every short outing. You do need to prevent the convenient decision to leave a damp chair in its bag from becoming long-term storage.
Build care requirements into your next purchase
If cleaning your current chair is consistently awkward, note why. Perhaps the seat cannot be removed, the bag traps debris, or padded areas take longer to dry than your storage arrangement allows. Use those observations to ask better questions before buying its replacement.
Download the care instructions before ordering. Check whether spare seats, feet, and bags are available, and whether the design exposes the areas you need to inspect. Compare the chair with your actual routine: a weekend camper who can dry gear at home has different constraints from someone moving between campsites every morning.
Keep the cleaned chair’s instructions with its model information. The next time it returns muddy, you can follow a known method rather than begin another search. A modest, repeatable care routine is more useful than an aggressive occasional wash that the materials were never designed to tolerate.
Something unclear or out of date? Send a correction with this article’s title and the detail to check.
Sources, research & corrections policy ↗