Clean a leather office chair according to its identified upholstery and finish, using the least aggressive method the manufacturer supports. Start by removing dry dust. Before using water, soap, conditioner, or a stain treatment, confirm that the material is leather and that the care guide applies to that particular finish.
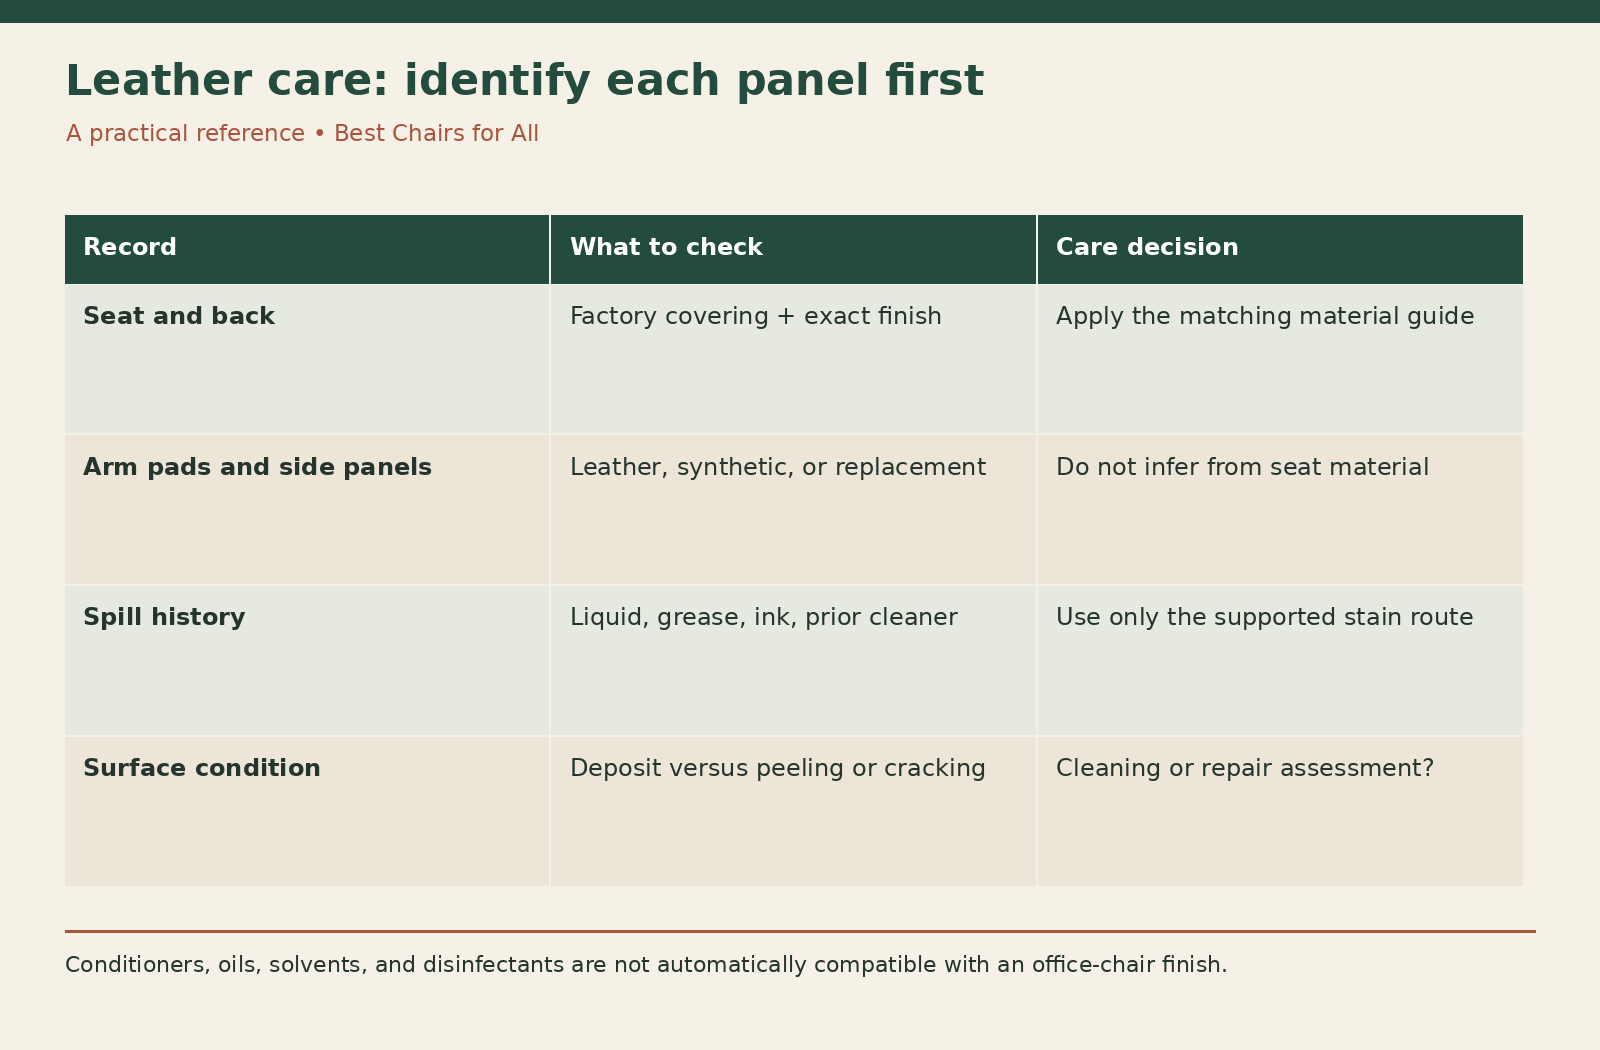
The word leather in a product listing can hide important differences. A chair may combine genuine leather contact panels with synthetic sides, or it may use bonded material or coated upholstery that needs a different guide. This article gives you a material-identification record and a comparison of manufacturer instructions so you can make a controlled care plan rather than treating every brown or black surface alike.
Identify the covering without damaging it
Check the invoice, material code, and manufacturer specification. Ask about the seat, back, and arm pads separately. A leather seat does not establish that every panel on the chair has the same construction. An aftermarket replacement pad may also differ from the upholstery supplied when the chair was new.
Avoid identification tricks that scratch, burn, soak, or chemically test the surface. A water-drop experiment may leave a mark on an absorbent finish and still fail to establish the complete material. The useful evidence is the product and finish documentation, supported by the manufacturer’s answer if the description is ambiguous.
Record the exact wording you find rather than simplifying it to real or fake. Pigmented, aniline, coated, bonded, and synthetic descriptions can carry different care implications. If the material remains unknown, keep maintenance limited to the documented dry route and obtain advice before applying a product.
Separate normal appearance from damage
Leather can show grain, wrinkles, and changes in appearance with use. Those features are not automatically dirt. Look for a surface deposit that transfers to an appropriate clean cloth, a known spill, or a specific sticky area before choosing a cleaning treatment.
Flaking, cracking, exposed backing, and a coating that comes away during wiping raise a repair question. Stronger cleaner will not restore a missing finish or reconnect a peeling layer. Photograph the condition and ask the manufacturer or an upholstery professional whether a pad, cover, or complete assembly is the sensible replacement.
Keep the distinction practical. A worn arm pad may need replacement while the seat remains serviceable. A stain on an otherwise intact panel may be a cleaning issue. Do not let the broad phrase old leather push you toward either discarding the whole chair or saturating every surface with conditioner.
Compare documented instructions carefully
The Herman Miller leather care guide recommends dry dusting or vacuuming and describes a mild-soap and damp-cloth method for relevant soiling. It says to clean the entire affected surface rather than spot cleaning and warns against oils, saddle soap, solvents, and several other treatments.
The Steelcase leather-maintenance instructions also emphasize dry dusting and a mild-soap approach for suitable stains, with a damp rinse and dry wipe. They warn against furniture polishes, oils, varnishes, and ammonia and recommend testing cleaning products inconspicuously.
Use these as examples of why the exact guide matters. They do not establish that every leather finish accepts the same treatment. If your chair has a specialist finish or a different supplier’s upholstery, get that material’s instructions. Do not combine one brand’s stain method with another brand’s conditioning recommendation to create a new routine.
Set up a small care station
Gather clean soft white cloths and the product, if any, approved by your guide. Keep one cloth for dry dust, another for permitted damp cleaning, and another for drying. A cloth previously used on the base or floor can carry grit onto a finish that is much easier to mark.
Move the chair to a protected area with normal indoor airflow. Keep liquids away from controls, seams that lead into filling, and any electrical accessories. Apply moisture through the supported cloth method rather than spraying a liquid over the assembled chair.
Take a photograph before treatment and record any cleaner used previously. This is especially helpful for a secondhand chair whose history is unclear. A glossy patch may be previous polish, a worn finish, or ordinary appearance; an accurate history gives a professional more information than a guess based on touch alone.
Remove dry dust first
Use a clean dry cloth or the appropriate gentle vacuum method specified for the chair. Work around piping and accessible seams without dragging a hard nozzle along the surface. Avoid stiff brushes unless the manufacturer explicitly prescribes one for a particular finish.
Dust removal often makes a larger difference than expected at the junction between the seat and back. Collect loose particles before introducing any damp treatment. Otherwise they can become a dirty paste or be pushed into stitching and creases.
Inspect the dry result. If the surface is clean and its feel is normal, stop. A routine cleaning does not require applying a nourishing or polishing product afterward. Extra treatment should have a documented purpose and compatibility, not just be included because a bottle is sold as a leather-care essential.
Use the approved damp method only where it applies
If your identified finish permits mild soap and a damp cloth, follow the maker’s specified method and test area first. Use the amount of moisture required by that method without soaking the filling or leaving liquid in seams. Inspect the dried test before treating a visible section.
Clean the area at the scale the guide specifies. Herman Miller’s instruction to treat the entire affected surface is different from concentrating repeatedly on a small spot. In that context, seat, back, or arm is a defined surface; it does not mean that the whole chair needs to be wet at once.
Remove residue and dry as directed. The rinse stage is controlled wiping rather than a water bath. Change cloths when they become dirty and keep the leather away from concentrated heat. Do not assume that a faster-drying treatment is better if it changes the finish or leaves an oily film.
Treat a spill by its type and the applicable guide
Absorb excess liquid promptly with a clean soft cloth. Avoid rubbing a colored spill across a larger panel. Note what was spilled and whether it reached stitching or filling. If the guide calls for air drying, give the area the time and conditions needed instead of using a hair dryer.
Oil and grease require particular restraint. Herman Miller’s leather guide treats them differently from water-based soiling, recommending dry removal of the excess rather than washing the grease spot with water. That is a material-specific instruction, not a universal home remedy for all leather products.
Ink, dye transfer, unknown chemicals, and extensive stains are good reasons to ask for professional guidance early. A remover intended for automotive leather or shoes may be unsuitable for an office-chair finish. Do not stack several treatments on the same area and then judge the final damage as if it came solely from the original stain.
Do not assume conditioner is required
A conditioner may be recommended for some leather products, but it is not automatically appropriate for your chair. Follow the actual material guide. Instructions that prohibit oils or furniture polishes are a reason to pause before applying a product sold as feeding or rejuvenating leather.
Check the finish compatibility and product directions rather than relying on the marketing category. A product can be suitable for one leather construction and unsuitable for another. The resulting change might be a darker appearance, a sticky surface, or residue that attracts more dirt.
If the leather feels different after treatment, stop and record what was applied. Avoid trying to remove an unwanted coating with a stronger solvent. Ask the manufacturer or professional how to assess it. Cleaning chemistry should not become a sequence of increasingly aggressive corrections.
Use this finish-first care worksheet
Make one row for each component with fields for material description, finish code, source of instructions, normal care, stain method, and products to avoid. Add a condition photograph and the date. This makes differences between a leather seat and synthetic arm pads visible before cleaning starts.
For example, a hypothetical record might say: “Seat: factory leather L08; maker confirms applicable leather guide; dry dusting; permitted panel cleaning for water-based soil; no oils or polishes.” A separate arm-pad entry might say “replacement polyurethane pad; follow pad supplier instructions.” The correct routine can vary within one chair.
The Haworth care and maintenance guide separates leather, faux leather, and polyurethane sections. That organization is a useful reminder to keep materials distinct even when their surface appearance is similar. Match the section to the documented covering rather than choosing the nearest-looking name.
Protect the cleaned surface in everyday use
Keep the chair away from heat sources and conditions outside its specified indoor use. Avoid leaving damp clothing, cleaning cloths, or adhesive materials on the upholstery. If the chair receives strong sunlight at one desk, ask the manufacturer about placement rather than applying an unapproved protective coating.
For shared chairs, provide the correct instructions to cleaning staff and keep suitable supplies labeled. A convenient disinfectant wipe can be inappropriate for a leather finish even if it is acceptable on a nearby desktop. Cleaning and any required disinfection must satisfy both material compatibility and the product’s own instructions.
Review the condition periodically without creating a rigid treatment calendar. Dusty surroundings, spills, and shared use affect the maintenance needed. A leather chair that is already clean does not benefit from repeated wet work merely because a monthly reminder appears.
Decide when cleaning has reached its limit
Stop if color transfers unexpectedly, the finish changes, the surface begins to peel, or the approved method no longer improves a stain. Dry the area as directed and contact support. Keep the product name, dilution, application history, and photographs available so the next advice can be specific.
If a professional recommends repair, ask which surface can be restored and what appearance change to expect. If a replacement pad or seat assembly is available, confirm model and revision compatibility. Cleaning a supported component and repairing a damaged finish are different services with different limits.
A good leather-care routine is simple because it is specific: identify the covering, remove dry soil, use only the applicable documented treatment, and leave the surface clean and dry. The useful result is an intact finish and a chair ready for work, supported by a record you can trust the next time a spill occurs.
Something unclear or out of date? Send a correction with this article’s title and the detail to check.
Sources, research & corrections policy ↗