Sewing chair height should be matched to the surface where your hands guide the fabric, while your feet remain supported and the pedal stays usable. The cabinet top alone may be the wrong reference. A machine sitting on top of a table raises the sewing bed above it; a machine lowered into a cabinet can place the bed near the surrounding surface.
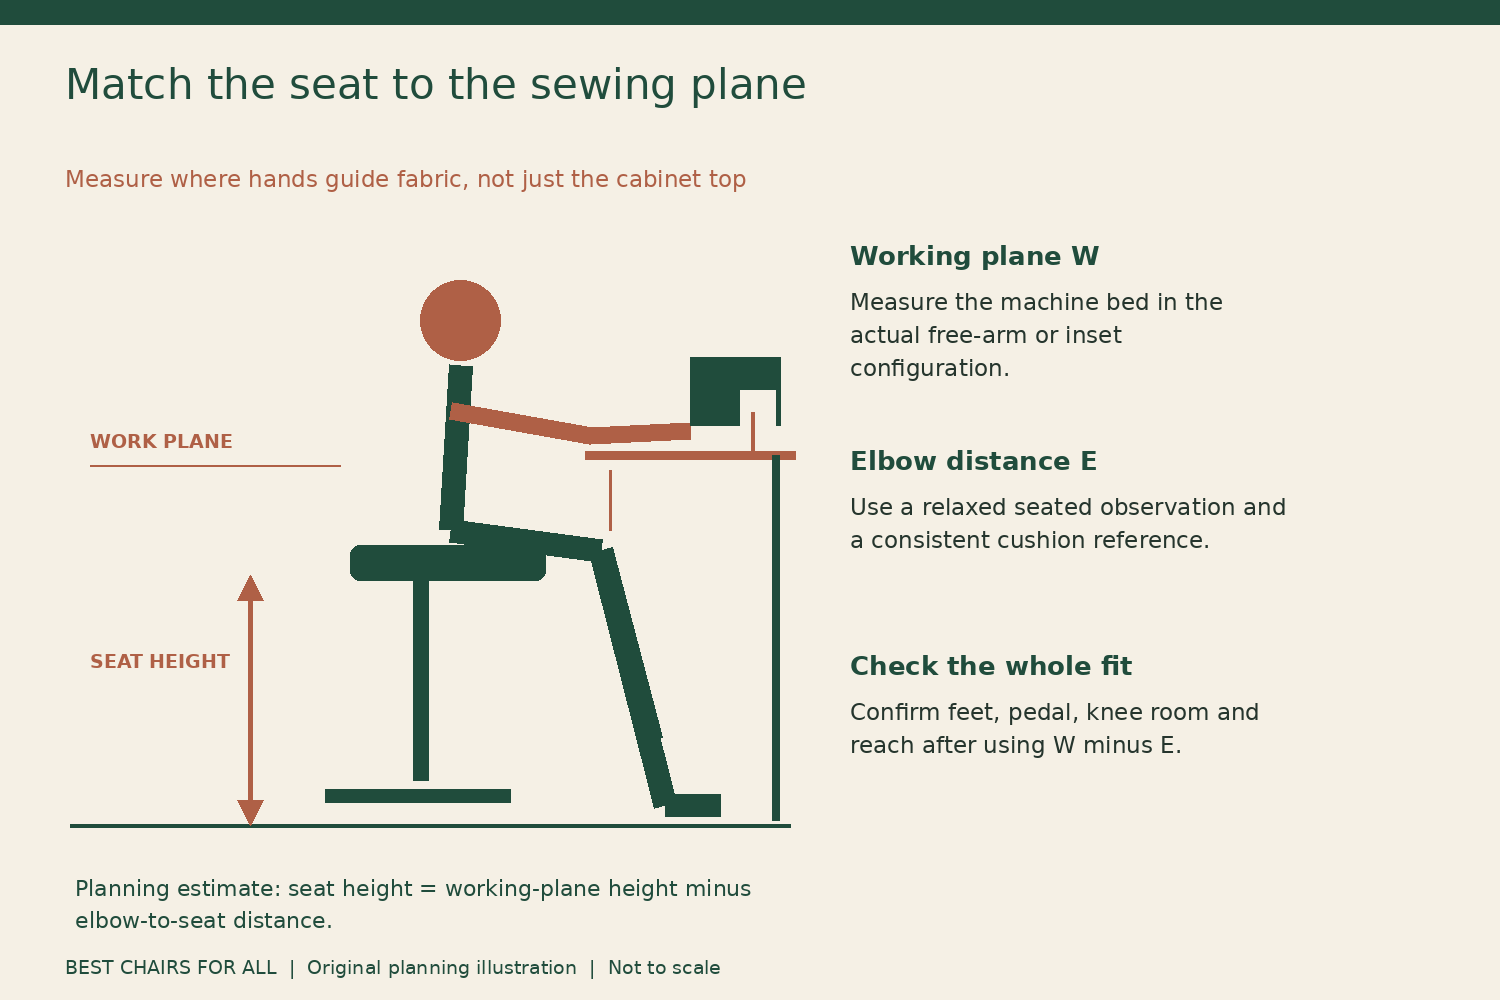
Start by measuring that actual working plane, then compare it with your relaxed seated elbow position. Adjust the chair and, where the equipment allows, the table or machine platform together. Raising the chair until the shoulders feel better is only part of the solution if it leaves your feet dangling or the pedal out of reach.
Find the fabric-guiding plane
Locate the surface immediately around the needle where the fabric is supported and your hands normally work. Measure vertically from the floor to that plane with the machine in the configuration used for sewing. Record whether a free-arm attachment, extension table, quilting insert, or cabinet platform changes its height.
Do not measure only to the highest point of the machine or to the tabletop under its feet. Those dimensions do not describe hand position. Likewise, a cabinet advertised at a standard height may not produce the same sewing-plane height with every machine. The machine bed and insert relationship deserve their own measurement.
For multiple tasks, record more than one plane. Free-arm work, flat-bed sewing, and embroidery setup may use different configurations. Cutting and pressing are different tasks again. A chair setting that suits one should not be expected to solve every activity in the room, especially where another task is normally performed standing.
Use elbow position as a starting relationship
OSHA's OSHA sewing station design guidance describes a sewing workstation relationship in which the work surface is at elbow height, with supported feet, and notes that pedal use may affect seat positioning. It also emphasizes adjustable furniture and appropriate distance from the station. Use that guidance as a starting point for fitting the complete setup, not a universal seat-height number.
Sit in ordinary work shoes with the shoulders relaxed and the chair adjusted so the feet have appropriate support. Bring the forearms toward the work without deliberately shrugging or reaching. Have someone help measure elbow height if that makes the observation easier. Keep the machine safely inactive while you arrange and assess the setup.
The aim is to compare the person and the task in a repeatable position. Do not force a rigid posture for the sake of a measurement, and do not interpret a single number as medical advice. If discomfort persists, an individual workstation assessment may be more useful than continuing to adjust the seat by trial and error.
Measure the chair separately
Record floor-to-seat height using a consistent point on the cushion, and note whether the measurement is empty or occupied. A compressible seat may settle under the user, while a contoured cushion may have several plausible reference points. Use the manufacturer's stated measurement for product comparison and a consistent occupied observation for your own fit record.
Check the complete chair's minimum and maximum, not the length of its cylinder. Horn of America's Horn 17090C chair height and adjustment specifications lists the 17090C seat range as 20–24 inches, along with separate seat dimensions and adjustments. That illustrates why both endpoints matter: a chair with a useful maximum may still start too high for a particular person's floor support needs.
Do not solve a range mismatch by cutting a cylinder, adding unapproved spacers, or altering the base. Ask the manufacturer about an approved alternative configuration or choose equipment with a suitable range. A pressurized lift component is not an appropriate DIY shortening project.
A simple calculation for planning
Call the sewing-plane height W and the vertical distance from the occupied seat reference to the relaxed elbow E. A first planning estimate for seat height is W minus E. This arithmetic describes the relationship; it does not account for every posture, cushion, or task detail, so it must be checked against foot support and pedal use.
For example, suppose a hypothetical machine bed is 31 inches above the floor and the user's seated elbow is 10 inches above the chosen seat reference. The estimated seat height is 21 inches. If their supported-foot position occurs at an 18-inch seat, the three-inch difference signals that the whole workstation needs attention. It does not mean the user should simply sit three inches too high without support.
Possible supported solutions might include lowering an adjustable work surface, using a manufacturer-approved machine-platform position, or arranging an appropriate stable foot and pedal support as part of a workstation assessment. The right choice depends on the equipment and person. Do not balance a pedal on loose books or create a platform that obstructs chair movement or the walking route.
Tabletop machine versus inset machine
Imagine the same machine moved from a tabletop arrangement to a correctly adjusted inset cabinet. If the sewing bed becomes lower, the previous chair setting may now be too high. Measure again rather than preserving the old seat height out of habit. Keep the insert and platform in the configuration approved for that machine and cabinet.
Arrow's Arrow cabinet and platform-height support documents provides assembly documents and platform-height help for its furniture systems. Use the instructions for the exact cabinet and lift. Do not improvise changes to a loaded lift mechanism or assume that a different cabinet's adjustment sequence applies. The chair fit problem may involve the machine platform, but that does not authorize unsupported equipment modification.
Also inspect the transition between the machine bed and surrounding surface. An uneven relationship can affect how fabric travels and where hands are held. A chair adjustment cannot make an incorrectly matched insert or unsupported extension surface behave like a properly configured work plane. Resolve those equipment issues through the manufacturer's process.
Distance from the needle matters too
Once the height relationship is promising, position the chair so you can guide the fabric without continually reaching forward. Check whether cabinet rails, drawers, the machine motor, or stored supplies block the knees. A person may appear to need a higher seat when the real limitation is that the chair cannot approach the work.
Try ordinary fabric-guiding motions with the machine inactive. Notice whether the elbows move far from the body or the torso leans forward to compensate for distance. Move storage and loose objects that interfere, but do not remove structural cabinet parts. If a fixed support prevents access, document it as a workstation constraint.
Check the chair back and seat depth. If you must sit on the very front edge to reach the needle, the backrest may provide little useful support. A smaller seat or adjustable backrest can change the relationship, but the correct choice still depends on the user. Do not judge chair fit only from an unloaded showroom measurement.
Keep pedal access in the same worksheet
Record the pedal's position relative to the chair, the supported position of the non-operating foot, and whether the pedal stays in place during normal use. Do the initial positioning with the machine safely off. Route the cable according to the machine's instructions and keep it clear of chair wheels and moving furniture.
If the pedal requires a stretched leg or an awkward ankle position, do not assume a different chair height alone is the answer. The pedal may need a different permitted location, or the overall workstation may need adjustment. Avoid modifying electrical controls or substituting an unapproved pedal to compensate for furniture fit.
A footring on a tall chair is not automatically a solution for a floor pedal. It may support one foot while placing the other far below it. Assess both legs together. The chair, work plane, pedal, and floor support form one arrangement and should be recorded as such.
A repeatable sewing-height worksheet
Use fields for machine model, cabinet or table model, sewing mode, working-plane height, chair model and range, occupied seat setting, elbow relationship, foot support, pedal position, and knee clearance. Add footwear and any insert or extension used. This lets you return to a known setup after cleaning or changing machines.
Make one adjustment at a time and record what changed. For example, “lowered approved machine platform; chair unchanged; shoulder position easier; pedal reach unchanged” is more informative than “new setup better.” A short sequence of specific observations helps distinguish a height issue from reach, lighting, or fabric-handling problems.
For a shared station, give each user a separate settings line. Do not assume their chair position can be predicted from standing height alone. A clearly marked, easily adjusted setup can make sharing practical; a chair that cannot reach one person's supported position remains unsuitable even if another person likes it.
Check visibility without chasing the needle downward
If you still lean toward the needle after height and distance are reasonable, examine lighting, contrast, the task, and whether the machine obstructs the view. Do not keep lowering the chair simply to bring the eyes closer if that makes the hands and shoulders work awkwardly. Visibility is another part of workstation fitting, not a reason to sacrifice every other relationship.
Use task lighting positioned according to its instructions and keep it clear of moving parts and cables. For specialized visual needs, obtain appropriate individual advice. A furniture article cannot diagnose why someone needs to move closer to see fine detail.
Recheck the setup when a new machine, insert, chair, or task changes the working plane. Keep the measurement record practical rather than elaborate: actual hand surface, relaxed elbow relationship, supported feet, accessible pedal, and adequate knee clearance. Those observations provide a stronger basis for sewing chair height than a generic recommendation based only on the table's advertised height.
Sources and specifications checked November 6, 2026. Examples are planning exercises, not product testing.
Something unclear or out of date? Send a correction with this article’s title and the detail to check.
Sources, research & corrections policy ↗