Salon chair installation begins with the complete model and the floor beneath it. A freestanding hydraulic chair, a permanently floor-mounted chair, and a powered service chair are different installations. Do not borrow anchoring, wiring, or clearance instructions from equipment that merely looks similar. Obtain the documents for the chair top, base, and accessories actually being delivered.
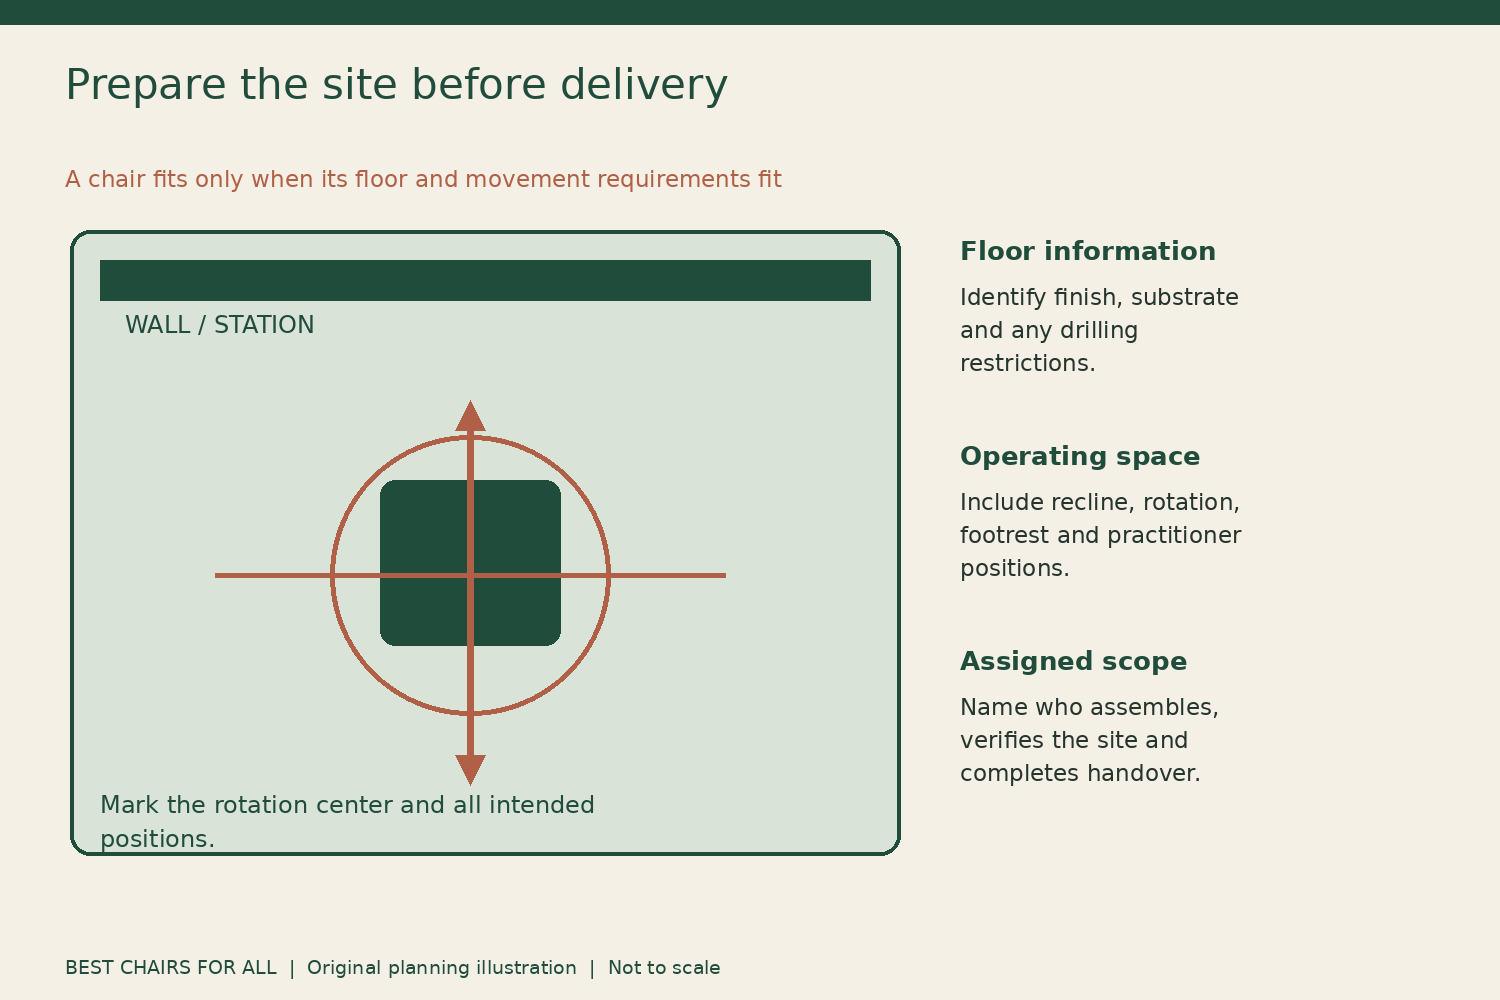
The owner can make installation smoother by preparing a site information packet: floor construction, finished surface, proposed station location, delivery route, operating envelope, and assigned installation responsibilities. The installer and manufacturer then have enough detail to answer specific questions. This is more useful than asking whether a chair “works on tile.”
Separate assembly from site suitability
Assembly joins the supplied components according to the manufacturer's instructions. Site suitability asks whether the intended floor, location, and surrounding space meet the equipment's requirements. A chair can be assembled correctly and still be placed on an unsuitable surface or in a station that prevents its normal operation.
Minerva's Minerva sales and installation responsibility policy makes this distinction explicit by addressing installation and assembly responsibilities and the customer's need to assess the premises. Read the current terms attached to your order. “Minor assembly required” does not automatically include a professional site inspection, floor modification, or approval of the building's construction.
Ask the supplier three separate questions: who assembles the chair, who confirms the floor is suitable, and who checks the completed station before use? Put the answers on the order. If different contractors handle the floor and equipment, decide who coordinates their information so that no requirement is left between the two scopes.
Identify the floor below the finish
Tile, vinyl, wood, or stone names the visible surface, not the whole floor structure. A finished surface may cover concrete, a raised floor, timber framing, or another assembly. For equipment that requires anchoring or a specified structural support, the installer needs information below the decorative layer.
Gather existing plans, renovation records, or information from the building owner. Identify any underfloor heating, concealed services, raised-floor panels, waterproofing, or areas where drilling is restricted. Do not investigate by drilling exploratory holes yourself. The appropriate installer or building professional should establish what can be safely and properly modified.
For a freestanding chair, ask about the required firmness and levelness of the support surface and its permitted contact arrangement. Takara Belmont's Takara Belmont hydraulic base floor and operation instructions specifies a solid, flat surface for the bases it covers. That is useful manufacturer guidance, but it does not establish that every apparently smooth floor meets every other chair's requirements.
Freestanding bases still need a plan
A freestanding chair may seem simple because it does not require floor anchors. It still needs its full base to sit as intended, its controls to remain accessible, and enough surrounding room for the chair and practitioner. A sloped patch, broken tile, thick uneven mat, or loose floor covering deserves attention before the station is put into service.
Do not shim the chair with cardboard, folded towels, or scraps of flooring. If the manual provides adjustable feet, have them set and secured by the specified procedure. If it does not, ask the supplier how an uneven support condition should be resolved. A larger decorative mat is not a repair for an unstable base.
Place the intended anti-fatigue mat on the plan as a separate component. Check that its cutout and edges suit the base and pedal. Confirm whether the base stands on the finished floor or any approved mat arrangement. Never assume the arrangement pictured in a showroom photograph is an installation instruction for your chair.
Floor-mounted bases require exact documentation
A floor-mounted chair changes the building interface. Request the manufacturer's mounting drawing, substrate requirements, fastener specification, and service access instructions. Give those to the installer before work begins. Do not choose an anchor by matching a visible bolt head in a photograph or reusing a hole pattern without confirmation.
Minerva's Minerva floor-mounted and freestanding base guide describes its floor-mounted option as a permanent installation. That has practical consequences for lease approval and future rearrangement even before technical details are considered. Ask the building owner whether the proposed fixing is permitted, who restores the floor later, and whether any planned flooring replacement will affect the installation.
An existing floor-mounted chair is not proof that a new one fits the same support. The mounting plate, force path, fastener arrangement, and manufacturer's requirements may differ. Have the installer compare the actual documents. If information about the old installation is unavailable, disclose that uncertainty instead of treating it as a verified foundation.
Keep hydraulic assembly model-specific
Parts that look similar may have different brackets, orientation, hardware, or intended connections. Keep cartons and parts identified by model until assembly is complete. Open and inspect the shipment using the supplier's process, documenting missing or damaged components before they disappear into a mixed pile of hardware.
The Minerva Cinque model 2902 assembly instructions for model 2902 identifies its supplied parts and warns that the hydraulic base must remain upright. That instruction should travel with the delivery and assembly plan. It is not permission to turn another hydraulic unit upside down or to create a universal assembly sequence from one chair's bracket layout.
Ask for help when the supplied parts differ from the diagram. Do not drill new holes, substitute convenient bolts, or force a connection because the remaining parts appear close enough. Preserve the packaging and photograph the discrepancy. A written resolution from the supplier is better than an improvised assembly that cannot later be traced.
Plan the complete operating envelope
Mark the proposed rotation center on the floor. Add the base, footrest, arms, backrest, and any headrest in their most space-demanding intended positions. For reclining equipment, include the reclined envelope. Obtain dimensions from the exact model drawing and confirm whether optional attachments are included.
Then add practitioner positions, the trolley, the operator stool if used, and the route clients take into and out of the chair. A rectangle around an empty chair does not describe the whole station. Open nearby drawers and doors in the mockup. A cabinet that clears the upright seat may strike a rotated footrest or block the operator's escape from a cramped corner.
Keep required building circulation and access provisions distinct from your preferred working space. This article does not supply a code-compliant aisle dimension. Have the relevant local requirements checked by the appropriate professional. A manufacturer's minimum mechanical clearance is not automatically sufficient for every service workflow or access need.
A site information packet
Prepare a page with a scaled station sketch, chair and base model, floor photographs, floor-construction information, and measured positions of walls, cabinets, outlets, and doors. Add a delivery-route sketch showing the narrowest door, corridor turns, thresholds, stairs, and lift restrictions. State which dimensions were measured and which came from existing plans.
Include the manufacturer drawings and the supplier's assembly scope. List unresolved questions beside the relevant area of the sketch: “substrate unknown,” “pedal may overlap mat,” or “reclined headrest dimension needed.” Assign each question to the supplier, installer, building owner, or design professional who can answer it.
Finish with a change log. If the base, station location, floor finish, or accessory list changes, mark the packet's revision date. Give everyone the same current version. This avoids an installer preparing for one base while the purchasing team accepts a substitute with different dimensions or anchoring requirements.
Worked example: a leased salon suite
Imagine a tenant replacing a freestanding chair with a floor-mounted model to improve walking space around the station. The visible floor is vinyl over an unknown substrate. The owner initially assumes the smaller base makes the change simple. The site packet instead reveals three unanswered questions: anchoring support, permission to penetrate the floor, and future restoration responsibility.
The supplier provides the exact mounting documentation, the building owner supplies floor information and restrictions, and an installer assesses the proposed location. Only then can the tenant compare the permanent option with another freestanding arrangement. The smaller visible footprint remains a benefit, but it is weighed against a documented installation rather than guessed compatibility.
The example also shows why order timing matters. If the tenant buys first and asks these questions on delivery day, the chair may sit unused while the floor issue is resolved. Preparing the packet before purchase reduces that avoidable uncertainty without requiring the owner to design the anchoring themselves.
Powered chairs add another specialist scope
If the chair uses electricity, obtain its regional electrical requirements and installation instructions. Ask a qualified installer or electrician to assess the supply, outlet location, cable routing, and any required protection. Keep powered-equipment work separate from ordinary user controls. Do not open electrical covers or adapt plugs to make a mismatched product work.
A cable also affects the operating plan. Confirm how it remains clear of rotation, recline, the pedal, trolley wheels, and the walking route. Do not run it through a moving gap or use loose covering to hide an unsuitable path. The equipment's instructions and the site's electrical requirements should determine the solution.
Do not transfer plumbing or electrical requirements from a shampoo system to a simple styling chair, or vice versa. Combined service units can include multiple interfaces with the building. Obtain a complete list from the supplier so the contractor's quote covers the actual equipment rather than an assumed category.
Handover before appointments begin
At completion, match the chair, base, accessories, and installed location to the approved packet. Have the normal controls, locks, entry and exit position, and permitted user maintenance demonstrated. Retain the assembly and installation record, current manual, supplier contact, and any inspection documentation that applies to the work.
Resolve wobble, unexpected movement, damaged components, missing hardware, or inadequate clearance before booking the station. A careful handover is the point where the equipment and the room become one working setup. The owner should leave with clear instructions and traceable records, rather than a chair that merely looks finished.
Sources and specifications checked November 6, 2026. Examples are planning exercises, not product testing.
Something unclear or out of date? Send a correction with this article’s title and the detail to check.
Sources, research & corrections policy ↗