A fishing-chair rod holder must match the chair’s permitted mounting point, leg profile, clamp or insert, accessory connection, and intended load arrangement. Measuring a tube diameter is necessary for many systems but does not settle the whole question. A holder can close around a leg yet be unsuitable for that chair, interfere with adjustment, or place a long arm where the manufacturer does not permit it. Confirm the complete combination before using it with a rod.
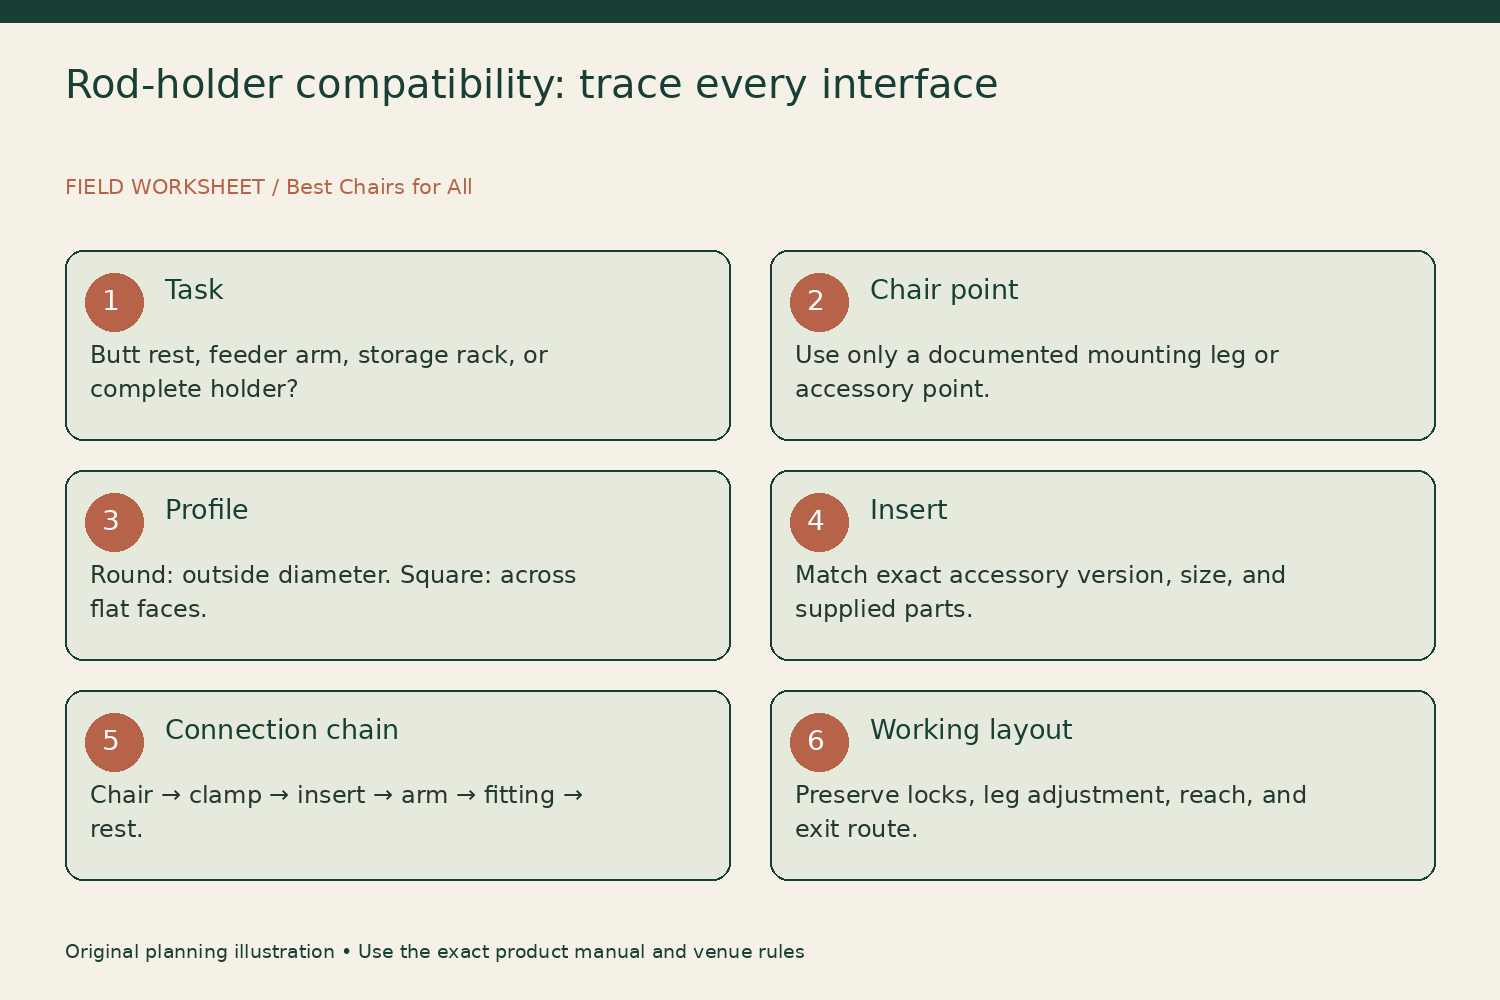
This guide provides a connection-chain worksheet from chair to rod. It distinguishes a butt rest, a feeder arm, and a storage rack, and shows how to measure round and square profiles without confusing them. Named products are documentation examples rather than current United States recommendations. Availability and revised models need separate confirmation, and no universal thread size, tightening torque, or side-load allowance is assumed.
Name the job of the accessory
A butt rest supports the handle end of a rod. A feeder arm positions another rest away from the chair. A storage rack holds spare equipment rather than necessarily supporting a rod in active use. A product called a rod holder may perform one of these jobs or something different. Write the intended task before deciding which mounting system you need.
Draw the rod’s intended position and identify every support. Do not assume a single accessory is designed to hold the whole rod under every fishing condition. Ask the maker about the intended arrangement, including whether another support is required. The fact that a rod can be placed in a cup or across a padded bar does not establish that the accessory is designed for that load or use.
Identify the chair's approved mounting points
Find the exact chair model and accessory compatibility information. Some specialist chairs are designed around modular leg-mounted equipment. A general folding chair’s cross brace, arm, or telescoping extension may not be an approved mounting point. Do not attach to a tube simply because it is exposed and the clamp fits. The chair’s load path and adjustment mechanism matter as much as the tube shape.
The Preston Absolute 36 Feeder Chair page explicitly discusses its leg system and accessory banksticks. That is a documented modular arrangement for the named chair. It is not a statement that a thirty-six-millimeter tube on any other piece of furniture can accept the same equipment. Start from the chair’s intended system and work outward.
Measure a round profile correctly
Use a suitable caliper if available to measure the outside diameter at the proposed mounting location without damaging the finish. Record the value in millimeters and identify whether the tube is round, oval, tapered, or interrupted by a seam or fitting. A cloth tape wrapped around the tube measures circumference, not diameter. Do not copy that wrapped number into a diameter field.
If you use circumference only as a rough identification aid, label it as such and verify the actual profile through manufacturer data. Dividing a circular circumference by pi gives a geometric estimate, but coatings, ovality, and measurement error can matter for an insert. Do not sand the frame or compress the tube to obtain a nominal size. The required fit should come from the correct clamp and approved insert.
Measure a square profile across the flats
For a square leg, measure the outside width across two opposite flat faces, not diagonally from corner to corner. Record both directions if the profile may be rectangular. The corner shape also matters: rounded corners and a true square insert may not behave like an arbitrary gap filled with padding. Photograph the profile beside a scale for the supplier when the identity is uncertain.
A simple geometry example explains a common error. A square twenty-three-millimeter profile has a corner-to-corner diagonal of about 32.5 millimeters, calculated as twenty-three times the square root of two. That does not make it a thirty-two- or thirty-six-millimeter round leg. These are illustrative calculations, not fit tolerances. Use the profile and across-flat measurement specified by the accessory manufacturer.
Match the insert and product version
A clamp system may use a large outer body with different inserts for different leg profiles. Record the accessory code, insert code, supported size, and whether the insert is supplied or sold separately. Do not assume all products carrying the same family name include the same set. Old packaging and revised adapters can describe different combinations of round and square sizes.
For example, the Taskers listing for Korum Any Chair Adaptor II K0300042 identifies several supported round profiles and a square profile. Because this is retailer information, confirm the current insert set and compatibility with Korum or the supplied instructions. Do not extend the word ‘Any’ in the product name into a literal promise that every chair and tube shape is supported.
Trace the complete connection chain
Write the parts in order: chair model, approved leg or bankstick, clamp, insert, arm or adapter, quick-release fitting if present, rest head, and rod support arrangement. Put a source beside each interface. A correct clamp-to-leg match does not prove that a rest head fits the arm, and a matching thread does not prove that the arm is appropriate for the chair.
Leave a blank where an interface is unresolved. This makes it obvious which question to ask rather than buying several parts and hoping they combine. If the manufacturer supplies a complete accessory assembly, compare that documented option before mixing components from unrelated systems. A complete package may be easier to verify than an improvised chain even when every individual part appears well made.
Verify threads and quick-release fittings
Ask for the documented thread or proprietary connector specification at the arm-to-rest interface. Do not assume all fishing accessories share the same thread or that a fitting is correct because it turns a few times. Avoid forcing dissimilar threads, adding an unapproved adapter, or leaving a connection partly engaged to achieve a desired angle. Use the adjustment method the maker designed for orientation.
For a quick-release system, confirm the matching insert or receiver and its engagement check. A similar-looking release from another range may not be interchangeable. Keep small locking pieces with the accessory and replace missing parts through the maker’s specified route. A strap or cable tie does not turn an incompletely engaged quick-release fitting into a documented connection.
Compare one-point and multi-point mounting
Some arms attach at one clamp, while others use more than one fixing point. Those arrangements can need different amounts of exposed leg or a specific relationship to the chair frame. Record the mounting span and location requirements from the instructions. A chair with the correct nominal tube size may still lack the space needed to install the accessory as intended.
The Preston manufacturer gear guide documents multiple OffBox accessory types and their supplied inserts. Use the exact accessory entry rather than a general family claim. Differences in mounting, reach, and supplied components are why a compact butt-rest arm and a long feeder arm should not be treated as the same purchase with different lengths.
Account for projection and working space
Draw the arm in its intended position relative to the chair, water, neighboring equipment, and your exit route. Note its documented extension range and any support requirements. Extending an arm changes where its load acts relative to the mounting point; that is a reason to respect the design’s instructions, not an invitation to calculate a personal maximum load from the chair’s occupant rating.
Do not hang a tackle bag or use the arm as a handhold unless the manufacturer permits that use. Keep long projections away from paths and neighboring anglers. If the required position blocks standing or using a landing net, reconsider the layout. A holder that fits mechanically can still be a poor operational fit for the peg and fishing method you intend to use.
Install through the documented sequence
Follow the accessory and chair instructions for mounting, insert orientation, tightening, and engagement checks. Do not invent a torque figure or use extra leverage on a handwheel. Over-tightening can damage a clamp or frame, while insufficient engagement can allow movement. If the instructions do not identify how to confirm secure installation, ask the supplier before using the assembly.
Keep telescopic leg controls and required frame locks accessible. Do not cover an extension mark or place a clamp across a release simply because that height gives a convenient rod position. A modular setup should preserve the chair’s intended adjustment and inspection functions. Photograph the completed arrangement so later checks can compare the location and orientation rather than relying on memory.
Resolve movement without improvised shims
If the accessory rotates, slides, or cannot remain at the documented position, stop using it and check the model, insert, routing, and condition against the instructions. Do not immediately add rubber, tape, foil, or a cut plastic sleeve. A shim can change contact and hide a wrong-size or damaged fitting without providing the approved support the system requires.
Send the maker the connection-chain worksheet, profile measurement, photographs, and description of the movement. Ask whether the combination is approved and which part should be replaced or corrected. Do not test the repair by applying a large side load or repeatedly pulling the rod. The manufacturer’s engagement check and service response are more appropriate than an improvised proof test on the bank.
Buy from the completed worksheet
Your final sheet should establish each interface and identify the exact parts needed, including inserts and any separately supplied rest head. Add packed size and whether accessories must be removed before folding the chair. This prevents a common surprise: a holder that fits during use but damages the seat or obstructs the transport closure when left attached.
Choose a different support arrangement when an essential compatibility question remains unanswered. An independently supported rod rest may be worth investigating if the chair has no documented accessory mounts, but it also needs its own suitable setup and instructions. The practical objective is a known connection from chair to rest, with the correct profile, components, location, and use. Diameter is the beginning of that inquiry, not its final approval.
Something unclear or out of date? Send a correction with this article’s title and the detail to check.
Sources, research & corrections policy ↗