Match a hunting blind chair to the window by measuring the opening and your seated viewing position inside the actual blind. A published seat-height range alone cannot predict the result. Your seated torso height, cushion compression, chair depth, distance from the wall, and the blind’s window adjustment all affect what you can see. Start with a comfortable permitted chair setup, then compare the view without stretching, perching, or raising the chair on improvised supports.
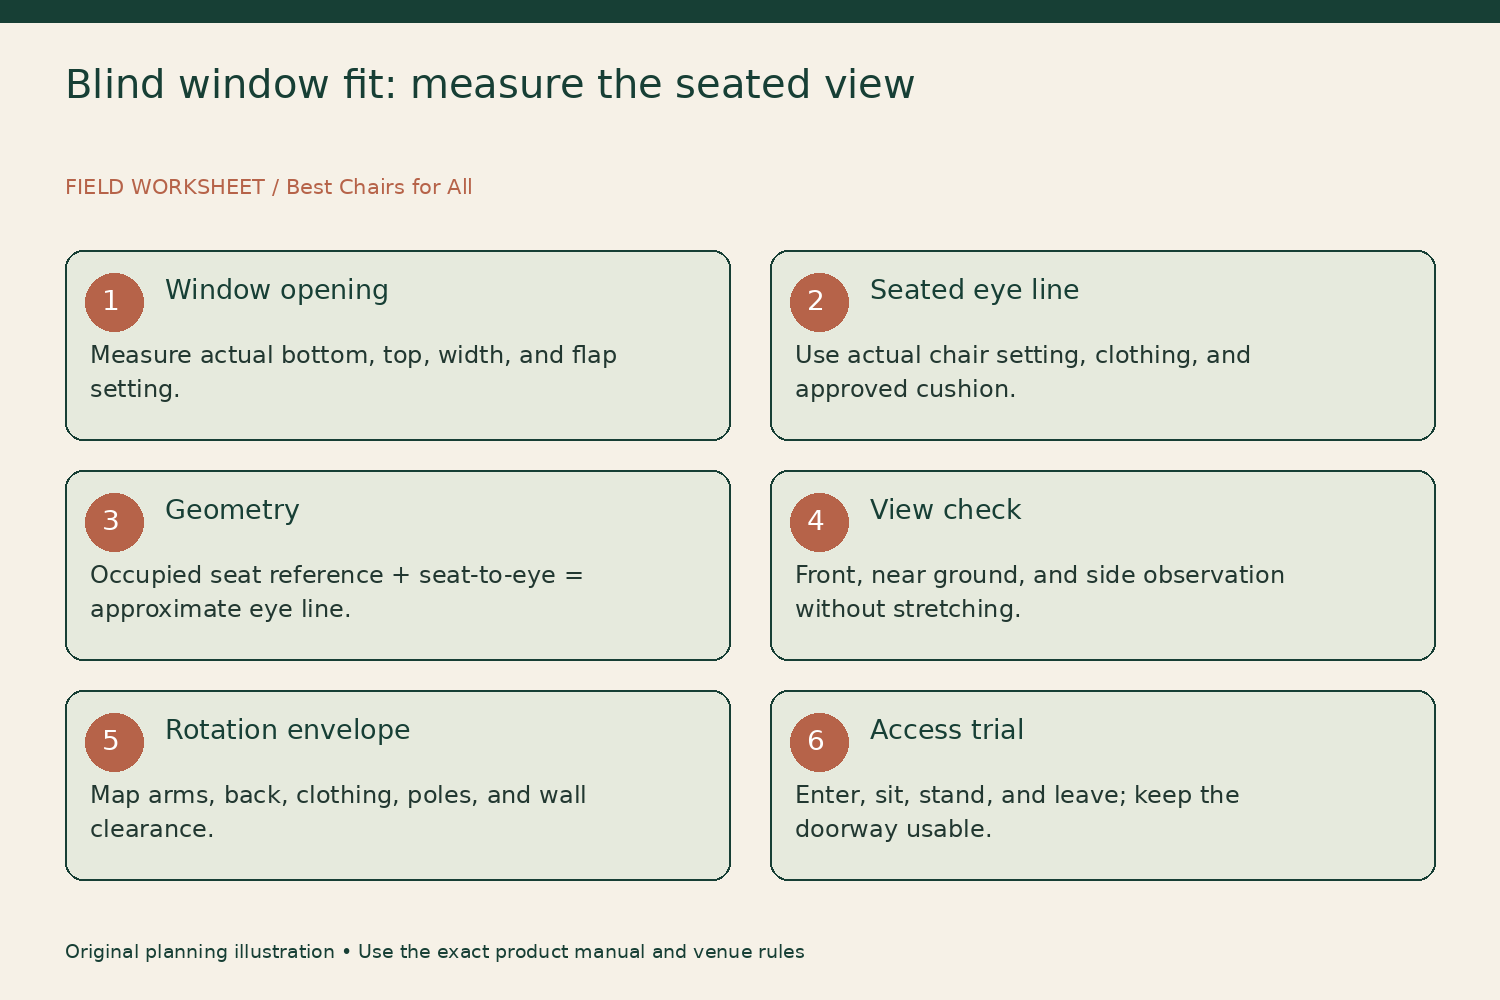
This guide concerns chair fit, observation, and movement within a ground blind. It does not prescribe a shooting position or determine whether any firearm or bow can be used through a particular opening. Conduct the measurement session without weapons. Use the chair and blind manuals for setup, and obtain the appropriate safety instruction for any hunting equipment separately. Furniture geometry does not establish safe equipment operation.
Measure the actual window opening
Set up the blind according to its instructions on a suitable permitted site. Measure from the supporting floor or ground plane to the bottom and top of the usable window opening. Note mesh, fabric flaps, frame members, and any adjustable panel that changes the opening. Measure the configuration you intend to use rather than the maximum opening shown in a catalog photograph.
Record the opening width and its position relative to the blind’s corners. A seated view through a wide central window can differ from the view through a side opening at the same height. If the blind is pitched on irregular ground, different walls can have different relationships to the chair. Do not treat the nominal overall blind height as a substitute for the window measurements you need.
Distinguish floor space from wall span
Pop-up blind listings may provide both floor dimensions and hub-to-hub dimensions. Those are different measurements. The wider wall span does not necessarily describe the area available for chair feet at ground level. Primos’s Full Frontal product page lists a 58-by-58-inch floor separately from its 75-by-75-inch hub dimensions, illustrating why both need attention.
Draw the floor first, then add the wall outline at seated shoulder height if it differs. Mark the door and required access route. A chair can fit the floor rectangle yet contact a sloping wall when you lean against its back or rotate. Use the actual installed chair outline, including arms and feet, to compare the space rather than relying only on seat width.
Measure your seated viewing height
On a suitable stable setup, sit naturally in the chair as its instructions allow, wearing the clothing you expect to use. Ask another person to measure from the same supporting plane to your eye level without placing objects against your face. Record the chair setting and whether its normal cushion is installed. Keep the measurement as a personal observation rather than a standardized body dimension.
Also note the vertical distance from the seat’s reference point to your eye level if it can be measured consistently. Fabric seats can sag, so an unloaded front-edge height is not necessarily the occupied reference beneath you. Photograph the side view for your own comparison if useful, making the measurement method clear. Do not claim precision greater than the soft seat and ordinary measuring method can support.
Use a simple eye-line calculation
Suppose a hypothetical occupied seat reference is eighteen inches above the ground and the measured seat-to-eye distance is twenty-seven inches. The eye line is then about forty-five inches above that ground plane. If a hypothetical window runs from forty to fifty inches, the eye line lies within its vertical range. This is arithmetic for an observation worksheet, not approval of a shooting arrangement or a promise about comfort.
The calculation also leaves out distance and the objects you want to observe. A window can sit around eye height while its lower edge blocks the near ground outside. Therefore use the arithmetic to identify candidate chair settings, then check the actual view. Do not adjust the chair beyond its documented limits or add a loose stack of cushions merely to make a number fall between two window measurements.
Check more than one view
From the selected chair position, record what you can see through the front and side windows while remaining in a manageable natural posture. Mark an intended observation area outside and note whether the opening obstructs it. Do not lean the chair or lift its feet to improve the view. If an ordinary view requires repeated stretching or sitting on the edge, reconsider the chair position or model.
Use three observation notes: straight ahead, toward the near ground, and toward a side opening. These are useful furniture-fit tasks without involving hunting equipment. A chair setting that works for the horizon may not work for nearby ground, while a lower setting may improve concealment but reduce the view. Record the tradeoff honestly instead of declaring that one chair height universally aligns with ground-blind windows.
Verify the chair's adjustment range
Obtain the current model’s actual minimum and maximum seat heights and adjustment steps. A listing may describe overall chair height, back height, or adjustment travel rather than absolute seat height. The Millennium G100 page, for example, describes 3.5 inches of seat-height adjustment. That travel figure alone does not provide every absolute setting needed for your window worksheet; ask for clarification where the specification is unclear.
Older documents and revised products can differ. The ALPS 2019 manufacturer catalog lists a 17.5-to-23-inch range for its identified Stealth Hunter version. Use that as a dated example, not a current specification for every chair carrying the name. Match model codes and request the present manual before purchasing for a narrow height requirement.
Keep leveling separate from raising the seat
Independent leg adjustment can serve a ground-leveling function, a seat-height function, or both as the manufacturer describes. Do not extend only one side to gain a better window view while leaving the seating surface tilted. Establish the documented stable setup first. Then use only the permitted height changes, preserving all required engagement and frame locks.
If the ground cannot support the chair appropriately, relocate within the permitted site or choose another suitable location. Do not build a platform from loose boards, stones, or tackle boxes. A higher seat is not useful when the support arrangement becomes uncertain. The window-fit worksheet should include the actual floor condition so a promising indoor measurement is not mistaken for a completed field setup.
Draw the rotation envelope
For a swivel chair, map the outline of its arms, back, feet, and your normal clothing as you turn through the range needed for observation. The seat width is not the full turning diameter. Keep the blind fabric, zippers, poles, and stored equipment clear according to the chair and blind instructions. A frame that brushes a wall may create noise as well as limit movement.
A practical paper method is to mark the chair’s central position and draw its outermost turning points at the chosen scale. Label the door route and any fixed equipment. Do not assume a 360-degree swivel specification means full rotation is usable inside every blind. The mechanism can rotate through a full circle while the surrounding space prevents that movement in the installed arrangement.
Include ordinary access tasks
Try entering, sitting, standing, and leaving the blind without weapons, following the product instructions. Notice whether the selected height changes how your knees, coat, or chair back approach the window and door. Keep bags and loose straps out of the route. A chair that offers a good seated view can still make the entrance impractical when placed too close to the wall.
If more than one person will occupy the blind, map each chair and a usable route for both. Do not rely on moving a neighbor’s chair every time you stand. Window alignment, turning space, and shared access need to work together. If an arrangement only fits while both occupants remain motionless, it is not a complete practical layout for a long visit.
Compare cushions as part of the actual chair
Use only cushions or covers approved for the chair, and include them in the measurement. A thick accessory can alter occupied height, usable depth, back contact, and how the seat folds. Do not assume a cushion adds its full unloaded thickness beneath an occupant. Measure the actual permitted arrangement instead of adding a catalog thickness to a seat-height number.
If cold-weather clothing changes your preferred sitting position, repeat the observation card with those layers. Avoid slipping a loose rigid board beneath a sling to create height or support. That changes the seating arrangement beyond the documented design. Ask about approved accessories when you need a different fit, and keep the exact part associated with the chair model in your comparison notes.
Prepare a window-and-chair worksheet
Use columns for window bottom, window top, chair setting, occupied eye line, chair-to-wall position, visible observation area, and access findings. Complete a separate row for each useful chair setting. Add the source of the adjustment range and any unresolved specification. This makes the comparison reproducible without pretending that a single eye-line number explains the entire blind.
For two candidate chairs, use the same blind configuration, clothing, and observation tasks where a permitted trial is possible. If comparing online only, identify which dimensions remain unknown and ask the supplier. A broad adjustment range is useful only if it includes settings you can actually use comfortably and stably. Do not choose a candidate merely because its largest number reaches the window on paper.
Confirm the complete installed arrangement
After selecting a chair, verify its identity, setup, and occupied measurements inside the actual blind before the trip. Keep the worksheet and manuals together. Revisit the measurements after changing cushions, blind location, floor arrangement, or chair model. Each of those changes can affect the eye line or available turning space even when the window itself has not changed.
A workable hunting-blind chair height provides a natural seated view, a documented stable setup, and room for ordinary movement and access. Window alignment is therefore a small layout project rather than a universal seat-height recommendation. Measure the opening, observe the real seated position, and resolve the surrounding space before treating a promising chair specification as a complete fit.
Something unclear or out of date? Send a correction with this article’s title and the detail to check.
Sources, research & corrections policy ↗