Adjustable fishing-chair legs help place the seat on ground of different heights, but they do not make every sloping or soft bank suitable for sitting. Start with a sound permitted location away from an unstable edge, then use the chair’s own adjustment and locking instructions. Independent leg length, foot contact, frame setup, and the bank’s condition all matter. A level-looking seat is only one part of that assessment.
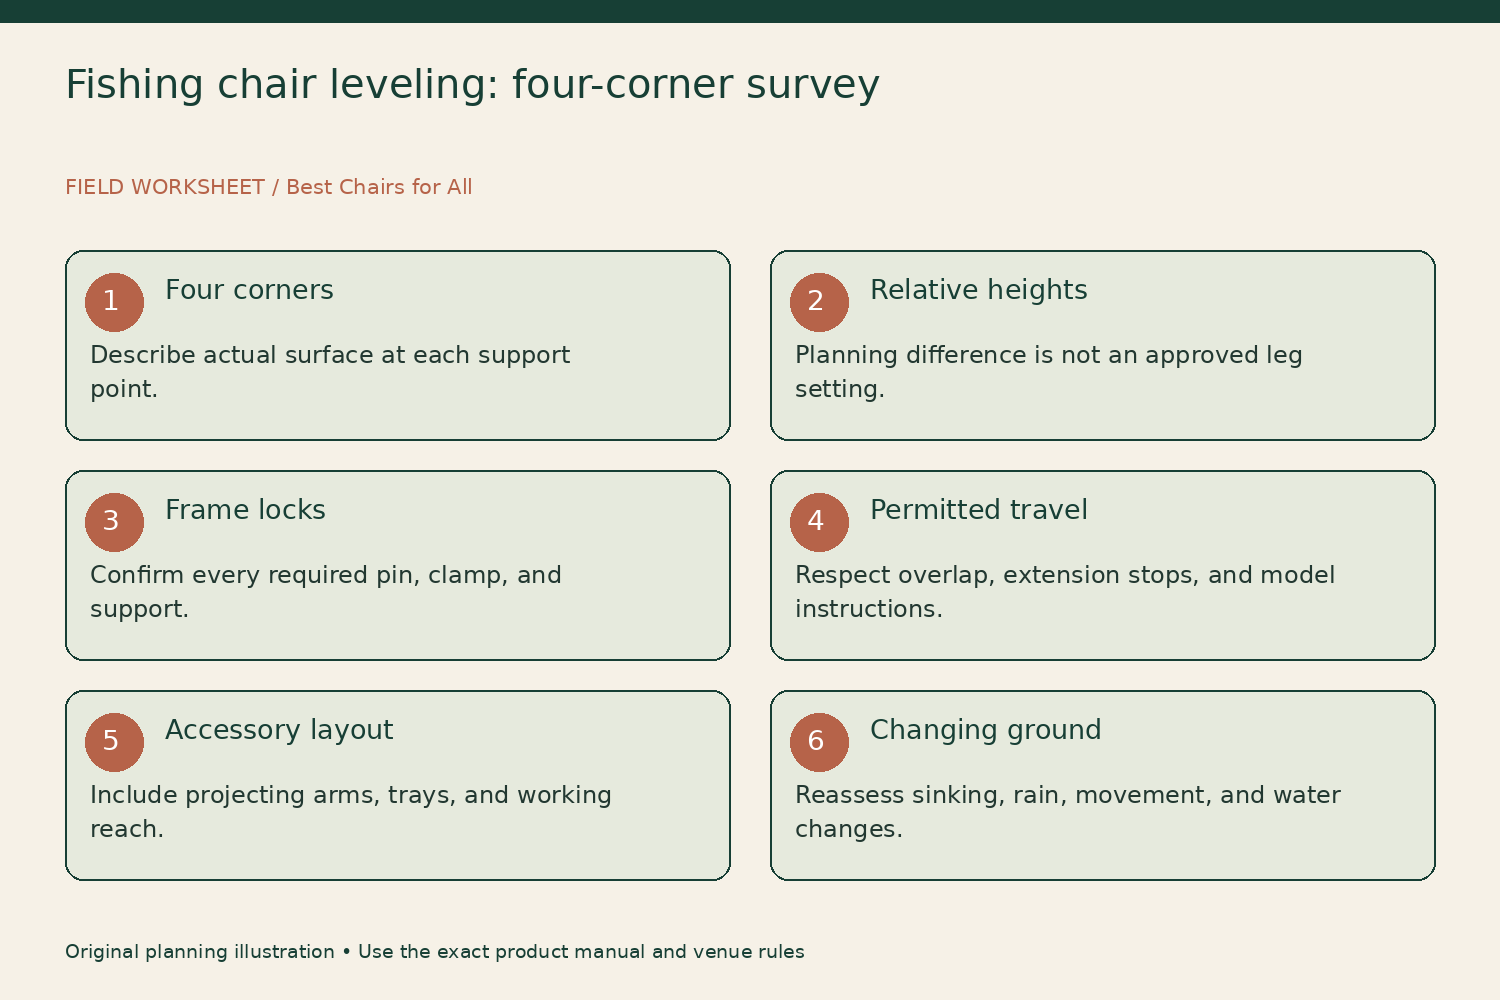
This guide gives you a four-corner survey and a leg-setting worksheet. It does not assign a universal safe slope, minimum edge distance, or extension length. Those limits depend on the model and site. If the ground is slipping, undercut, saturated, or too irregular for the documented adjustment range, choose another permitted location rather than using blocks, improvised extensions, or accessories to force the chair level.
Identify which parts actually adjust
A chair can have telescopic legs, removable legs that slide through clamps, adjustable front legs only, or a combination of fixed and moving supports. Confirm the exact model and the parts diagram. ‘Adjustable legs’ in a listing does not tell you which corners move or what travel is permitted. Record each leg separately instead of assuming all four have identical mechanisms or ranges.
The Preston Absolute 36 Feeder Chair page identifies four 36-millimeter legs and additional accessory banksticks. Those additional banksticks are not automatically extra chair supports. Read the assembly information to understand which pieces carry the chair and which provide accessory mounting positions. Similar tube diameters do not make their functions interchangeable.
Separate seat height from leg extension
A published seat-height range describes the seat’s position under the maker’s measurement conditions. A leg-extension range describes a component’s travel or length. They are different figures. Do not subtract a minimum seat height from a maximum to create a slope allowance. The frame geometry, leg angle, foot position, and number of independently adjustable corners can change how a range is used.
Nash’s Indulgence Hi-Back Auto Recline page lists a 38-to-52-centimeter height adjustment and identifies spring-loaded legs with mud feet and rear locking pins. Those are named-model features, not a fourteen-centimeter guarantee for every bank. Obtain the actual operating instructions and any extension markings before trying to use the whole published range at one corner.
Survey four corners before placing the chair
Choose the proposed orientation and mark the approximate four support locations on a sketch. Describe each surface: firm ground, loose gravel, root, soft mud, or an uneven board. Look for visible changes near the water and follow the fishery’s site rules. Do not dig into a bank or alter a platform without permission. A convenient casting position is not a reason to ignore a deteriorating support surface.
Record whether each foot can contact an appropriate surface within the chair’s intended footprint. If one would sit on an edge, hole, loose stone, or unsupported vegetation, move the arrangement. Do not balance a foot on a small object to imitate an adjustable leg. A foot can be at the desired height yet have an unsuitable contact surface, so keep height and ground condition in separate worksheet columns.
Use relative-height arithmetic only as a planning tool
Suppose a paper survey describes two front support points six centimeters below the rear pair. That suggests the chair would need to accommodate a relative height difference of six centimeters in that orientation. It does not establish which legs to extend by six centimeters or whether the chair is approved there. The actual adjustment depends on its geometry, minimum insertion, travel, and setup instructions.
Write ‘required relative accommodation’ beside the survey number. Then compare it with the manufacturer’s documented procedure rather than treating the difference as a leg setting. If information is missing, send the sketch to the supplier. The arithmetic is most useful for rejecting a clearly unsuitable site or identifying a question; it cannot certify the bank or substitute for a model’s operating limits.
Open and lock the frame first
Follow the manual’s order for unfolding, installing removable legs, securing the back, and engaging any frame locks. Keep the chair unoccupied while completing the setup unless the instructions explicitly prescribe a different action. A leg can be at the right height while a rear frame lock remains disengaged. Treat those as separate mechanisms and confirm both through the maker’s stated check.
Do not remove a pin because the chair appears to stand without it. The Nash example explicitly identifies rear locking pins as part of its design. For your own chair, locate every required lock in the diagram and record how its engaged state is recognized. If a pin, release, or clamp does not work as documented, stop and obtain service guidance rather than relying on the remaining supports.
Adjust within the documented range
Use the specified release or clamp and retain the required insertion or overlap. Respect extension marks, stops, and orientation. Do not pull out a telescoping section beyond its limit because it remains attached by friction. Likewise, do not assume a removable leg can be clamped at any visible point. The allowed adjustment belongs to the component and mechanism, not to whatever position looks reachable.
A spring release, cam lever, and screw clamp need their own instructions. Do not borrow a tightening method from another model or add a tool to a hand-operated fitting unless directed. Keep fingers clear of telescoping and folding contact points. Adjust incrementally and verify the engagement in the way the maker specifies before considering the setup complete.
Understand what mud feet do and do not prove
A broad or pivoting foot changes the contact arrangement compared with a narrow tube end. It can help accommodate the surface as the manufacturer describes, but it does not make saturated soil or a failing bank sound. Check that the foot is present, correctly attached, and able to sit in its intended position. A damaged or missing foot is a parts problem, not a reason to substitute a rock or bottle cap.
Keep the contact area clear of loose tackle and straps. Do not trap a foot partly on a hard object and partly on soft mud. If a foot sinks or shifts after placement, leave the chair carefully and reassess the location and setup. Continually extending another leg to chase a changing tilt can hide the fact that the supporting ground remains unsuitable.
Keep accessory loads in the survey
A feeder arm, side tray, umbrella mount, or loaded bait bowl can change the working arrangement and the space around the chair. Fit only accessories documented for the chair and mounting system, following their own instructions. Do not assume a chair’s occupant capacity includes every possible side load or long projecting arm. Ask about the combined configuration when the documentation is unclear.
Preston’s manufacturer gear guide illustrates different leg systems and accessories across its chair range. Use the exact model and component identification, particularly when comparing thirty- and thirty-six-millimeter systems. A larger-looking tube or an insert that fits physically does not establish that an accessory may be loaded at every extension or position.
Check reach without creating a balancing act
Once the setup satisfies the instructions, consider the tasks you need to perform: reaching bait, lifting the rod, using a landing net, and standing. Place equipment within the permitted arrangement so you do not need to lean far sideways or pull on a tray to rise. A perfectly level seat is not useful if the working layout encourages repeated awkward reaches toward the bank edge.
Draw the normal reach area on the four-corner sketch and mark objects that obstruct leaving the chair. This is a layout exercise, not an ergonomic or medical prescription. If an accessory position forces you outside a manageable working arrangement, move it or use an independent manufacturer-approved support. Do not treat the chair’s arm or a rod rest as an improvised handrail unless its instructions explicitly permit that use.
Recheck when conditions change
Record the initial leg arrangement with a photograph and note the ground condition. Reassess after rain, changing water levels, moving the chair, or discovering that a foot has settled. A setting that worked earlier does not establish that the bank remains unchanged. Follow fishery closures and local instructions even if your equipment could still be adjusted to appear level.
When moving to another peg, begin again with the ground survey. Do not carry forward the old leg settings as a shortcut; they describe the previous surface. Avoid transporting the chair with long exposed extensions unless the manufacturer specifies that configuration. Fold or remove parts as directed so a projecting tube or foot does not catch on the route or damage its adjustment mechanism.
Maintain the adjustment system correctly
Clean mud, sand, and debris using the model’s care instructions. Do not oil a clamp or spring release without explicit guidance, because lubrication requirements vary. Dry and store the chair in the specified arrangement. If a leg slips, a clamp cracks, or an extension is visibly bent, request the correct part and procedure rather than adding another clamp or drilling a backup hole.
Keep leg and accessory parts labeled by model when several chairs share storage. A tube that seems to fit can have a different length, stop, or foot arrangement. Record replacement part numbers and any revised instructions with the chair’s original manual. This preserves the distinction between a documented replacement and a convenient spare from another frame.
Complete the four-corner worksheet
Your finished page should identify the chair, support locations, relative heights, surface condition, documented adjustment range, lock checks, accessory arrangement, and unresolved issues. Mark the site unsuitable when a necessary condition cannot be met. The worksheet should make it easier to choose a workable location, not provide a formula for making every bank usable.
Fishing-chair adjustable legs are most useful when their travel and locks are understood and the ground is appropriate in the first place. A sound location, correct frame setup, permitted leg adjustment, and manageable working layout belong together. If leveling requires an improvised extension or repeated compensation for sinking ground, change the location or equipment instead of treating a level seat as the only goal.
Something unclear or out of date? Send a correction with this article’s title and the detail to check.
Sources, research & corrections policy ↗