Protect power-recliner cords by planning a route that stays outside the chair’s moving envelope and outside normal walking paths. Keep the transformer where the manufacturer requires it, use the specified electrical connection, and inspect accessible cables for damage. A cable hidden neatly under a rug or tucked beneath the chair may look tidy while creating the very wear or pinch problem you are trying to avoid.
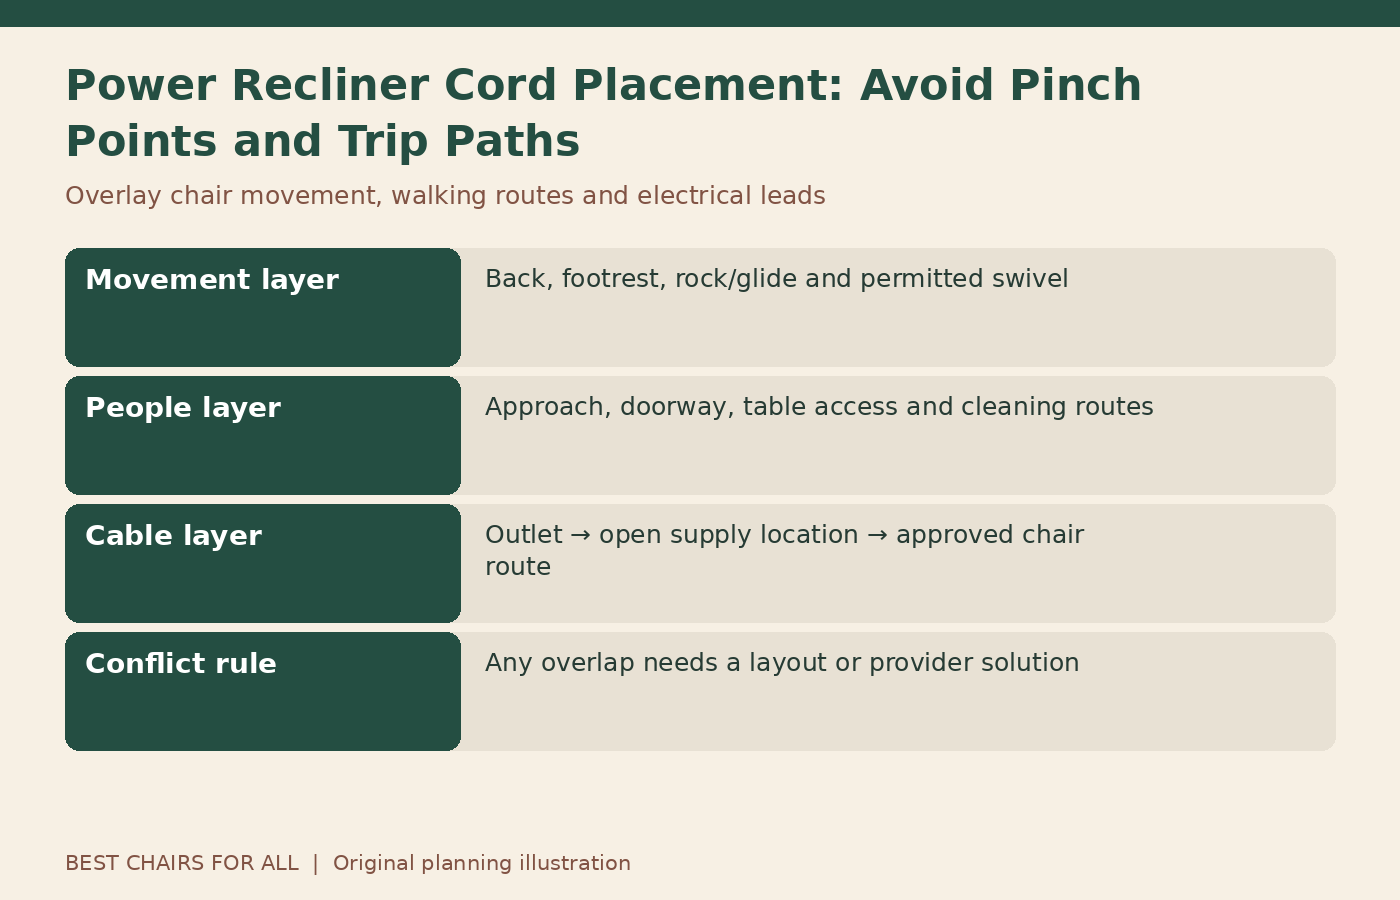
The right route depends on the chair, outlet, room layout, and any approved battery system. This guide uses a two-layer floor plan: one layer for furniture movement and another for people and cables. It explains how to resolve conflicts before buying accessories that may be prohibited by the chair’s manual.
Begin with the exact electrical instructions
Find the model’s manual and identify the required outlet connection, external power-supply placement, permitted accessories, and cable warnings. Do not assume a power strip, extension cord, surge protector, or adapter is allowed because it is common elsewhere in the home. Furniture manuals can differ substantially on these points, even between recognizable manufacturers.
The La-Z-Boy DOC014818 manual directs its covered products to a wall outlet and prohibits specified intermediate devices. The Pride nonmedical lift-chair manual has its own specific electrical provisions. Use your matching manual rather than combining permissions from one with the restrictions of another.
Identify every cable in the installation
List the mains cord from outlet to supply, the low-voltage lead from supply to chair, the hand-control cable, and any approved accessory or battery connections. They may face different risks and have different routing instructions. A remote-control lead can become trapped between cushions even when the wall-power cable is safely outside the base.
Draw these components using separate lines and label the connectors that are intended to remain accessible. Do not trace hidden cables by pulling them out of the furniture. If the installation has been altered or a cable cannot be identified, ask the retailer to inspect it. A clear diagram can include an unknown section without inviting an unsafe investigation.
Draw the chair’s complete movement layer
Mark the upright footprint, rear movement, footrest projection, and any permitted swivel or rocking range on a floor sketch. Use the exact model dimensions and operating clearances. The protected cable route must remain outside this movement throughout normal use, not merely while the chair is upright. A cable beside a stationary base can still be approached by a moving back or legrest.
For a swivel model, ask how the supplied cable arrangement accommodates its permitted rotation. Do not assume repeated turns are allowed because a sales page mentions a full swivel. The complete installed system determines what movement is permitted. Keep the outlet location and transformer arrangement in the conversation when asking the retailer about rotation limits.
Add the people-and-objects layer
On the same sketch, draw the usual routes to the seat, doorway, sofa, and nearby table. Include any mobility aid or helper arrangement relevant to the user. Mark table legs, lamp bases, rug edges, and furniture that is moved during cleaning. These objects can trap or pull a cable even when they are not part of the chair mechanism.
A good cable route does not depend on people remembering to step over it. If the only available outlet forces the cable across a regularly used route, revise the chair placement or ask about a manufacturer-approved power option. Do not treat a narrow gap behind a table as a protected route unless the cable remains free from crushing, tension, heat, and prohibited concealment.
Keep the transformer visible and ventilated as required
An external power supply often needs an open location, clear of the chair and heat sources. Do not hide it beneath the recliner, wrap it in a blanket, or pack it into a decorative box. Its placement instructions are part of the electrical system, not a cosmetic preference. Leave the access the manual requires for inspection and disconnection.
Pride’s caregiver guide reiterates keeping the transformer uncovered and out from under the chair for the products discussed. A wall-mount option, where offered, has its own approved installation instructions. Do not improvise a bracket, hang a supply by its cord, or assume every transformer can be mounted vertically.
Plan slack without creating a loose loop
The manufacturer’s routing should allow normal movement without pulling connectors taut, while avoiding excess cable where feet or moving parts can catch it. There is no universal number of spare inches suitable for all chairs. Ask the installer to demonstrate the approved arrangement and identify where slack belongs. A low-voltage lead that looks comfortably loose upright may tighten during recline.
Keep the route visible enough to check without crawling beneath the chair. Do not wind excess cable around a swivel base or fasten it to an unknown moving frame member. If the supplied cable cannot reach the outlet while following the instructions, do not lengthen it with an unverified extension. The provider should specify an approved arrangement or a different placement.
A worked two-layer room example
Imagine a recliner beside a wall outlet, with a side table between the chair and the wall. The first proposed route crosses the front of the table leg and then runs underneath the chair. On the sketch, that line overlaps both a cleaning path and the chair’s operating envelope. It fails the route review even though most of the cable would be hidden.
A revised hypothetical layout moves the chair closer to the suitable outlet and the table slightly forward, leaving the supply in the manual’s permitted open location and the cable outside movement and walking areas. The exact distances must still be checked against the real model. The example demonstrates conflict detection, not a universal cord-placement diagram or an electrical approval.
Choose cord-management accessories only after approval
A floor cover, clip, sleeve, tie, or adhesive channel may be useful in some installations, but none overrides the manual. Confirm that an accessory is compatible with the cable, surface, and required inspection access. Avoid sharp bends, crushing, heat accumulation, or fastening methods that damage insulation. Never staple a furniture cord or nail through it.
Do not use a cover to justify a route the chair manufacturer prohibits, such as under-carpet placement. A cord protector also does not make a walking route appropriate where someone could trip on the cover itself. If the room cannot accommodate a compliant route, solve the layout or power-supply problem before adding cosmetic concealment.
Keep children and pets away from accessible leads
A cord routed outside a mechanism may still attract a child or chewing pet. Follow the manufacturer’s warnings and manage access through the room arrangement and supervision. Do not use bitter sprays, wraps, or improvised enclosures on electrical equipment without verifying suitability. Damage from chewing requires stopping use and obtaining an approved replacement, not covering the area with tape.
Store the remote and its lead in the intended holder when not in use. Avoid a dangling loop that can be pulled from the seat or caught by nearby furniture. If the supplied storage point is unsuitable for the user, ask about an approved alternative. Keeping the remote reachable should not place its cable across a pinch point.
Inspect after the room changes
Recheck the cable route after moving the chair, shifting a rug, replacing a table, or cleaning behind the furniture. Small changes can put a lead under a leg or pull an external connector. Follow the manual’s moving and power-isolation instructions before handling the setup. Do not drag a chair while it remains tethered to the wall.
Use a simple inspection record with location, visible condition, and action. Examples include mains plug accessible and intact, low-voltage cable clear of frame, transformer uncovered, and remote lead stored. Record damage as a stop condition. Do not run fingers along a suspect cord to search for heat or exposed conductors; keep the equipment unused and contact the appropriate provider.
Recognize when replacement or electrical help is needed
Frayed insulation, crushed cable, damaged connectors, unusual odor, discoloration, sparking, fluid exposure, or intermittent operation after cable movement warrants attention. Stop using the chair and follow the manual’s disconnection guidance where it is safe to do so. Do not splice a damaged cable, repair it with household tape, or substitute a power supply selected only by plug shape.
The furniture provider handles approved chair components; a qualified electrician handles a damaged or unsuitable building outlet. Be clear about which problem you observed. If another outlet is needed for the intended location, arrange a proper assessment rather than assuming a longer extension cord is an acceptable permanent solution.
Understand what a battery option changes
An approved rechargeable pack can alter the mains-cable arrangement for compatible furniture, but it does not eliminate every cable or placement requirement. The pack, connectors, charging route, and operating limitations still need planning. Ask whether it is intended for routine operation or only emergency return, and where it should be placed during use and charging.
Do not connect a generic battery or portable power device without manufacturer confirmation. Features such as lights, USB charging, heat, or powered headrests can affect a battery system’s behavior. Keep the original installation instructions with the pack details. A cordless-looking room should be the result of an approved system, not a collection of improvised adapters hidden behind the chair.
Record the approved final route
Once the installer or provider confirms the arrangement, photograph it from outside the operating area and update the two-layer sketch. Label the outlet, supply position, accessible connectors, and areas that must remain clear. Keep the drawing with the model’s manual so other household members can restore the setup after cleaning or moving nearby furniture.
Review the route when the chair’s use changes, especially if another user, walking aid, or helper arrangement is introduced. The practical standard is simple: the installed system follows the matching manual, the chair can perform its permitted movements without touching cables, and people can use the room without stepping over power leads. Any unresolved conflict calls for a layout or provider solution.
Something unclear or out of date? Send a correction with this article’s title and the detail to check.
Sources, research & corrections policy ↗