Position a gaming chair for controller play around a supported body, a readable screen, and hands that can hold the controller without reaching or shrugging. Start with the seat and feet, then choose the backrest angle, then arrange the armrests and display. A controller removes the need to reach a fixed keyboard, but it does not make every reclined position comfortable or every chair suitable for your room.
The best setup is repeatable and easy to leave. Keep walking space, charging cables, and the chair’s moving envelope in the plan. Do not copy a promotional photograph by reclining to the deepest angle or holding the controller high in front of the face. Use the controls and safety limits in your exact chair manual, and stop a position trial if it becomes uncomfortable.
Choose a screen position before fine-tuning the arms
Identify the screen you actually use: a desk monitor, television, projector, or handheld display. Sit in a supported chair position and check whether text is readable without leaning forward. If not, use the display’s ordinary position or text-size adjustments, or change the viewing location. A chair can feel as though it lacks head support when the real issue is a distant screen that encourages you to crane toward small interface elements.
For a television, check the vertical view as well as distance. A screen above a fireplace and a monitor on a desk create different head positions from the same chair. Do not prescribe one viewing distance for all screen sizes, eyesight, and games. Instead record the distance and whether ordinary game text is clear while your back remains supported. That observation is more useful than a number copied from a home-theater chart without context.
For a handheld, the screen moves with the controller or device. Notice whether you gradually lower it into your lap and bend forward to see. A suitable stand or supported surface may help some setups, but check the device’s ventilation and attachment instructions. Do not rest a hot device against upholstery or block cooling openings to achieve a preferred viewing angle. Separate device support from chair adjustment.
Set the seat and foot support
Sit toward the back of the seat, with feet supported by the floor or a stable suitable footrest. Check that the front edge does not press behind your knees and that you can change position without sliding off the backrest. A chair chosen for a tall desk may remain too high when moved to a television area. Lower it through its normal range rather than balancing on the toes.
OSHA’s working-position guidance provides a useful broad reference for relaxed shoulders, arms close to the body, and supported feet. Its computer-workstation context does not establish one mandatory controller pose. Use those observations to identify obvious reaching and unsupported contact, then adapt the equipment to your ordinary play. The purpose is a workable arrangement, not holding yourself rigidly in a diagram.
If the chair’s seat is too deep, the controller does not remove that limitation. You may slide forward to clear the front edge and lose back contact. If the seat is too narrow, bolsters may constrain the position of your thighs when the hands rest near the lap. Record these as seat-fit issues rather than attempting to fix them entirely through recline or a thick cushion.
Separate backrest recline from seat tilt
Choose a modest backrest position you can hold comfortably while viewing the display. On many gaming chairs, the backrest angle and whole-chair rocking are independent. The TITAN Evo usage guide lists backrest recline and multi-tilt separately. Verify which control does what on your model, including whether the tilt lock holds only upright or selected positions.
A reclined backrest can move your head farther from the display while leaving the controller near your lap. Whole-chair tilt can change foot contact and the front-edge angle. Check each change on its own. Do not assume a number advertised for maximum recline describes a comfortable gaming position. An available endpoint is a mechanism capability, not a requirement for relaxed play.
After changing angle, reassess the lumbar system and head pillow. A pillow that works while upright may push your head forward when reclined, or may need to move within its approved mounting range. Do not compensate by lifting the chin toward a high television. Keep the screen relationship visible in the comparison. If no supported chair position gives a comfortable view, the display location may need to change.
Find useful forearm contact
Hold the controller normally with your upper arms near your torso, then bring the armrests toward that position. Do not spread your elbows to meet widely spaced pads. Start with height, then inward movement, front/back position, and rotation where available. The pad should support a useful part of the forearm without becoming a hard pivot under one small area or forcing the shoulders upward.
Controller play often brings the hands closer together than keyboard-and-mouse use. A chair with broad minimum pad spacing may therefore work at a desk but provide little contact during controller use. Rotate pads only within their normal range and note where the forearms actually land. A narrow distance between pad tips does not establish a narrow distance under the elbows. Measure at the real contact location if spacing is uncertain.
You may prefer some unsupported hand movement while using the controller. The question is whether your ordinary position is comfortable and sustainable with opportunities to change position, not whether both forearms remain planted every second. Do not wedge the controller between pads or squeeze your arms against them to create contact. If the armrests obstruct the task, check the manufacturer’s approved adjustment or removal options rather than improvising a modification.
Include controller settings in the setup
Hardware placement is only part of input fit. Microsoft’s Xbox Accessibility Guideline 107 discusses input mechanisms and remapping as design considerations. For your own game, check the actual platform and game settings before assuming every action must use the default layout. Remapping availability differs by device and title, so confirm it in the current interface rather than relying on a generic button list.
Write down any setting you change: button assignment, stick inversion, trigger behavior, or vibration option supported by the product. Change one at a time and use a familiar, low-pressure game section to evaluate it. This is a usability comparison, not a performance claim. A setting that reduces awkward hand repositioning for one user may be undesirable for another, particularly on a shared controller.
If you use a mounted or adaptive controller, follow its own mounting instructions and consult appropriate support for your needs. A wheeled gaming-chair armrest is not automatically an approved equipment mounting point. Check load, clamp compatibility, interference with chair controls, and the route for entering and leaving. Do not use a casual chair setup article as an individualized accessibility assessment.
A controller-position commissioning sheet
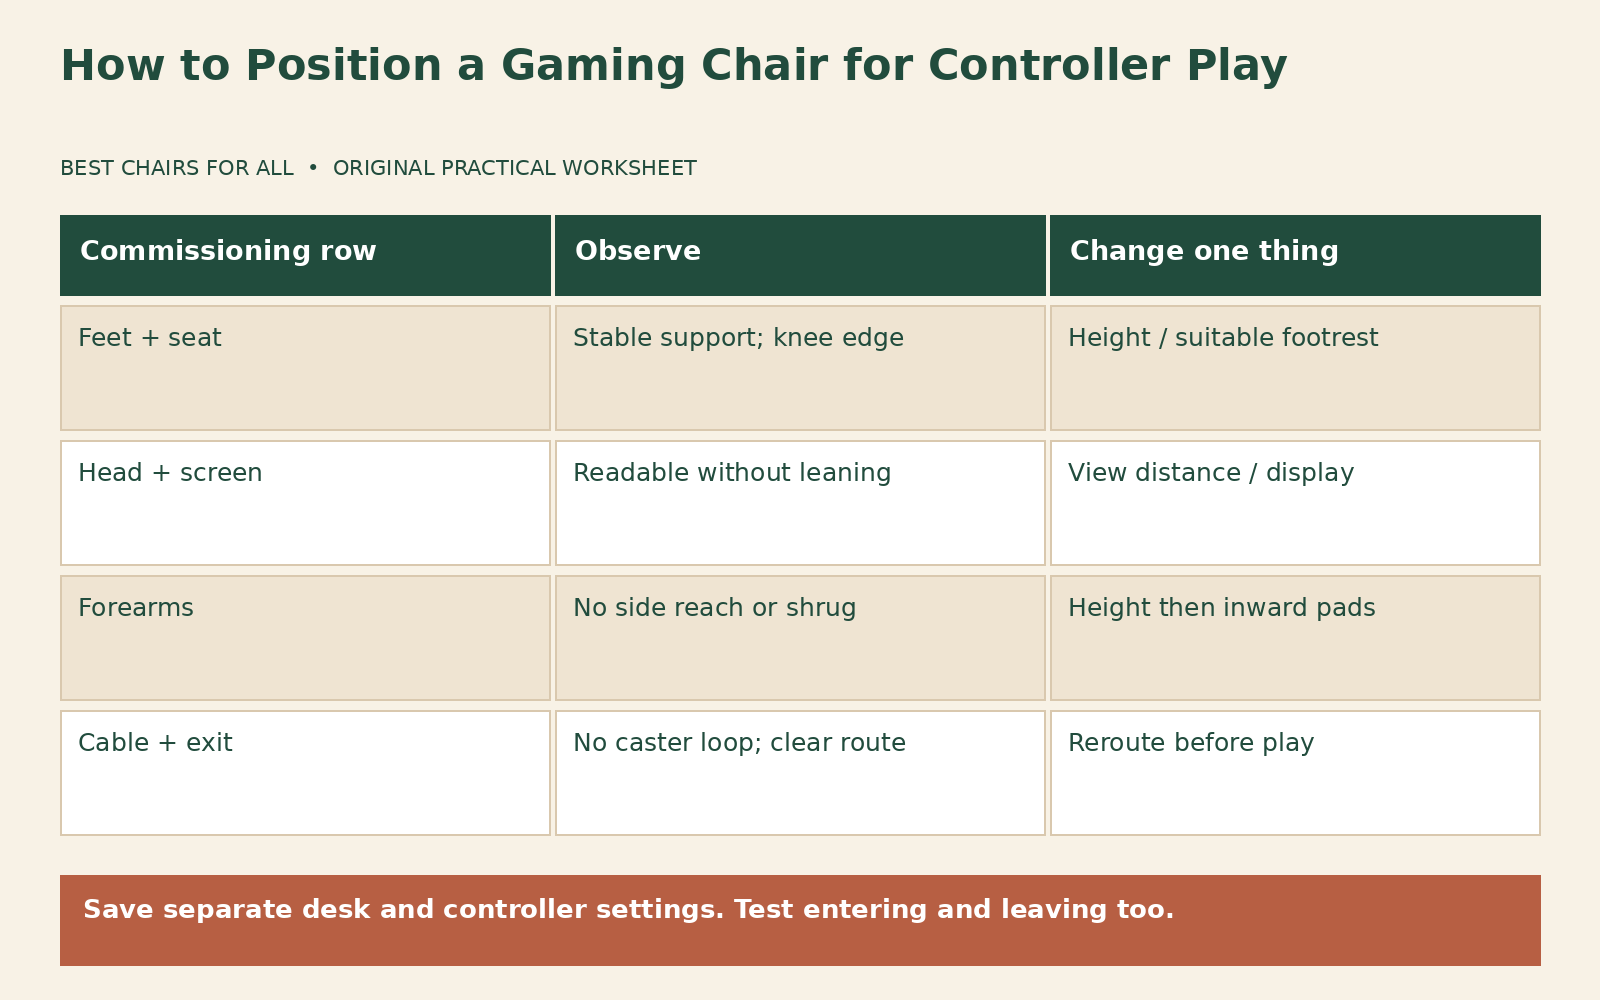
Create five rows labeled feet, back, head-and-screen, forearms, and cable route. In the initial column, describe the current issue. In the change column, record one adjustment. In the result column, write whether normal play becomes easier, unchanged, or less comfortable. Add a final column for the setting you will keep. This keeps several interacting adjustments from becoming an untraceable sequence.
Here is a hypothetical filled example. Feet: toes only, lower chair, now fully supported. Back: comfortable slightly reclined, leave unchanged. Screen: text small, move chair closer within the room plan, readable without leaning. Forearms: pads too far apart, bring inward and rotate slightly, useful light contact. Cable: crosses a caster path, reroute with adequate slack outside the moving base. The example shows a coordinated setup without claiming those changes suit everyone.
Use a second row set if you alternate with a desk. Record keyboard position and armrest settings separately from the controller arrangement. A small card or photograph of the empty setup can help restore it. Do not mark permanent changes on upholstery or hardware unless the manufacturer permits them. Descriptions such as “pads inward, back slightly reclined” may be sufficient if the chair has no numerical indexes.
Plan cables and ordinary movement
A charging cable needs slack for the chair’s normal movement but should not loop around casters, a footrest, or the recline linkage. Check the complete route before sitting, then after the chosen angle changes. Do not pull the controller against a taut cable to gain another few inches of reach. Use the correct charging accessories and device instructions; chair positioning does not establish electrical compatibility.
Leave a clear place to set the controller where it will not fall when the chair rocks or when you stand. A sloped arm pad is not necessarily a stable shelf. Keep drinks, headsets, and remote controls out of the recline envelope and walking path. If several people share the room, check that the chair’s relaxed position does not block a doorway or force others to step over cables.
For couch-distance multiplayer, check each player’s sight line and cable route independently. Moving one chair closer may block another player’s view or put a charging lead across the shared walkway. Mark the ordinary chair location on a room sketch, including its base rather than just the seat. Check that headsets and microphone booms do not collide with the pillow when you turn toward another player. A shared-room arrangement needs room for conversation and movement as well as a clear view of the game.
Make leaving the setup part of the trial. Return the chair through its normal controls, place the controller safely, and stand without leaning your full weight on an unapproved arm or moving backrest. If the arrangement makes entry or exit awkward, revise the layout before calling it finished. The practical goal is comfortable play that can be paused easily, with settings you can restore and enough room to change position throughout a session.
Something unclear or out of date? Send a correction with this article’s title and the detail to check.
Sources, research & corrections policy ↗