The most avoidable gaming chair assembly mistakes are using the wrong instructions, fully tightening a joint before its matching holes align, confusing similar fasteners, and operating a mechanism before the chair is ready. Start with the exact model’s manual, inventory the parts, and follow its sequence. If parts do not align under the prescribed procedure, stop rather than using extra force to make the next step possible.
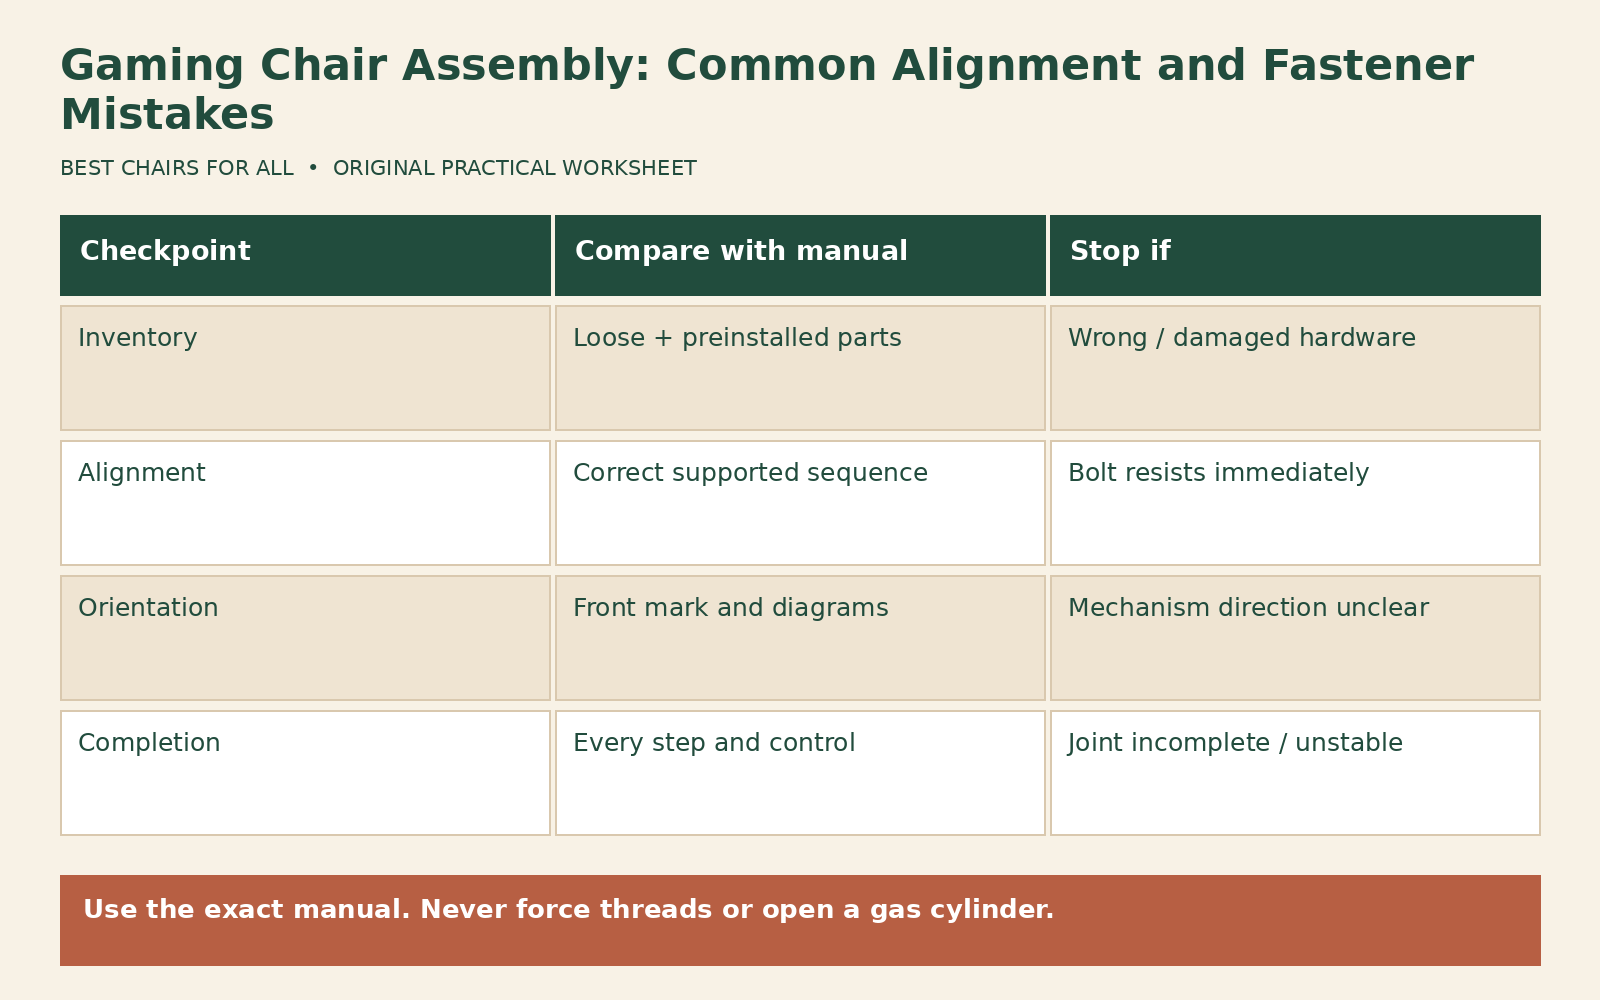
This article is an error-prevention companion, not a replacement assembly manual. It does not provide universal bolt sizes, torque values, or a disassembly procedure. Heavy parts and spring-loaded or pressurized components need the manufacturer’s handling instructions. Do not open a gas cylinder or sealed mechanism, and do not remove a safety device until the exact documented step calls for it.
Confirm the model and instruction revision
Match the model, size, generation, and upholstery variant on the box and order record with the manual. Similar product names can hide different tilt units, armrests, covers, or backrest attachments. Download the official instructions before removing protective packaging. If the supplied booklet and online guide differ, ask which revision applies to the delivered hardware rather than combining steps from both.
The Secretlab TITAN Evo assembly guide identifies its own parts, controls, and armrest-width adjustment. The Razer Iskur V2 assembly transcript describes a different sequence and hardware inventory. Those documents are useful examples of model-specific evidence, not interchangeable instructions. A video for an older Iskur or TITAN should not determine what you remove from a newer chair.
Corsair’s T3 RUSH 2019 instruction page explicitly identifies the generation. Preserve that distinction when searching. An online retailer may attach a generic manual to several variants. If you cannot verify the exact guide, send support photographs of the parts and labels before assembly. It is easier to resolve a mismatch before components have been pressed together or hardware has been damaged.
Prepare a stable assembly area
Choose enough clear floor space to lay out parts without blocking an exit. Protect the floor using the manufacturer’s suggested packing material or another appropriate surface that does not make parts slide unpredictably. Keep small hardware in separate labeled groups. Do not balance a heavy backrest on a narrow table edge or assemble where children or pets can move through the work area.
Read the full sequence before beginning so you know which steps require assistance and which protective materials remain until later. Arrange a second person when the instructions recommend it or when a heavy part cannot be held safely in position. Do not use the recline handle as a carrying grip. A part that appears convenient to hold may be a control, cover, or linkage rather than a lifting point.
Keep packaging until the chair is complete, inspected, and accepted. Do not throw away foam blocks or bags before checking for small accessories. Photograph the unopened and unpacked condition if there is visible shipping damage. Separate a damaged-part report from an assembly problem: forcing a bent bracket into position can obscure the original condition and create additional damage.
Inventory preinstalled and loose hardware
Some fasteners arrive installed in the seat or backrest, while others are loose in the accessory kit. A missing-looking bag may therefore be normal. Razer’s Iskur V2 transcript, for example, describes removing four screws from the underside before securing the tilt mechanism. Count and identify parts using that exact guide rather than assuming every screw should be in a separate packet.
Sort hardware by the labels in the manual, not just appearance. Two bolts can share a head size while differing in length, thread, or purpose. A decorative-cover screw is not a structural substitute. Do not borrow a screw from another joint to finish the chair, and do not install a hardware-store replacement without manufacturer confirmation of the complete specification.
Use the supplied tool or a correctly fitting approved tool. A bit that partly engages can damage the head before meaningful tightening occurs. Avoid power tools unless the instructions expressly allow them and specify the method; they can hide cross-threading or over-tightening. If the manual provides torque values, use them with an appropriate tool. If it does not, do not invent a numerical target from another model.
Treat alignment as its own step
Support the backrest as the manual shows and align the intended holes before tightening. Where the instructions call for starting multiple fasteners before final tightening, follow that sequence. Tightening one side fully can remove the small movement needed to align the other side. Do not pull a misaligned bracket into position by driving a bolt at an angle.
A fastener that resists immediately may be misaligned, wrong, or cross-threading. Stop, unload the part as instructed, and verify the hardware and hole alignment. Do not add oil, use a longer lever, or enlarge the hole to overcome resistance. If a correctly identified fastener cannot begin normally under the documented procedure, photograph the alignment and ask support what to inspect next.
Here is an illustrative alignment log. Step: backrest attachment. Observation: two holes appear offset while the first side is fully tightened. Manual check: confirms both sides should be positioned before final tightening. Action: follow the permitted sequence with the part supported. Result: record whether alignment resolves. If it does not, stop with the joint incomplete and request guidance. The log documents the issue without prescribing a universal loosening procedure for every chair.
Orient the tilt mechanism from its markings
Look for front-direction arrows, labels, and control orientation in the exact manual. A mechanism can appear to fit the bolt pattern while facing the wrong way. Check the relation to the seat front before tightening anything. Do not rely on the location of a knob in a photograph of another chair; control positions and bracket shapes differ.
Check that no upholstery, cable, or protective wrap is trapped between the specified mating surfaces. Keep hands clear of moving parts and do not operate levers to make room unless the assembly instructions call for it. If a powered or speaker-equipped chair has cables, follow its routing diagram and connector identification. A pinched cable is not merely a cosmetic assembly issue.
After the specified fasteners are secured, compare the exterior with the diagram before proceeding. The purpose of this pause is to catch a reversed component while the sequence still allows correction through manufacturer-approved steps. Do not improvise removal after a gas lift or tapered connection has been seated. If a mistake is discovered later, request the official correction method rather than striking or prying components apart.
Respect safety tabs and spring-loaded mechanisms
A warning tab or transport screw may control a spring-loaded backrest assembly. Identify it in the manual and leave it untouched until the documented stage. Never remove an unfamiliar screw because someone online calls it a shipping screw. Do not hold the backrest bracket in a risky position while another person operates a release. The exact sequence exists for the specific mechanism.
The same caution applies to the gas lift. Assembly may involve placing an intact cylinder into a base or mechanism, but that is not permission to open, puncture, heat, drill, or rebuild it. If the cylinder is damaged, leaks, or behaves abnormally, stop and contact the manufacturer. A general assembly checklist should not become a pressurized-component repair guide.
Do not test recline before the chair is assembled to the stage required by the instructions. A partly connected backrest, unsecured mechanism, or incomplete base changes the load path. Keep people off the chair until the final inspection is complete. The fact that a seat appears to support weight for a moment does not establish that omitted fasteners or covers are optional.
Perform an exterior completion check
Compare every assembly step with the finished chair. Confirm the prescribed fasteners are present and secured, the base and casters are installed as directed, and covers or handles are fitted where required. Identify leftover hardware using the inventory: a documented spare is different from a missed structural fastener. Do not assume every leftover item is an extra.
Check ordinary external controls only after the chair is ready, following the usage guide. Confirm height adjustment, backrest hold, tilt operation, and armrest latches behave as described. Use the permitted floor surface and keep the immediate area clear. If anything shifts unexpectedly, makes a concerning new sound, or will not hold position, stop the test and contact support rather than repeatedly loading it.
Create a final assembly record with model, manual revision, date, any replacement parts, and unresolved questions. Keep it with the invoice. Record the manufacturer’s maintenance interval instead of inventing a universal tightening schedule. Some accessible fasteners may require periodic checks, but sealed mechanisms and pressurized components remain outside ordinary owner inspection.
A useful escalation packet
For a problem, send a wide photograph showing the part orientation, a close photograph of the relevant holes or hardware, the manual step number, and a concise description of what happened. State whether the fastener would not start, started but would not seat, or was damaged. Do not conceal a mistake; accurate information helps support choose an appropriate correction and replacement part.
If a fastener head has already been damaged, report that explicitly and stop using the damaged tool interface. Do not hammer in a larger bit, cut a new slot, or apply an extractor without manufacturer authorization. Those actions can damage surrounding parts and make the original alignment harder to assess. Keep the damaged fastener and its original location identified so a replacement is matched to the correct joint rather than selected only by appearance.
Ask for the exact approved next step and any replacement hardware specification. Leave the chair unused when the joint is incomplete or operation is uncertain. A successful assembly is one that matches the documented sequence and operates predictably, not one completed at any cost. The error-prevention worksheet makes stopping points visible so a small alignment question does not become damaged threads, trapped material, or an unsafe first use.
Something unclear or out of date? Send a correction with this article’s title and the detail to check.
Sources, research & corrections policy ↗