An office chair armrest should meet your arm where it naturally falls during the task you are doing. If you have to lift a shoulder, spread an elbow, or slide forward to reach the pad, the support is in the wrong place. Start by lowering the arms, settling into the seat, and bringing your keyboard and mouse within comfortable reach. Then raise and reposition the pads until they provide light support without dictating your posture.
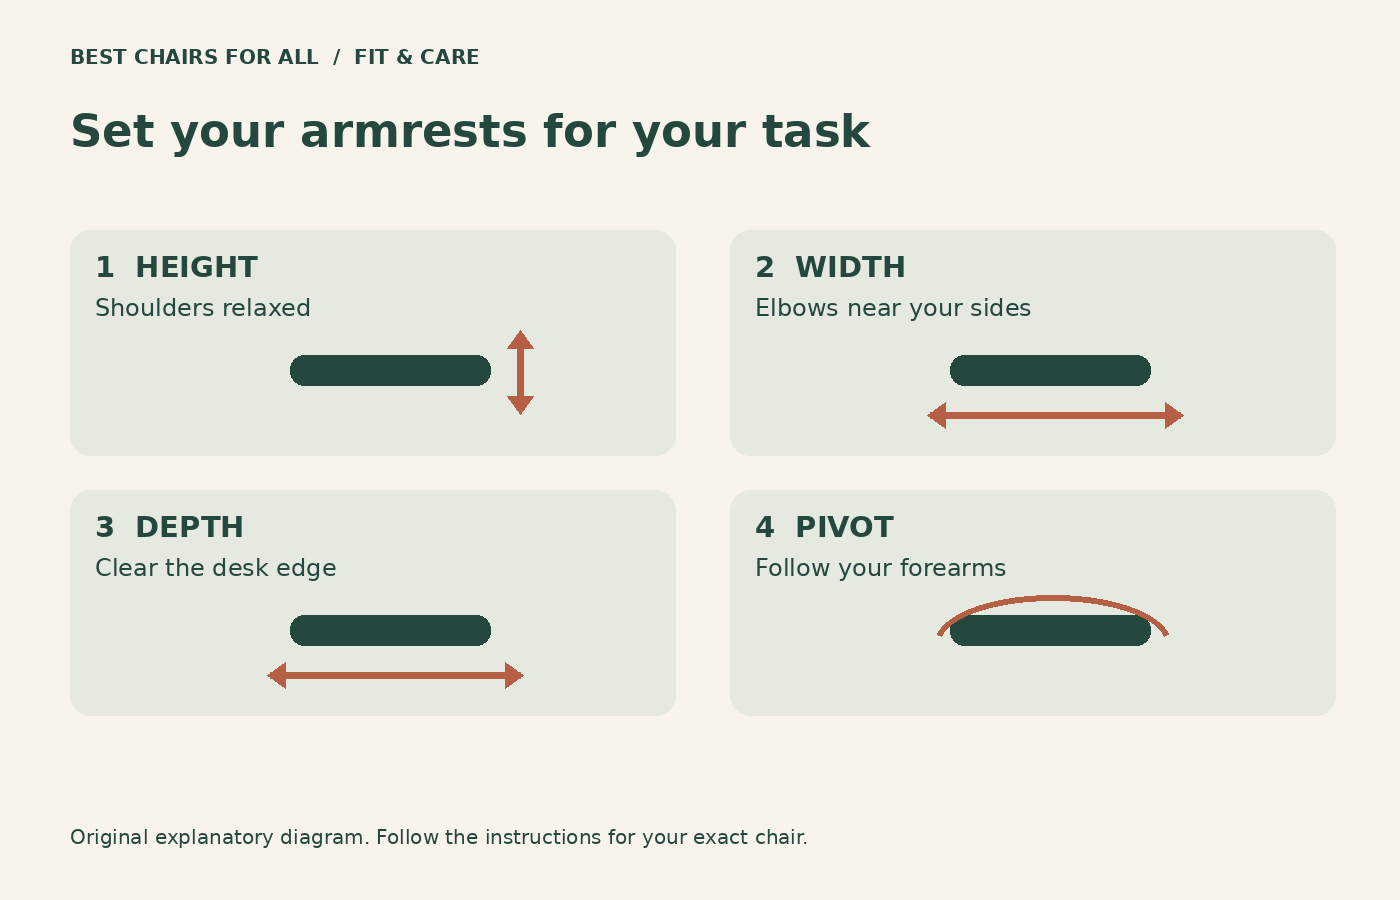
This guide gives you a repeatable setup sequence and a way to identify the part that is actually causing the problem. It covers chair adjustment and workstation fit, not diagnosis or treatment of pain. You can use it with basic height-adjustable arms or with more elaborate sliding and pivoting designs.
First identify which movements your chair actually offers
Find the model label, then look up its adjustment guide. A button under the pad may release height; another chair may use a latch on the back, a ratchet, or a rotating control. Do not force an arm simply because an online photograph shows a similar mechanism. Upholstery, arm options, and controls can differ within a product family.
Manufacturers do not use the labels “2D,” “3D,” and “4D” consistently enough to make them a complete buying or adjustment guide. Read the list of movements instead. The Steelcase Leap user guide, for example, identifies height, width, pivot, and depth on the applicable arm option. That is a description of an option, not proof that every used Leap listing includes those controls.
| Movement | What you are trying to change | Useful test |
|---|---|---|
| Height | Vertical contact with the forearm | Can the shoulder stay relaxed? |
| Width | Distance between your supported arms | Can the upper arms stay near your body? |
| Depth | Where the pad begins and ends | Can you approach the desk? |
| Pivot | Direction of the pad | Does it follow the working forearm? |
Set the seat before the armrests
Armrests cannot correct a seat that leaves your feet hanging or a keyboard that sits well above your natural working height. Move the chair away from the desk and establish a stable seated position first. Settle against the backrest and check that the seat edge does not press into the backs of your knees. Keep both feet supported. These are preliminary checks, not a demand to remain motionless in one pose.
Next return to the desk and locate the actual input surface. The keyboard keys may be higher than the desktop, while a pull-out tray may be lower. Evaluate the surface you use, rather than measuring the desk and assuming the two are identical. If you must raise the seat to work at a fixed high desk, reassess foot support. Record this change before moving the arms so that you know which adjustment caused the result.
Step 1: Find the light-contact height
Let your shoulders settle and your upper arms hang comfortably beside your torso. Bend your elbows into the position you use for the keyboard. Starting with the pads below your arms, raise them until they make gentle contact. Avoid pressing down to make contact with a pad that remains too low. Also avoid holding your shoulders up to accommodate a pad that is too high.
CCOHS chair-adjustment guidance uses relaxed upper arms, elbows bent around a right angle, and armrests that barely meet the elbows as a starting reference. It also explains that fixed desk height can change the chair-height requirement. Treat the reference as a starting position to test with your real equipment, rather than a precise angle to hold throughout the day.
Try typing a short paragraph. Then stop, lift your forearms slightly off the pads, and let your shoulders relax again. If releasing the support makes your shoulders drop noticeably, lower the pads and retry. This is a practical observation exercise, not a clinical assessment. Repeat on both sides; a matching number of adjustment clicks does not guarantee matching contact.
Step 2: Bring the pads underneath your working arms
Width adjustment matters when the seat fits your hips but the arms sit too far apart. Move the pads inward enough that you do not have to reach sideways for support. Leave space for normal movement, clothing, and getting into and out of the chair. Do not squeeze your body between the arms to achieve a narrow keyboard position.
Use your actual keyboard for this check. A full-size keyboard may place the mouse farther out than a compact keyboard does. If the mouse forces your right arm outward, moving the right pad outward may provide a temporary resting place but does not bring the mouse closer. Try relocating the mouse and keyboard first. Note whether the restriction comes from the input layout, the chair, or the available desk space.
For a buying trial, check both the minimum and maximum usable space between the pads. Ask whether a published width is measured between arm posts or pad edges. Those measurements answer different questions. If your elbows still sit inside the nearest edges at the narrowest position, the chair may not offer useful arm support for your build.
Step 3: Solve desk clearance with depth adjustment
A pad can be the correct height and still hit the desk before you reach the keyboard. First slide the pads backward if the design allows it. This keeps support available while reducing the part projecting toward the desk.
Check what is making contact: the pad, the upright post, a desk apron, or the underside of a keyboard tray. Sliding the pad will not fix a collision involving the post. Similarly, a rounded tabletop may provide room at the center but collide with the arms farther to the sides. Approach slowly and watch the contact point rather than repeatedly pushing the chair into the desk.
Do not lower a correctly positioned pad several inches and then lean down to use it. If the arm cannot clear the workstation in a useful position, you may need to leave it lowered during keyboard work, use a different input arrangement, or choose a different chair-and-desk combination. A support that prevents comfortable reach is failing its purpose.
Step 4: Match the pad angle to the task
With pivoting pads, rotate them to follow your forearms rather than arranging them symmetrically for appearance. A narrow keyboard position may call for a different angle from a mouse-heavy drawing task. Keep the movement within the manufacturer’s intended range and check that the pad remains secure after adjustment.
Imagine two tasks: writing an email with both hands, and reviewing a large spreadsheet using the mouse. During the first task, both forearms may point slightly inward. During the second, one arm may change direction or move more often. Save a comfortable general position, then allow yourself to make small changes. The purpose of adjustability is to accommodate the task, not to create a single setting that must never move.
Run a three-task check before calling the setup finished
- Keyboard task: Write several sentences without watching your arms. Notice whether you drift forward or lift a shoulder.
- Pointer task: Open menus, select text, and move between windows. Check whether the mouse remains easy to reach.
- Transition task: Roll back, stand, sit again, and return to work. Check that the arms do not trap you or require awkward entry.
Keep a simple log: “height down one step; mouse closer; desk collision unchanged.” One change at a time makes the result interpretable. If you change chair height, pad height, keyboard position, and seat depth together, you may feel better without knowing which setting to retain. A small written record also helps if someone else uses the chair.
When pads are uncomfortable even after adjustment
Contact quality matters as much as location. Inspect pads for splits, hard edges, exposed fasteners, and compressed or loose coverings. A replacement pad must fit the exact arm assembly securely. Thick aftermarket cushions alter the effective height and width, so repeat the fit checks after installing any approved accessory.
OSHA’s chair guidance describes problems associated with armrests that are too high, low, wide, close, or intrusive. It favors rounded, softer contact surfaces and says that unusable armrests can be removed or left unused. Removal should still follow your chair manufacturer’s instructions; do not remove hardware whose structural role you cannot identify.
A pad is not a wrist brace. Avoid arranging the arm so that a small hard edge bears on one spot while the rest of your arm is unsupported. If you experience ongoing pain, numbness, or tingling, stop trying to solve the problem by adding pressure or tightening the setup. Seek suitable professional advice and, where available, a workplace ergonomic assessment.
Common situations and the next useful experiment
| Situation | Check first | Next experiment |
|---|---|---|
| Shoulders rise while typing | Pad height and keyboard height | Lower pads; reassess input height separately |
| One elbow reaches outward | Mouse position and arm width | Bring pointer closer before moving support outward |
| Chair stops too far from desk | Exact collision point | Slide pads back if the design permits |
| Pads feel good only while leaning sideways | Seat position and support width | Return to supported sitting and move pads inward |
| New cushions create a problem | Added thickness and attachment | Remove accessory and compare original setup |
A useful shopping note beats a feature count
If your current chair cannot fit, write down the limitation before shopping. “Needs pads that retract enough to clear a deep desk apron” is more useful than “needs 4D arms.” Take a side photograph of the collision, record the desk opening, and measure your preferred contact height from the compressed seat surface. Ask the seller for clarification when a specification does not identify its measurement points.
During a trial, repeat the same keyboard, mouse, and transition tasks. Test the configuration you intend to buy, including the arm option and any headrest. Confirm the return conditions before committing to a chair you cannot try locally. Useful armrests are the ones that fit your body and workstation together; additional directions of movement have value only when you can use them.
What if you prefer working without armrests?
Arm support is a choice to evaluate in the context of the whole workstation. Try the pads lowered and compare your usual tasks, keeping the keyboard and mouse close. Notice whether you can sit comfortably without leaning on the desk edge. Do not assume that constant contact is necessary, or that leaving the pads unused makes the chair unsuitable. Some people use the supports mainly while pausing or reading.
If you share the chair, preserve adjustment options rather than permanently removing components just for convenience. Note the control locations and show other users how to reset them. A shared setup works better when each person can find a useful position without tools or guesswork.
Something unclear or out of date? Send a correction with this article’s title and the detail to check.
Sources, research & corrections policy ↗