Bar stool spacing is best planned from the center of one stool to the center of the next, then checked against the stool’s full width and moving parts. A narrow backless seat and a broad swivel chair cannot use the same layout simply because both sit at a kitchen island. Measure the usable run, reserve room at the ends, and mock up occupied positions before buying a full row.
Understand what the spacing number measures
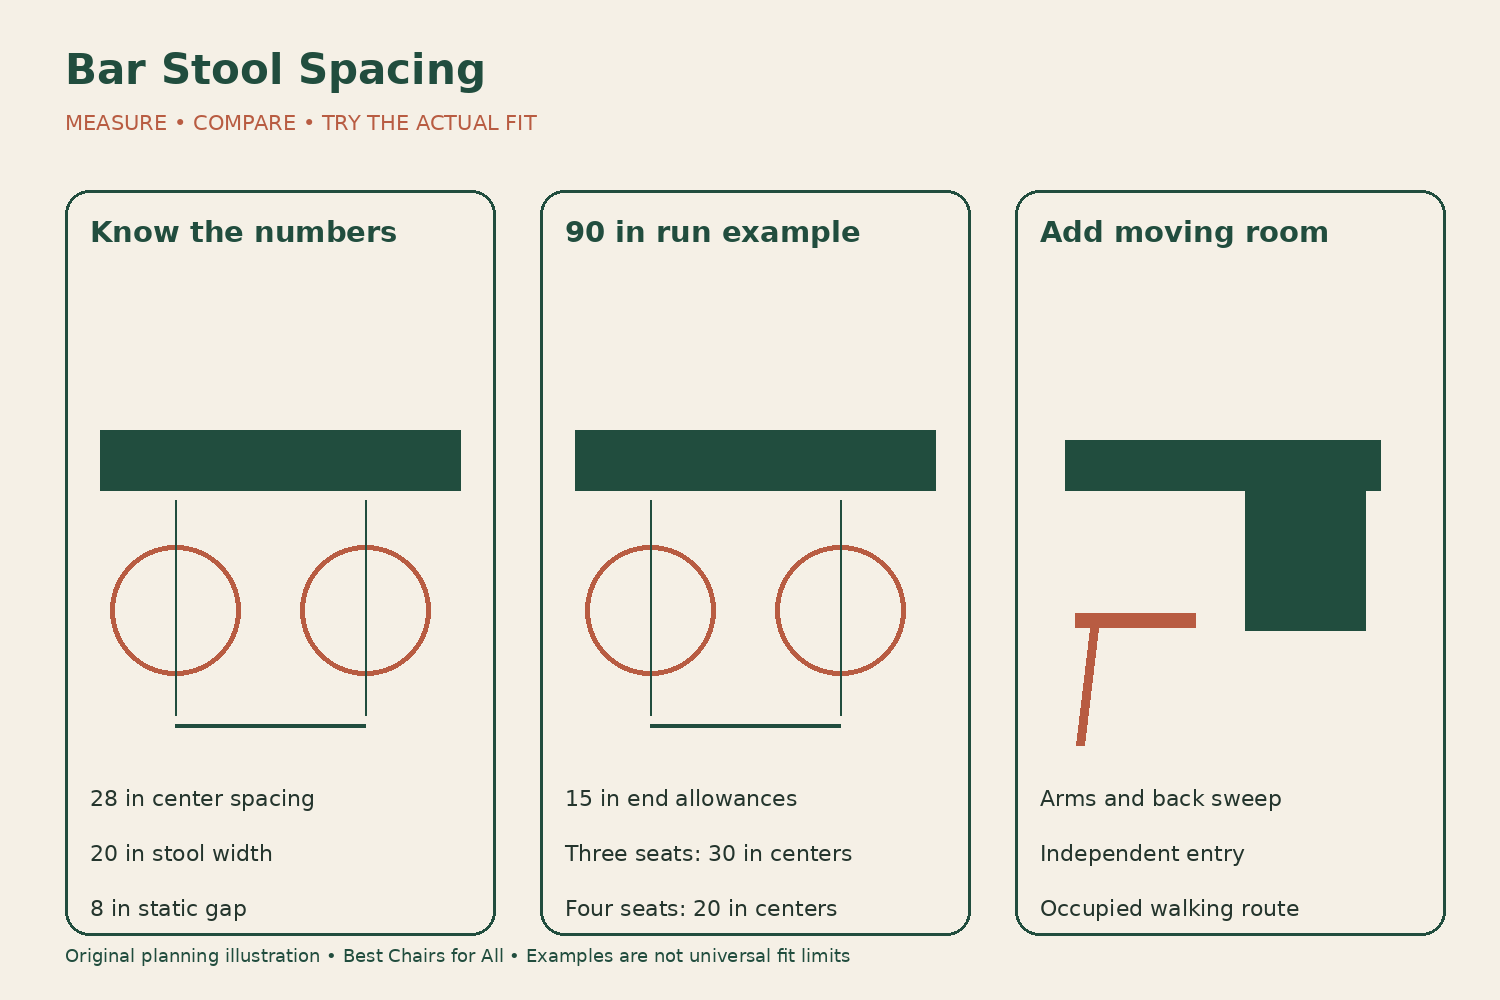
Center-to-center spacing is the distance between two stool centerlines. Edge-to-edge spacing is the open gap between their widest neighboring parts. These measurements are related, but they are not interchangeable. With identical 20-inch-wide stools on 28-inch centers, the static gap is 8 inches. Calling either number simply “the spacing” makes it easy to misunderstand a retailer’s advice.
For different-width stools, subtract half the width of each stool from the distance between their centers. If a 20-inch stool and a 24-inch stool stand on 29-inch centers, the static gap is 29 minus 10 minus 12, or 7 inches. Use the widest relevant part, including arms or a flared back, rather than automatically using the seat cushion width.
Home Depot’s measuring guide gives a general center-to-center range of 26–30 inches and reminds readers that arms require more room. That range is a planning reference. It does not guarantee that a particular pair of chairs, bodies, and counter ends will work at the narrow end of it.
Measure the usable run
Start with the stretch of counter intended for seating, not the island’s maximum overall length. Deduct a section blocked by a cabinet return, a panel, a projecting appliance, or a wall that prevents approach. A support bracket may not remove an entire seat position, but mark it so you can check its relationship to knees and stool placement.
Treat a corner separately. Two people seated on adjacent sides of an island can compete for knee space and countertop space near the same corner. Counting the full length of both sides independently may count that shared corner twice. Set out plates and use chairs or cardboard markers on both sides at once before accepting the total seat count.
Make notes about the ends. A stool beside an open room has different approach conditions from one beside a wall or tall cabinet. End allowances also depend on whether people enter from the side, pull the stool back, or swivel into place. Do not assume a neat centered lineup leaves adequate room to use its outermost seats.
Calculate a row with explicit end allowances
Write the equation this way: usable length equals the first center’s distance from the left end, plus the number of spaces between centers multiplied by the center spacing, plus the last center’s distance from the right end. For three stools there are two spaces between centers, not three. This distinction helps avoid a surprisingly common layout error.
As an example, a 90-inch usable run with first and last centers 15 inches from the ends leaves 60 inches between those outer centers. Three stools could be placed on 30-inch centers. Four stools would put the three internal spaces on 20-inch centers with the same end allowances. If the stools themselves are 20 inches wide, that second layout has no static side gap at all.
These are arithmetic examples rather than prescribed end distances. The 15-inch allowance may be unsuitable beside your wall, and the 30-inch spacing may still be too tight for a broad rotating chair. The advantage of the equation is that you can replace each assumption with an actual measured requirement and see how the answer changes.
Compare guidance without mixing measurement systems
Different sellers use different planning shorthand. Lowe’s stool guide relates the gap to seat width, describing a 6-inch gap for seats 16–18 inches wide and an 8–10-inch gap for seats 19–22 inches wide. Amisco’s catalog describes 22–25 inches per stool and says swivel or armed models need more. These are starting points tied to seating assumptions, rather than competing universal laws.
A recommendation expressed as width per person is not necessarily a promise of a specific edge gap. Check what the diagram actually measures. If a source shows centerlines, use centerlines in your sketch. If it shows a person-sized allocation, reserve that allocation before checking the chair width inside it. Keep notes on the method rather than averaging unrelated numbers into a new supposed rule.
The safer purchasing calculation uses the actual chair’s envelope. If the recommended spacing is narrower than the physical chair, investigate the discrepancy immediately. It may be a different model, a different width field, or a diagram intended for an armless version. Ask for a dimensional drawing rather than assuming a marketing photo resolves the conflict.
Include swivel movement
A swiveling stool’s widest horizontal span can change as it turns. A deep back and projecting arms can sweep closer to the neighboring seat or countertop even when the chair looks narrow facing straight ahead. Measure or obtain the overall width and depth of the moving upper section, not just the footprint of the base on the floor.
For a conservative paper check of a rectangular upper envelope, the diagonal of its width and depth describes a circle large enough to contain that rectangle during rotation around its center. This is only a geometric screening method: an actual swivel axis may be offset, and arms or backs may curve differently. Use the real pivot location and manufacturer drawing when available, then confirm with the chair itself.
If one stool is available to try, mark its center and rotate it gently through the normal entry and exit movement while another person observes the nearest edges. Do not deliberately strike a stone counter or adjacent furniture to discover the limit. Mark the required envelope on paper or low-tack floor tape, checking that the tape is suitable for your finish first.
Test arms, elbows, and place settings separately
An empty gap between wooden frames is not the same as comfortable room for two people eating. Put plates or placemats in the intended positions. Seat two adults side by side and try ordinary movements such as reaching for a glass, cutting food, or turning to speak. The purpose is to identify interference that a simple chair-width calculation cannot show.
Arms introduce two more questions. Can someone enter the chair without a large sideways maneuver, and can the arms turn or slide past the counter? A chair can fit between its neighbors but still be awkward to access. Conversely, a compact armless stool may offer easy access while providing less of the resting support a particular user wants.
Check whether everyone can leave independently. A layout that requires the middle sitter to wait while both neighbors move may be acceptable for occasional entertaining and frustrating for daily breakfast. Record that tradeoff honestly. Having one extra advertised seat is not always worth reducing the usability of every regular place.
Leave room behind the row
Spacing along the counter does not establish adequate circulation behind it. Put stools in their occupied positions and assess the route to the refrigerator, sink, doors, and adjacent room. Open the appliance doors that normally operate nearby, keeping the test free of hot or sharp items. A row that fits laterally can still obstruct the kitchen’s ordinary work.
Repeat the check with a stool pulled out for entry or exit. Swivels may reduce the need to pull the base backward, but they do not remove the person or chair from the room. Backless models may store completely beneath a counter and still need substantial space when occupied. Document both positions on the sketch rather than judging only the photograph-ready arrangement.
Use a seat-count decision worksheet
List two possible counts, such as three stools and four stools. For each count, record usable run, left and right center allowances, calculated center spacing, chair width, resulting static gap, and any swivel envelope concerns. Then add observations for elbow room, independent entry, counter corner conflicts, and circulation behind occupied stools.
Separate daily use from occasional hosting. If three people normally use the island, test whether three comfortably spaced seats serve that routine better than four tightly packed ones. An extra chair stored elsewhere may help during some gatherings, but do not call a temporary squeezed arrangement equivalent to a normal dining place. Keep the main route and each chair’s intended use in mind.
If ordering online, ask for dimensions across the arms and the widest back as well as across the seat. Confirm whether the model swivels fully, partially, or returns to a starting position. These details change your movement test even if the static width remains the same. Save the answers with the order so you can verify the delivered variant.
The final spacing is the layout that passes all these checks with the actual stools and intended users. Center-to-center guidance gets you started, arithmetic tells you what a row implies, and the occupied mockup shows whether the counter can be used comfortably. When the checks disagree, reduce the count or change the chair before committing to the full set.
Make the layout repeatable after cleaning
Measure the distance from each end to the outer stool centers and keep it on the underside of your planning sketch. After stools are moved for vacuuming or a gathering, restore the intended positions before judging the room again. Small shifts at each end can compress the middle positions enough to change how a row feels, especially when arms or swivels are involved.
For an asymmetrical island, keep the deliberate asymmetry. You may need more room beside a wall and less at an open end. There is no benefit in forcing the chairs into a visually even lineup that makes one place difficult to enter. Photograph the successful occupied arrangement from above or from the side if that helps explain the placement to other household members.
Something unclear or out of date? Send a correction with this article’s title and the detail to check.
Sources, research & corrections policy ↗