A built-in lumbar system should make contact with your lower back without forcing you to perch forward. Start by identifying the chair and its controls, then adjust support height before adding much protrusion. The position that feels strongest is not automatically the position that fits best. If the adjustment produces discomfort, stop the trial rather than treating it as something you must endure.
This is a furniture fit process, not a treatment for back pain. A dial setting cannot establish a diagnosis or guarantee a particular posture. If symptoms persist away from the chair, or you need advice about a medical condition, speak with a qualified clinician. For operation and safety, the instructions supplied with your exact chair take priority over general guidance.
Identify which mechanism you actually own
The original Razer Iskur and the Iskur V2 are useful examples of why the model matters. In its official adjustment instructions, Razer describes a lever for the original Iskur, while the V2 uses a right-side protrusion knob and a left-side height knob. Copying a video for the other generation can send you looking for a control your chair never had. Record the full model from the invoice or label before experimenting.
Secretlab’s TITAN Evo usage guide separates L-ADAPT lumbar adjustment from backrest recline, multi-tilt, and armrest adjustment. That distinction is important: tipping the whole seat is not the same operation as moving the lumbar support. A chair with a fixed lumbar curve, such as a design advertised with integrated support but no lumbar controls, cannot be converted into a height-adjustable system by turning its tilt-tension knob.
Make a small control map on paper: height lever, backrest lever, tilt lock, tension knob, lumbar height, lumbar depth. Write “absent” where an adjustment does not exist. Do not remove upholstery to search for hidden mechanisms. If two knobs look alike, use the diagram in the manual to identify them rather than rotating each through its full travel under load. Ask support for a diagram if the manual and delivered chair do not match.
Establish the rest of the chair first
Empty bulky objects from back pockets and sit with your pelvis toward the back of the seat. Put your feet on a stable surface. Choose a seat height that lets you sit without balancing on your toes, and check that the front edge is not pressing behind your knees. These observations matter because sliding forward to reach the floor changes where your back meets the lumbar curve. You may otherwise chase a problem with the dial that originates in seat height or depth.
Bring the controls you use into a comfortable reach. If you must lean forward to reach a keyboard or controller, the backrest cannot support you consistently, whatever the lumbar setting. Arrange the screen so you can view it without craning toward it. For this initial comparison, use a modest, supported backrest angle that you can reproduce. Avoid starting with a deep recline and then expecting the resulting setting to feel identical at a desk.
Record the starting condition in ordinary terms rather than invented precision: “seat high enough for desk, footrest in use, backrest slightly reclined, support nearly retracted.” There is no universal correct number of knob turns. Markings, internal travel, body proportions, and chair size vary. If the manual provides indexed positions, use them; if it does not, a photograph of the controls and a brief description are more useful than a claimed millimeter measurement you cannot verify.
Set height, then introduce depth
If the system has separate height and depth controls, begin with a low level of protrusion. Following the manufacturer’s unloading instructions, move the support vertically until its broadest contact sits in the lower-back area rather than against the pelvis or high on the ribs. Make a small change, settle back, and notice where contact occurs. The objective is a broad, tolerable contact area, not a sharply defined bump you can identify through clothing.
Next add only enough depth to maintain contact in your chosen sitting position. If more protrusion moves your entire torso forward or leaves the upper back floating away from the backrest, reverse the last change. A thick curve can reduce the usable seat depth even though the seat pan itself has not moved. If your thighs then feel insufficiently supported, that is useful fit information. It does not prove that still more lumbar pressure will solve the problem.
The Iskur V2 master guide identifies separate upward/downward and inward/outward lumbar movement and cautions users about hand placement around adjustments. Use the prescribed controls within their normal range. A knob that reaches a firm stop should not be forced. Grinding, a detached-feeling knob, or a support panel that will not hold position calls for manufacturer assistance, not a larger tool or a homemade spacer behind the upholstery.
A four-pass adjustment worksheet
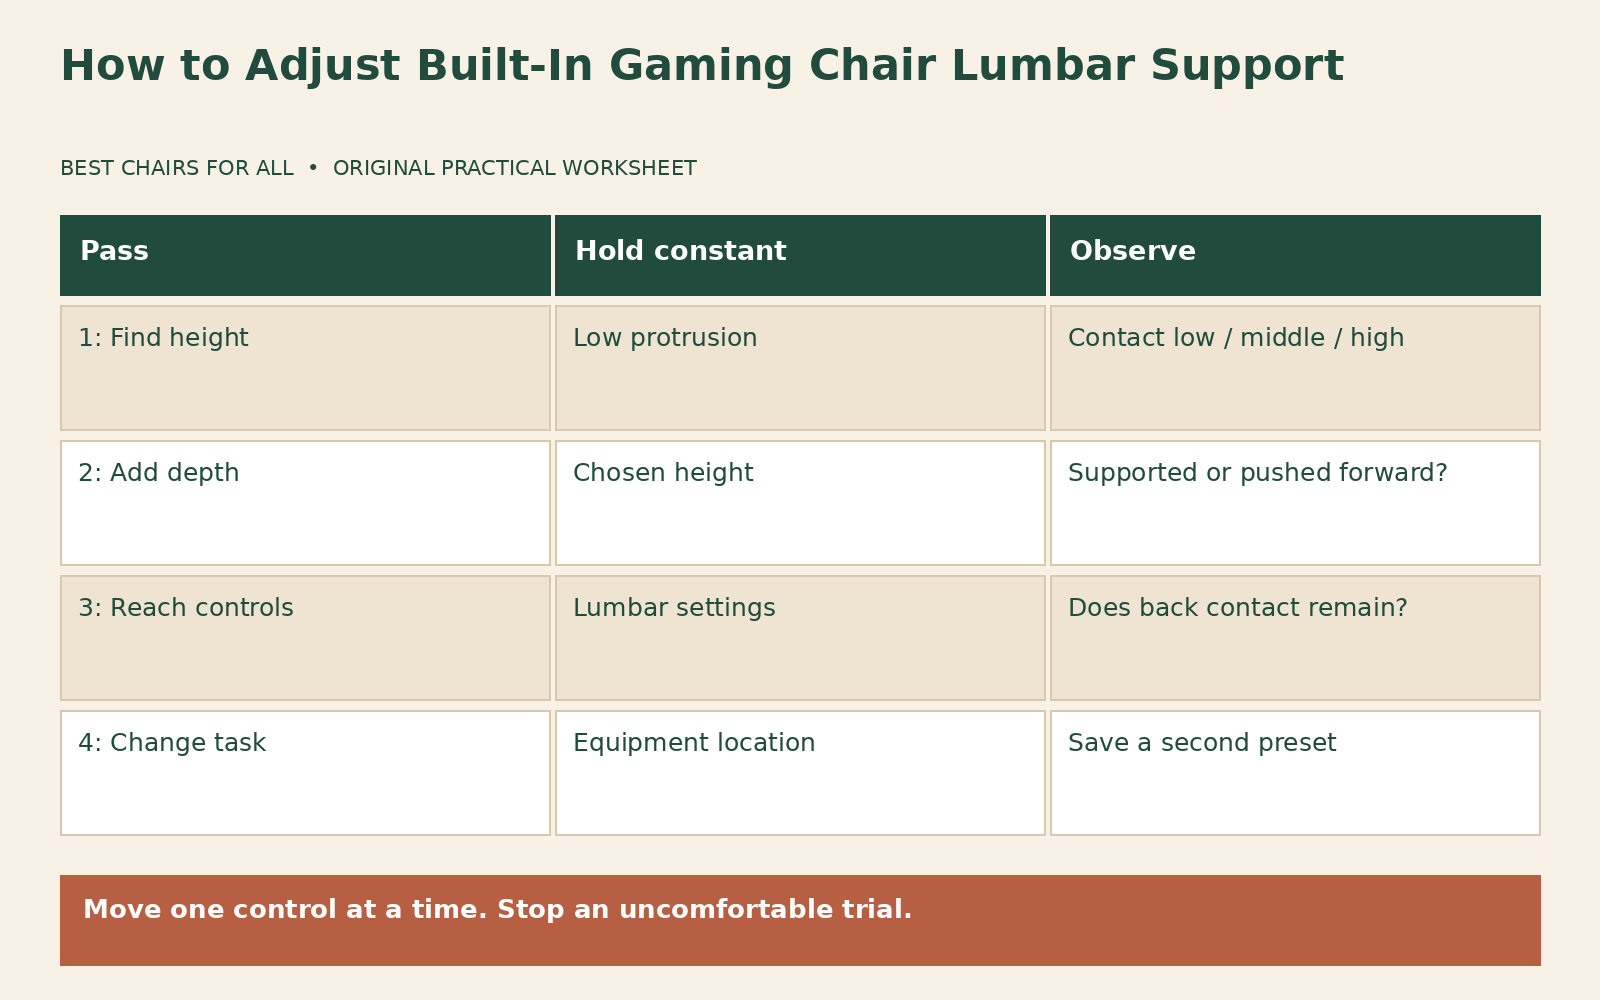
Use four passes instead of repeatedly changing every control. In pass one, keep the lumbar projection low and compare two nearby heights. Write down whether the contact feels low, centered, or high. In pass two, hold the better height and compare the current depth with one small increase. Write down whether you stayed back against the chair or moved forward. This separates location from amount, which makes the result easier to interpret.
In pass three, return to your actual activity: type a few ordinary sentences, move the mouse, or hold the controller as you usually do. Record whether your back remains in contact when your hands reach the controls. If contact disappears because you reach forward, move the equipment closer before revisiting the lumbar setting. In pass four, change between two normal sitting positions and note whether a small readjustment is necessary. Adjustable furniture is allowed to need adjustment when the task changes.
Here is a worked example, not a measurement recommendation. A player first reports a strong bump and short-feeling seat. The support is set high and deep. They lower protrusion while leaving height alone; the short-seat feeling improves, but contact remains high. They then lower support height slightly; contact becomes broader. Finally, moving the keyboard closer lets them keep contact during play. The useful conclusion is that three separate variables were involved, not that a particular number of turns is right for everyone.
Your worksheet can have these columns: date, task, chair position, lumbar height description, lumbar depth description, contact location, and next action. Keep each observation short enough to compare. “More pressure after ten minutes” is more actionable than “ergonomics bad.” “No contact while aiming because I lean forward” points to task reach. Stop the comparison if it becomes uncomfortable; there is no benefit in completing a worksheet at the expense of tolerability.
Diagnose the pattern before adding a cushion
When the support feels too low at every height, verify the chair size and your sitting position. When it feels too high at every height, check the same factors in the other direction. If the chair’s travel simply does not put the curve where you need it, that may be a fit limitation. Advertised user-height ranges are screening information rather than a guarantee that every torso and leg proportion will match the same backrest.
If contact is centered but too strong at the minimum setting, consider whether the built-in curve itself is too pronounced for you. A separate pillow usually adds thickness; it does not retract the existing structure. If you already use an accessory, compare the chair with the accessory removed, provided removal is permitted. Do not stack several supports and then evaluate the chair as though the original seat geometry were unchanged. Keep the seat-height and knee-clearance consequences visible in your notes.
A squeak is a different question from fit. Record whether it appears only when you adjust, when you lean back, or when you shift laterally. Send the manufacturer a short description and a video if requested. Do not open the backrest, spray lubricant into upholstery, or alter the lumbar linkage based on a generic online repair. Keep original packaging while an early fit issue is being resolved, and check the seller’s return deadline promptly rather than waiting indefinitely for a change that may never arrive.
Build two repeatable presets
Most people benefit more from a repeatable desk position and a repeatable relaxed position than from endlessly seeking one perfect setting. Describe the desk position in terms of supported feet, reachable controls, backrest angle, and moderate lumbar contact. Describe the controller position separately if the screen is farther away or the backrest is more reclined. Recheck pillow position and arm support when switching, because the contact points move together.
Leave the process with a decision: a comfortable adjustment range, a question for manufacturer support, or evidence that the chair does not fit. Do not turn “adjustable” into a requirement to accept a poor match. Good notes make all three outcomes easier. They also help another household user restore their own setup without pretending that two people should share the same settings. The practical endpoint is a chair you can operate predictably and sit in comfortably for your ordinary tasks, with regular opportunities to change position and step away.
What to send to support
A useful support request separates normal operation from the result you cannot achieve. Include the full model, size, purchase date, and whether the problem began immediately or after a period of use. Describe which control changes height and which changes projection, then explain the remaining limitation: for example, the support moves but its lowest location still contacts too high. A clear side-view photograph of the empty chair can show the current backrest position without requiring a personal photograph.
Ask whether the observed adjustment range is normal for that model and whether there is a documented reset or inspection the owner is permitted to perform. Do not assume advice for another generation applies. If support requests a video, demonstrate the exterior control only and keep fingers away from moving interfaces. Save the answer with your invoice so any later return or warranty conversation has a consistent record. A precise question often resolves uncertainty faster than a broad statement that the chair feels wrong.
Something unclear or out of date? Send a correction with this article’s title and the detail to check.
Sources, research & corrections policy ↗