Choose chairs for a glass dining table by measuring the table’s real opening, checking arm and movement clearance, and considering the visible base and floor together. Transparency changes what you see; it does not change the physical space occupied by chairs or people. A good match works without chair parts contacting the glass and remains practical to use and clean when everyone is seated.
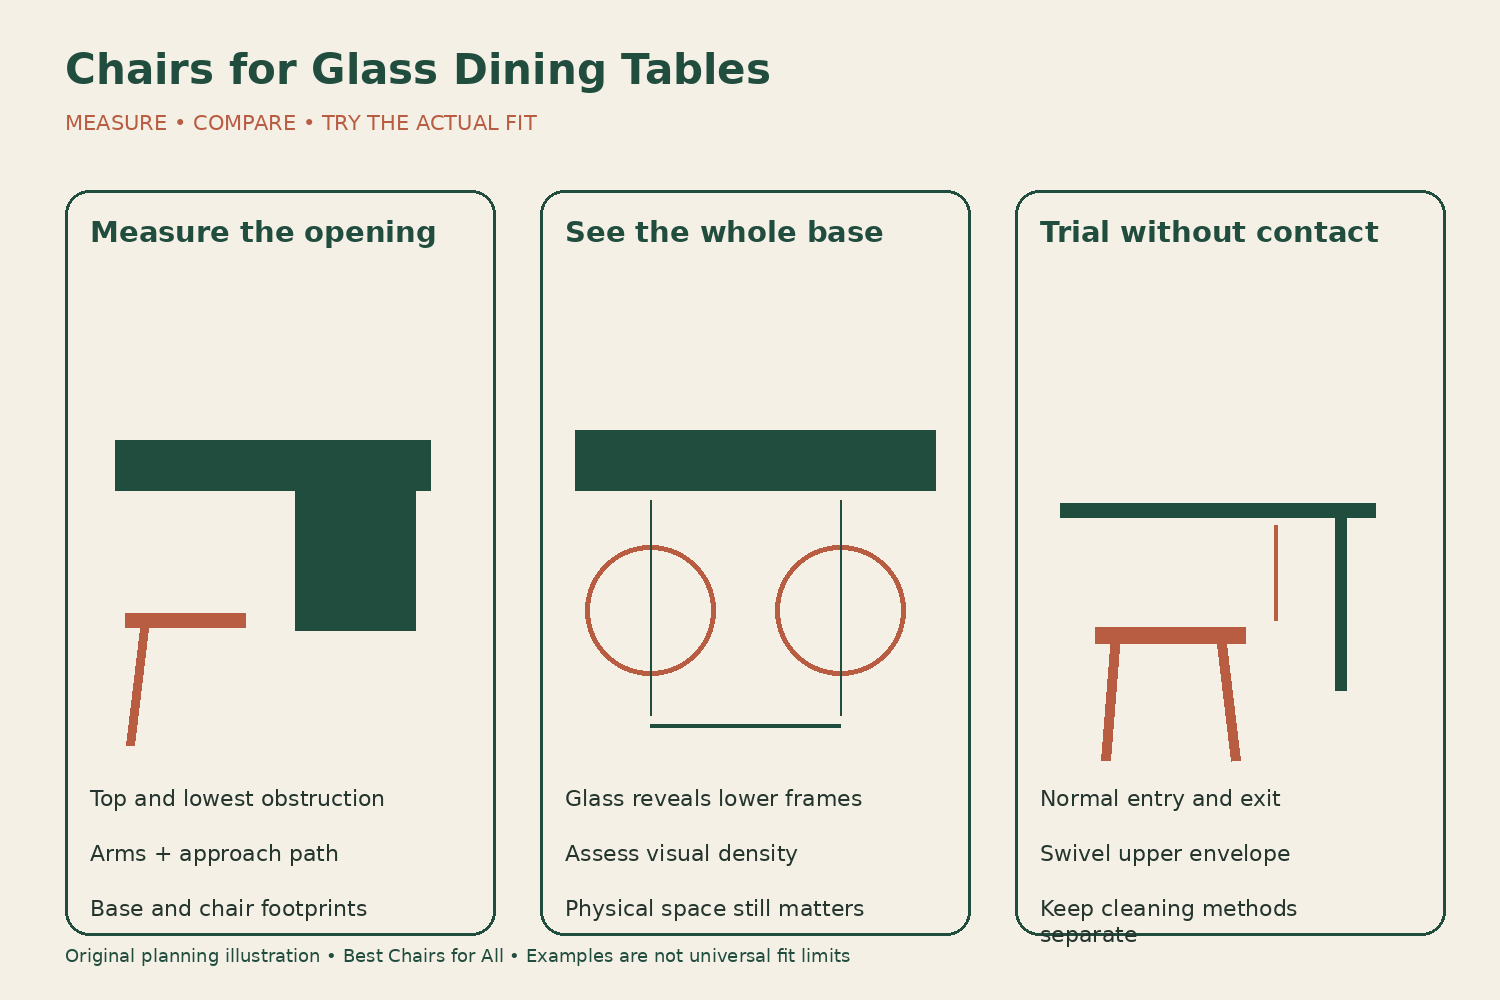
Start with the actual table construction
Find the table’s maker, model, assembly instructions, and glass-care guidance. A clear top may be attached, supported on specified pads, or integrated into a frame. Do not assume it can be lifted or repositioned casually to improve chair fit. Follow the table’s instructions for its support and handling before planning changes around it.
Measure height to the top and to the lowest obstruction beneath it. Include an apron, mounting plate, cross rail, or leg bracket. Glass can make these elements visually less obvious, but the sitter’s legs still need room around them. Record the clear opening between table legs rather than relying on the maximum tabletop length.
Measure the base footprint as well. Transparent tops expose where table supports, chair legs, and feet converge. That is both a visual and functional issue. A chair with a compact seat can have widely splayed legs, and a pedestal table can have a broad floor base despite a narrow central column.
Check arm clearance before matching finishes
For an armed chair, find the highest point of the arm, including upholstery and upward curves. Compare it with the lowest edge the arm must pass beneath. A rounded arm that nearly meets the glass when empty may behave differently when the chair turns or the cushion compresses under a person. Test the intended movement with clearance, stopping before contact.
Do not rely on a soft upholstered arm as a protective bumper. Repeated contact can affect upholstery, finishes, or glass, and a padded surface can hide a hard structure underneath. The desired arrangement avoids contact rather than using one material to cushion another. If a chair cannot approach the table without touching it, reconsider the chair or the dining position.
For an armless chair, inspect the back, top rail, and front seat edge along the pullout path. An armless outline removes one possible collision but does not make the chair automatically suitable. A high curved back or projecting frame can still meet the table when angled during entry or cleaning.
Make an arm-height comparison with real measurements
Suppose a table’s lowest obstruction measures 27 inches above the floor. Candidate A has a highest arm point at 26 inches, while candidate B’s is 28 inches. A’s nominal difference is one inch; B’s arm is higher than the opening. These are explanatory measurements, not recommended margins or evidence that A will slide safely under your table.
Check the approach path, the accuracy of the dimensions, and the exact upholstery configuration. Equal or nearly equal catalog numbers do not account for manufacturing variation, floor conditions, or curved shapes. Ask the seller for clarification if the fit is close, and trial the chair under the actual table where practical.
Record where the chair stops in its normal dining position. If arms remain outside the table, measure whether the sitter can still reach the place setting comfortably. The answer may be acceptable for one chair and poor for another. Avoid treating a visually pleasing setback as automatically usable for eating.
Compare visual density below the glass
Look from normal standing and seated viewpoints. A transparent top reveals chair bases, upholstery undersides, table supports, floor protectors, and the rug pattern. Several strong shapes can appear busy together even when each piece looks attractive alone. Use a photograph or sample arrangement to assess the combined view rather than matching only the tabletop material.
A wood chair can add warmth, a metal frame can echo the base, and upholstery can introduce color or a softer silhouette. These are design choices, not compatibility rules. You do not need to select clear chairs because the table is clear or match every metal finish exactly. Choose a deliberate relationship and keep physical fit as the first filter.
Consider the seat’s underside and frame details if they will be visible. A tidy, appropriately finished underside may matter more under glass than under an opaque table. This is an appearance check, not evidence of hidden structural quality. Do not infer strength or safety from a clean-looking underside alone.
Test the whole dining position
Sit at the table with a normal plate, glass, and cutlery arrangement. Check usable seat depth, back contact, supported feet, and eating reach. Glass does not establish a different ergonomic rule for the chair. A seat that is too high or deep remains a poor fit even if its style complements the table beautifully.
Room & Board’s dining-room guidance considers seat height, arm height, chair width, aprons, and leg placement together. Apply that complete relationship here. The transparent top can encourage judging only the outline, so deliberately include the less visible clearances and the occupied trial.
Check adjacent places at the same time. Table legs or a cross base can push one chair away from its ideal position, changing elbow room beside it. A seat count from the table listing is a starting description, not proof that the chosen broad chairs fit every intended diner comfortably.
Add swivel and pullout movement
For a swivel chair, assess the moving upper envelope, including arms and back. The base may remain stationary while the shell approaches the glass edge or a neighboring chair. Limited rotation, full rotation, and return mechanisms need different trials. Confirm the exact base variant rather than assuming the same shell creates the same motion.
For a fixed chair, pull it out and turn it as normally needed for access. Check the path between table supports and nearby furniture. Do not drag it against the base or use the glass as a handhold while moving furniture. Follow the chair’s and table’s handling instructions, particularly when a top is not permanently fixed to its base.
Keep the route behind occupied chairs usable. A glass table may make the room appear open while the same physical congestion remains. Open nearby doors and cabinets during the planning trial, keeping the area free of hot food and other hazards. Measure actual movement rather than relying on visual lightness.
Protect the floor as a separate surface
Choose floor protectors for the chair and the actual flooring. A metal chair leg can look coordinated with a glass table’s base while arriving with glides that need review for your floor. Inspect each contact point and ask for the correct approved replacement when needed. Do not attach a flat pad to an unsuitable curved or angled foot without checking fit.
Bona’s wood-floor guidance recommends felt pads on chairs and tables and advises against dragging furniture. Follow guidance for your own floor and finish; other flooring materials can have different requirements. Keep the protector and floor clean so trapped debris does not become part of the contact.
Avoid using floor protection as a way to hide an unstable chair. Missing or crushed glides can affect floor contact, but loose joints and cracked parts need separate assessment. A chair selected for a glass table should be sound before any fit or appearance trial.
Keep cleaning routines compatible
Room & Board’s clear-glass care instructions advise suitable glass cleaning and avoiding abrasive cleaners, scrapers, and rough objects dragged across the surface. Use instructions applicable to the table you own. A product used on glass may not be suitable for the chair’s wood, leather, fabric, or coated metal nearby.
Clean the chair by its own material guidance and protect adjacent surfaces from overspray or runoff. A transparent top makes fingerprints and dust visible, but frequent cleaning should not become repeated exposure of chair finishes to an unrelated cleaner. Keep cloths and products identified by task rather than using one saturated cloth around the entire dining set.
The Furniture Village glass-dining care guide also emphasizes careful handling and use of glass dining furniture. If a glass top is chipped, cracked, or otherwise damaged, stop the ordinary chair-fit trial and contact the table maker for guidance. Do not conceal damage with a cloth or improvise a repair to continue using the arrangement.
Create a glass-table pairing sheet
Record the table’s top dimensions, overall height, lowest obstruction, leg opening, base footprint, and top attachment method. For each chair, add seat height, usable depth, arm height, overall width and depth, base footprint, and motion. Keep unknown fields explicit until the seller clarifies them.
Add four observed results: approach without contact, comfortable eating position, neighbor clearance, and occupied circulation. Then assess the visible base relationship and cleaning routine. This order prevents a compelling visual match from overshadowing a clear physical failure. Keep photographs of both empty and occupied arrangements if they help compare options.
Before ordering a full set, confirm the exact finish, upholstery, and base version evaluated. Similar family names can conceal different arm heights or seat dimensions. A successful glass-table match combines deliberate visual proportion with measured clearance and controlled everyday movement, so the table remains useful as well as visually light.
When comparing fabric samples, place them near the actual table in normal daylight and evening lighting. Clear glass, a tinted top, and a reflective metal base can change the apparent color relationship. Check the sample from the doorway and from a seated position, then keep the selected fabric code with the measurements. This separates a repeatable color decision from the unreliable impression of two product photographs taken under different lighting.
For a tinted or patterned glass top, use its own care instructions rather than assuming the clear-glass guidance applies unchanged.
Something unclear or out of date? Send a correction with this article’s title and the detail to check.
Sources, research & corrections policy ↗